Oswald Rivera

Author, Warrior, and Teacher

Author: Oswald Rivera (page 42 of 83)

BAKED EGGPLANT WITH YOGURT

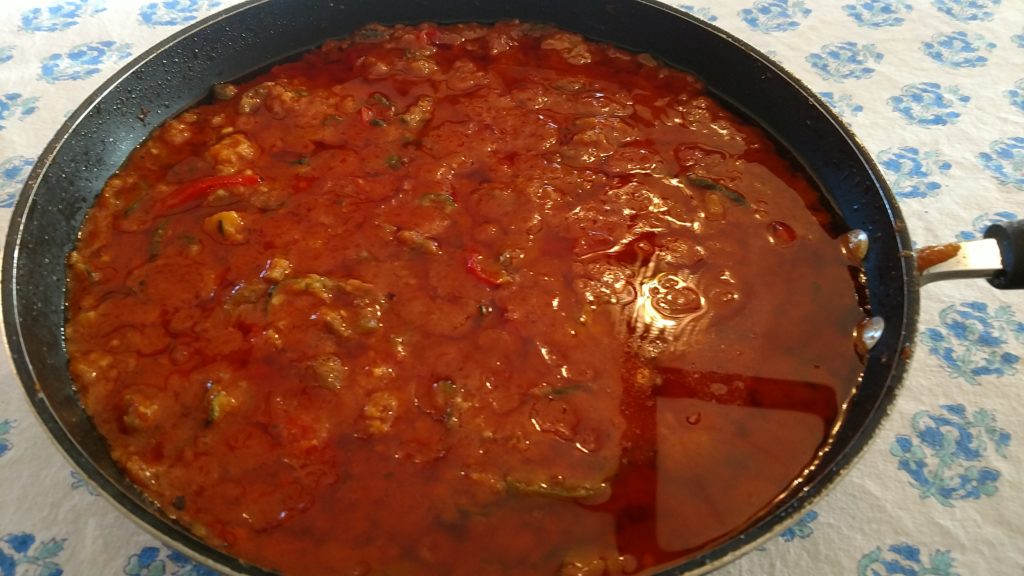
This is an Indian recipe that we especially favor, since it contains eggplant, one of our favorite vegetables. In our family we are eggplant aficionados. We prepare it baked, breaded, fried, grilled, you name it. In this rendition the eggplant is flavored with yogurt. For the record, the recipe is from an Indian cookbook we’ve had for years, Flavors of India (Recipes from the Vegetarian Hindu Cuisine) by Shant Nimbark Sacharoff. It’s an oldie but good, copyrighted in 1972.

Note that, among the ingredients, the dish calls fr black mustard seeds.  If you can’t find black mustard seeds in your area, then green mustard seeds (which are easier to find) will do.

The normal accompaniment to this dish is either rice, or roti, a delicious Indian flatbread found these days in most any Asian store.

BAKED EGGPLANT WITH YOGURT (OLA)

Ingredients:

1 large eggplant (about 1½ pounds)
3 tablespoons yogurt
3 tablespoons water
2 tablespoons peanut oil
¼ teaspoon black mustard seeds
2 cloves chopped garlic
½ teaspoon salt
½ teaspoon turmeric powder
¼ teaspoon cayenne
¼ teaspoon cumin powder
¼ teaspoon coriander powder

Instructions:

Preheat oven to 350º. Wash the eggplant and pat dry with a towel. Place the eggplant on a rack in the middle of the oven and bake for 30 to 40 minutes. When the eggplant is ready, it will appear misshapen and the skin will be very wrinkled and burnt. Carefully remove the eggplant from the oven. Put on some gloves or cover your hands with a kitchen towel so you do not get burnt in case the eggplant breaks open while you are handling it. Then let it cool at room temperature until it can be handled without gloves.  Now peel off all the skin and place the eggplant in a bowl. Mash the eggplant with a fork until it forms a smooth pulp. In a separate bowl beat together the yogurt and water until they are well blended. Set both the eggplant and yogurt aside.

In a heavy frying pan heat the peanut oil over a low flame. Add the mustard seeds and the chopped garlic to the hot oil. When the mustard seeds have ceased popping, quickly add the mashed eggplant and then the salt,  turmeric, cayenne, cumin and coriander. Mix the spices into the eggplant and sauté for 5 minutes. Now add the well-beaten yogurt and water mixture to the frying pan and stir for 3 minutes. Cover the pan and continue to cook over a low heat for 10 minutes. By this time the yogurt will be well mixed in with the eggplant pulp. Taste to correct seasoning if necessary. Serve hot with roti or rice.
Serves Two or Three


MUSTARD-SHERRY CHICKEN

Some recipes come out of necessity: see what you have available in the cupboard or fridge and then crate something. Sometimes it happens by accident: you recall an old recipe and tweek it.

And this is where this option comes in. It’s just chicken in a marinade composed of sherry wine and mustard. You can use Dijon mustard or regular ball park mustard. Whatever is convenient or available. You can add a tablespoon of honey to the marinade and make it Honey-Mustard chicken. Or you can use another fortified wine like Marsala or port a make it Mustard-Port or Mustard-Marsala chicken. The possibilities are endless. You’re only limited by your imagination.

The recipe can also be done in either of two ways: once the chicken has been breaded, it can it be fried in oil or, baked in the oven, the way it’s presented below (a healthier alternative to frying). But, then, it’s a matter of preference. As for the chicken, you can use boneless skinless chicken breasts, chicken cutlets, or, what I used, chicken thighs (bone in). Again, it’s a matter of what you can get or have on hand. Enjoy.

MUSTARD-SHERRY CHICKEN

Ingredients:

¼ cup mustard
¼ cup dry sherry
1 teaspoon  dry Italian seasoning, dried herbes de provence or dried tarragon
¼ teaspoon salt
¼ teaspoon ground black pepper
1½ pound chicken breasts, cutlets or chicken thighs
1 cup bread crumbs
Olive oil or nonstick spray

Instructions:

  1. Place the mustard, sherry, Italian seasoning, salt and pepper in a  zip-lock bag. Add the chicken, close the bag and shake well, coating the chicken with the mustard mixture. Let marinate in the fridge for 1-8 hours.
  2. Preheat oven to 400 degrees F. Fit a baking rack on a large baking sheet. Cover the baking sheet with foil to catch drips and make cleaning easier. Or you can place a rack atop a baking dish, lining the dish with foil. Lightly spray or brush the rack with olive oil to keep chicken from sticking.
  3. Place bread crumbs on a plate. Remove the chicken from the marinade with tongs or a fork, and toss in crumbs to coat on all sides.. Place breaded chicken on rack and top lightly with olive oil (or nonstick spray). Bake chicken until cooked through (160 degrees). Cooking time will vary between 35 to 45 minutes depending on type of chicken used, whether boneless or bone-in thighs.
    Yield: 4 servings.
ADOBO PORK

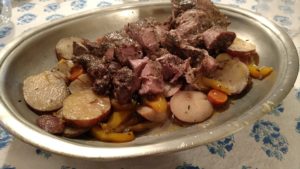
 This recipe is very similar to that Nuyorican favorite, Pernil, or roast pork shoulder. But it differs in terns if ingredients. It’s termed Pork Adobo or Adobo Pork, yet the adobo seasoning has a definite Asian motif—it includes  soy sauce, rice vinegar, and scallions. It brings to mind more of a Filipino adobo. Also, the recipe calls for lots of garlic, which we love. Vampires don’t stand a chance against us. The final result is heavenly. My wife, who is a tough critic, states that this recipe is one of the best she’s ever encountered. That says a lot.

The main ingredient is cubed pork. We did the recipe with boneless pork shoulder, which rendered the right amount of fat in the cooking. This dish is traditionally served with steamed white rice rice. This time around we did it with yellow rice . And, final note: as stated, the recipe calls for rice vinegar which, these days, can be found in most supermarkets or Asian stores. If you don’t have, or can’t find rice vinegar, regular white vinegar will do (although purists will say it doesn’t impart the same flavor).nv

ADOBO  PORK

Ingredients:

14 cloves garlic, peeled and minced
½ cup soy sauce
½ cup rice vinegar
1 teaspoon freshly ground black pepper
1½ to 2 pounds pork, not too lean, cubed
3 tablespoons olive oil
1 large onion, peeled and sliced into thin rings
1 cup water
2 carrots, peeled and cut into ¼-inch rounds
2 scallions, sliced

Instructions:

  1. Place half the garlic in a bowl with the soy sauce, rice vinegar, pepper, and pork. Cover and allow to marinate 1-2 hours.
  2. Heat the olive oil over medium-high heat in a large pan or skillet. Add the remaining garlic, and onion, and cook until golden. Add the meat, plus marinade, and 1 cup water, and bring to a boil. Add the carrots, cover and simmer for 45 minutes. Remove cover and simmer for another 15 minutes. Serve over rice and sprinkle with scallions.
    Yield: 4 servings.


GARLIC SHRIMP

 I love garlic, and I love shrimp. That should be obvious from the previous posts I’ve had on what we call Camarones con Ajo , or Garlic with Shrimp (10/2717 and 03/01/18). In both case it was shrimp cooked the Nuyorican way, with the usual condiments: garlic, salt, pepper, oregano, and a touch of brandy. This is a different garlic shrimp recipe. It comes from the Solera restaurant, now closed, that was on East 53rd Street in New York. The restaurant offered Iberian style cuisine, and tapas. among them Garlic Shrimp tapas.

I miss the restaurant, but I did get their recipe for Garlic Shrimp. And it’s a eye opener, and a joy. It’s spicier than the usual Camarones con Ajo, but great nevertheless, with nuances of flavor that just enlighten the taste buds. Though it may be a tapas dish, it goes good with rice as a main  dish, or any other grain of choice. I served it atop whole wheat linguine. It did not disappoint.

Ingredients:

½ cup olive oil
2 large garlic cloves, peeled and thinly sliced
1 tablespoon crushed red pepper flakes
28 to 32 large shrimp, peeled and deveined
½ teaspoon salt, plus more to taste
Freshly ground black pepper to taste
½ teaspoon paprika
bay leaf
6 tablespoons shrimp or chicken broth
½ teaspoon lemon juice
2 teaspoons chopped parsley

Instructions:

  1. Heat olive oil in a large sauté pan over medium heat. Add the garlic and pepper flakes. Cook until the garlic is sizzling (reduce heat if garlic colors too quickly), about 1 minute.
  2. Season shrimp with salt and pepper and add to pan. Add paprika and bay leaf. Sauté until opaque on the bottom, about 1 minute. Turn shrimp over. Cook about 10 seconds.
  3. Add broth. Simmer until shrimp are cooked, about 1 minute. Remove shrimp from pan with a slotted spoon and keep warm. Add lemon juice to cooking liquid. Taste and correct seasonings.
  4. Spoon sauce and sprinkle the parsley over the shrimp. Serve immediately.
    Yield: 4 servings.


PIMIENTOS RELLENOS REDUX

I posted a stuff peppers (pimientos rellenos) dish back on 09/18/13.  I got remarks back about the whole scenario of crushing peppercorns, garlic, oregano, salt and other ingredients in a mortar. What I was told was, Is there an easier way of doing it? I realize that not everyone is a purist when to comes to Nuyorican cooking. So, for those who want a simpler method of making pimientos rellenos, this is it.

This dish is a meal in itself. But, if desired, you can serve it with  a side of french fries, a baked potato or, as we did back in the hood, arroz con gandules (rice and pigeon peas— see recipe of 12/01/14).

PIMEINTOS RELLENOS REDUX
(Stuffed Peppers)

Ingredients:

4 green or red bell peppers (or a mix)
3 tablespoons olive oil
1 pound ground chuck, pork, or lamb
1 medium onion, peeled and chopped
2 cloves garlic, peeled and minced
1 tablespoon fresh chopped oregano or 1 teaspoon dried
Salt and ground black pepper to taste
1 cup  herb stuffing mix
1 8-oz can tomato sauce
1 cup beef broth
2 tablespoons chopped basil or scallions for garnish

Instructions:

  1. Preheat oven to 400 degrees F.
  2.  Slice the top off the peppers. Take out the seeds and white veins.
  3. Drop peppers into a pot of boiling water to cover and simmer for 10 minutes. Remove, drain and set aside.
  4. Meanwhile, heat the olive oil in  a skillet or pan, add meat and sauté until brown.
  5. Darin off excess fat, add onion, garlic, oregano, salt and pepper, and cook for 5 minutes. Add herb stuffing mix and tomato sauce and cook 2 minutes more.
  6.  Stuff peppers with meat-tomato filling and place in a shallow baking dish (I refer cast-iron). Spoon the broth on top and bake 15 minutes. Sprinkle with basil or scallions and serve.
    Yield: 4 servings.
 

BASIC STEAMED CHICKEN – REDUX

Back on 06/04/10 I did a post on Basic Steamed Chicken. It was a recipe I had utilized for years in terms of preparing a good steamed fowl. That being said, I’m always on the lookout for recipes that may enhance or improve on the original. And that is where this version of steamed chicken comes in. I came across it recently; and I can attest it is far superior to the original recipe. I am not an absolutist in my cooking. If I come across something better, whether it’s given by a friend or other, I own up to it. If it’s an improvement, I’ll say so. It’s a process of growth—even for an old geezer like myself.

This recipe can be done in any steamer contrivance, be it metal or bamboo. Harking to its original method, I utilized a wok in this one. Today, most woks come with a steamer attachment; usually a small rack placed at the bottom of the wok for steaming. If your wok doesn’t have one, they are easy to find in almost any hardware store. Cooking in a wok gives it an Asian pedigree. If you don’t have a steamer then you can use a small 8-ounce can and place it in the bottom of a pot with a cover. Place the chicken in a plate, and atop the can, and follow directions as given for steaming. Enjoy!

For this dish, steamed rice is the usual accompaniment. I served it with brussels sprouts (I had a bunch on hand—as well as the steamed rice).

BASIC STEAMED CHICKEN – REDUX

Ingredients:

1 2½ to 3-pound chicken
5 tablespoons soy sauce
1 tablespoon peanut oil
¼ teaspoon sesame oil
1 cup chicken stock or bouillon
3 tablespoons dry sherry
1 teaspoon salt (optional)
1 shallot, peeled and sliced or 2 scallions
2 or 3 slices fresh ginger root (unpeeled)
1 tablespoon brown sugar
Parsley for garnish

Instructions:

1. Rinse chicken under cold running water and pat dry with paper towels.
2. Rub chicken with 3 tablespoons of the soy sauce, peanut oil and sesame oil.
3. In a wok with steamer rack, pour chicken stock, sherry, salt (if using), shallot or scallions, and ginger root. Bring to a boil. Place chicken on top of rack, cover wok tightly and steam 35-40 minutes or until tender. Note that if your wok is not large enough to accommodate the chicken, you can slice chicken in half and then place on wok. Same for a bamboo,  metal steamer or pot.
4. Remove chicken from wok, set aside. Remove steamer rack. Replace chicken in the liquid left in the pot or wok. Add the remaining 2 tablespoons soy sauce and brown sugar.  Cook chicken over medium heat, turning frequently until bird is evenly colored.  Let cool. Remove chicken from wok and, with a clever or chef’s knife, cut chicken, bone and all, into into 1½-inch sections. Serve hot or cold, garnished with parsley.
Yield: 4 to 6 servings.

VEAL FRICASSEE

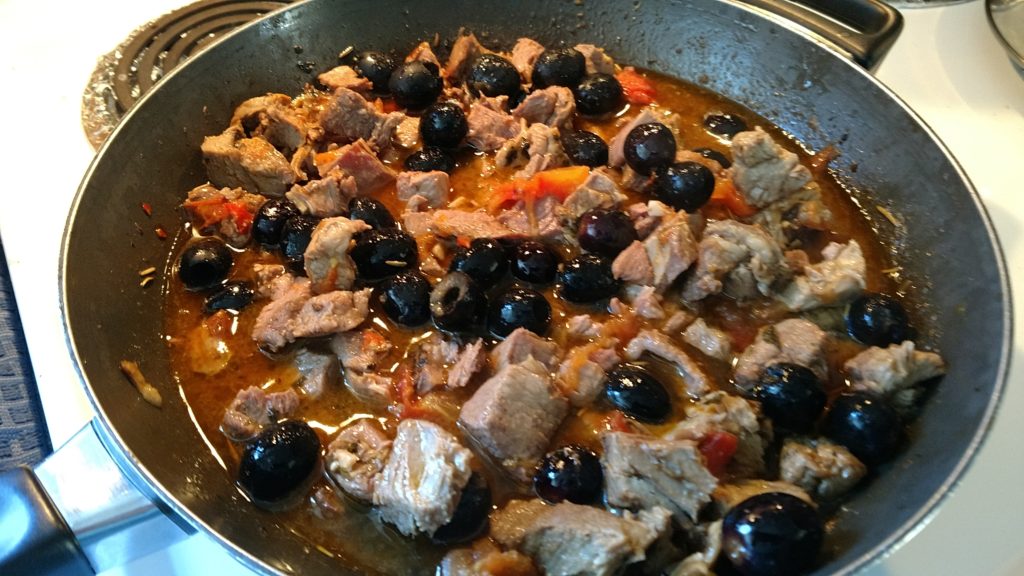
Back in Spanish Harlem, the family did not eat that much veal. Reason being, it was an expensive cut of meat. Thus, veal was a special occasion for us. And when we had it, Ternera en Fricasé was one of our most popular renditions. You can call it veal fricassée. Years later I learned that our version was similar to the French dish called Veal Marengo. In that renowned effort, mushrooms and parsley are combined with the meat to create a sort of veal stew. We do it the Nuyorican way in that we adhere to a simple mix consisting of broth, tomato sauce, onions and pepper strips. If desired, quartered potatoes, capers and olives can be included in the mix. Just increased liquid content accordingly by adding ½ cup water.

Back on the block, the accompaniment to this dish was arroz con gandules,  or rice with pigeon peas (see blog 12/01/14 for a recipe). This time around we used mashed potatoes and,as a side dish, it was perfect.

Let me add that this recipe is from my first cookbook, Puerto Rican Cuisine in America (Running Press). It’s still out there, folks.

TERNERA EN FRICASÉ
(Veal Fricassée)

Ingredients:

2 pound boneless shoulder of veal, cut into 1-inch chunks
1/2 cup flour
Salt and ground black pepper to taste
1/2 cup olive oil
1 medium onion, peeled and finely sliced
1 large green bell pepper, cored, seeded and cut into ¼-inch strips
2 cloves garlic, peeled and crush
1 cup beef broth or bouillon
1 8-ounce can tomato sauce
1 tablespoon fresh chopped oregano or ½ teaspoon dried
½ teaspoon fresh chopped thyme or ¼ teaspoon dried
1 bay leaf

Instructions:

  1. Rinse veal and pat dry with paper towels.
  2.  Season flour with salt and pepper.
  3.  Dredge veal chunks in seasoned flour
  4.  Heat oil in a heavy skillet or Dutch oven. Sauté onions, bell pepper and garlic over moderate heat for about 4 minutes. Add veal and cook until meat is lightly browned (another 2-3 minutes).
  5.  Add broth, tomato sauce, oregano, thyme a d bay leaf. Stir to combine.
  6.  Cover and simmer, on low heat, for 20-30 minutes or until veal is tender.
    Yield: 4 servings

MISO-GLAZED EGGPLANT SLICES

I will say this unequivocally, this is the best eggplant recipe you’ll come across. And it’s a grill recipe. But, I’m sure you can also prepare it atop the stove  Anyway, it’s mighty big statement to make, and I stand by it. I am a lover of eggplant, and when it’s well rendered, I swoon. This recipe makes it unique in that includes miso, the traditional Japanese seasoning that is made by fermenting soybeans, salt, barely or rice. The mixture comes in a paste that is used enhance soups,tofu and vegetables.

Let me add that there are various types of miso. For this recipe I used sweet white miso (shiro miso), which is the most versatile type. But you can also use red miso (aka miso), which is the saltiest, most pungent variety. And here you only need a little bit; and it goes especially well with eggplant.

This is not a Nuyorican recipe. It’s more Asian in  style it that, apart from miso, it also calls for sesame oil as one of the ingredients. The one thing that I must note is with regard to the eggplant. Again, I’ve had comments on both sides of the divide regarding this. I’ve heard from diehard cooks on my end,  that salting the eggplant prior to cooking, draws out the eggplant’s  bitter liquids, and will make it less likely that the eggplant will absorb oil while it fries. I’ve tried both methods and, honesty, I found no difference in taste. But, if you’re still a partisan of the salting thing (and have the time), then salt eggplant slices liberally, place in a colander in the sink and let sit 20-30 minutes. Then rinse, pat dry, and grill.

Ingredients:

2 medium or 1 large eggplant, peeled and cut into ½-inch slices
3 tablespoons corn or canola oil (or more as needed)
1 tablespoon sesame oil
Ground black pepper to taste
½ cup miso
¼ cup honey or maple syrup
¼ cup hot water

Instructions:

1.  Heat a charcoal or gas grill to medium-high and place the rack about 4 inches from the flame.
2. In a cruet or small bowl (or even a cup), combine the corn and sesame oils, and brush the eggplant slices on both sides with the oil mixture. Sprinkle with pepper and brush with more oil. Grill until brown on both sides, about 6-8 minutes total, turning once or twice and brushing with more oil if it looks dry.
3. When the eggplant is almost done, in a small bowl, whisk together the the miso, honey (or maple syrup), and hot water. Then generously brush the eggplant with this mixture. Continue to grill another minute or two. Serve hot or at room temperature, drizzled with any remaining miso sauce.
Yield: 4 servings.
Note: I served the eggplant with grilled steak; but grilled pork, lamb, or chicken can also be a good side.

GRILLED GLAZED PORK CHOPS

Sill in the grillin’ mode. Might as well enjoy it while the season lasts. This time it’s Glazed Pork Chops. A common enough entry. But, when one thinks of glazed pork chops, grilled or not, it’s pork chops smothered with orange marmalade. That’s been most of the recipes I’ve seen. Well, it can be done with any glaze, not just orange. Recently I scoured the fridge and discovered I had some leftover red raspberry and wild blueberry jam. Two small, half empty bottles, and still good to use. I mixed them all up and I had a suitable delicious glaze for the chops.

The trick here is that you can use any kind of crushed fruit for a glaze, even cramberry sauce and and sweet mango chutney. You’re only limited by your imagination.

Ingredients:

¼ cup your favorite jam or marmalade, or a mix
1 tablespoon soy sauce
1 tablespoon lemon or lime juice
1 1-inch piece fresh ginger, peeled and chopped
4 boneless pork chops, ¾-inch think, about 1 pound.

Instructions:

  1. Preheat a charcoal or gas grill for 6 minutes. For best results, brush the grate with vegetable oil before grilling. Fire should only be moderately hot.
  2.  For the glaze, combine jam or marmalade (or a mix), soy sauce, lemon juice, and ginger. Place chops on grill, and pour glaze over chops. Close lid and cook 6 to 8 minutes or until meat is no loner pink. Remove chops and pour glaze from grill over all.
    Yield: 4 servings.


GRILLED CHICKEN WINGS

Labor Day has passed. But that doesn’t mean we can’t continue grilling anymore. The weather is still hot in some parts; and the grill can still get some use. Like in this recipe for chicken wings. Normally, we make chicken wings Nuyorican style with the usual condiments: oregano, garlic, salt, pepper, and olive oil, all crushed in a mortar and then used as seasoning.

This recipe has more of an Asian aspect to it: ginger, scallions, honey, along with some white wine for added flavor. So, heat up the ole’ grill and go at it.

GRILLED CHICKEN WINGS

Ingredients:

4 tablespoons soy sauce
3 tables spoons dry white wine (or can use sake, if preferred)
3 tablespoons honey or maple syrup
3 scallions, trimmed and roughly chopped
3 cloves garlic, peeled and chopped
1-inch long piece fresh ginger, peeled and chopped
3 ponds chicken wings

Instructions:

  1.  Wash chicken wings under cold running water and pat dry with paper towels.
  2. In a large dish, mix all ingredients except chicken wings. Now, here you can marinate chicken wings in two ways:  1) Place chicken wings in 2 large zip-lock bags, and add marinade ingredients. Place in refrigerator and refrigerate for at least 2 hours or, preferably, overnight, shaking the the bags occasionally to coat wings.  or 2) Add chicken wings to the dish, turn  to coat,  cover with plastic wrap and refrigerate (turning wings occasionally in marinade). Your choice
  3.  Start a charcoal or gas grill, and preheat. Fire should be moderately hot and rack should be about 6 inches from source of heat. Remove wings from marinade, place on grill and cook for about 10 minutes on each side. Remove from heat and sere immediately.
    Yield: 4 servings or more.
Older posts Newer posts

© 2025 Oswald Rivera

Theme by Anders NorenUp ↑