Monkfish is an ugly looking fish. It has short, stubby face that reminds everyone of some prehistoric being. Yes, it looks unappetizing—but it is delicious! When I’m at a fish market, being it New York’s Chinatown or some other fish monger joint, I’m always on the lookout for monkfish. Not only does it taste good, but another benefit: it’s fairly inexpensive. Why? You guessed it—people get turned off by its looks.
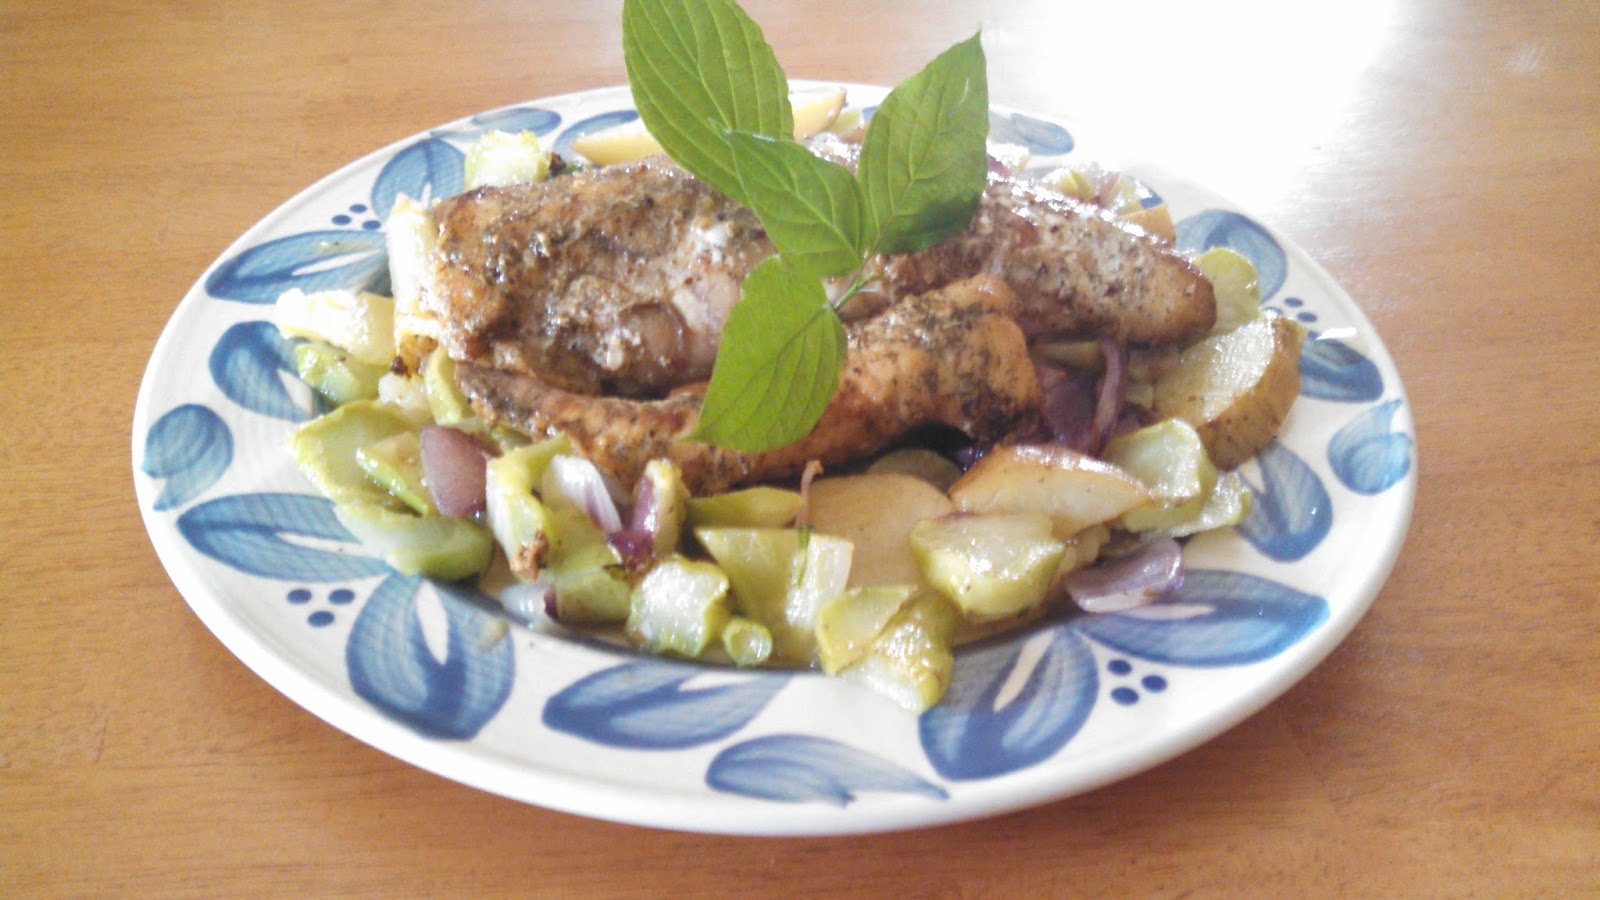
I usually cook monkfish whole, either steamed or in baked in the oven. Lately I came in possession of some monkfish fillets. And I wasn’t disappointed. It’s as scrumptious as any delicacy. To compliment its sweet, mild flavor (some call it the “poor man’s lobster”), I decided to cook it in a simple wine-butter sauce. The result was heavenly. In this recipe you can use fresh, thawed or frozen fillets. But it goes without saying, if you can get ’em fresh, you’re ahead of the game. Also, I prepared it in my own seafood rub. Think of it as adobo plus. It gives bit of tang to the fillets, but does not take away from the overall flavor.
MONKFISH FILLETS IN WINE-BUTTER SAUCE
1 to 1 1/2 pound fresh monkfish fillets
3 tablespoons olive oil
1 teaspoon garlic powder
1 tablespoon dried oregano
1 teaspoon dill weed
1 teaspoon paprika
2 tablespoons fresh chopped parsley
1/2 teaspoon caraway seed
1/4 teaspoon salt
1/4 teaspoon ground black pepper
1/4 teaspoon brown sugar
1 teaspoon fresh chopped lemon peel
1/4 cup dry white wine
2 tablespoons butter
1. Rinse fish fillets under cold running water, and pat dry with paper towels. Set aside.
2. In a small bowl, combine olive oil with herb ingredients. This is the seafood rub.
3. Pat or brush both sides of fish fillets with the rub.
4. Place in a heated skillet (I prefer cast iron), and cook over medium-high heat for about 3-4 minutes or until fish is browned. Turn fillets occasionally to keep from sticking.
5. Add wine and butter, reduce heat to medium, cover and cook for 2 minutes, Uncover and cook about 1 minute more, just until fish is opaque and sauce is reduced.
6. Serve with potatoes combined with greens, or pilaf rice.
Yield: 4 servings.