Oswald Rivera

Author, Warrior, and Teacher

Author: Oswald Rivera (page 61 of 83)

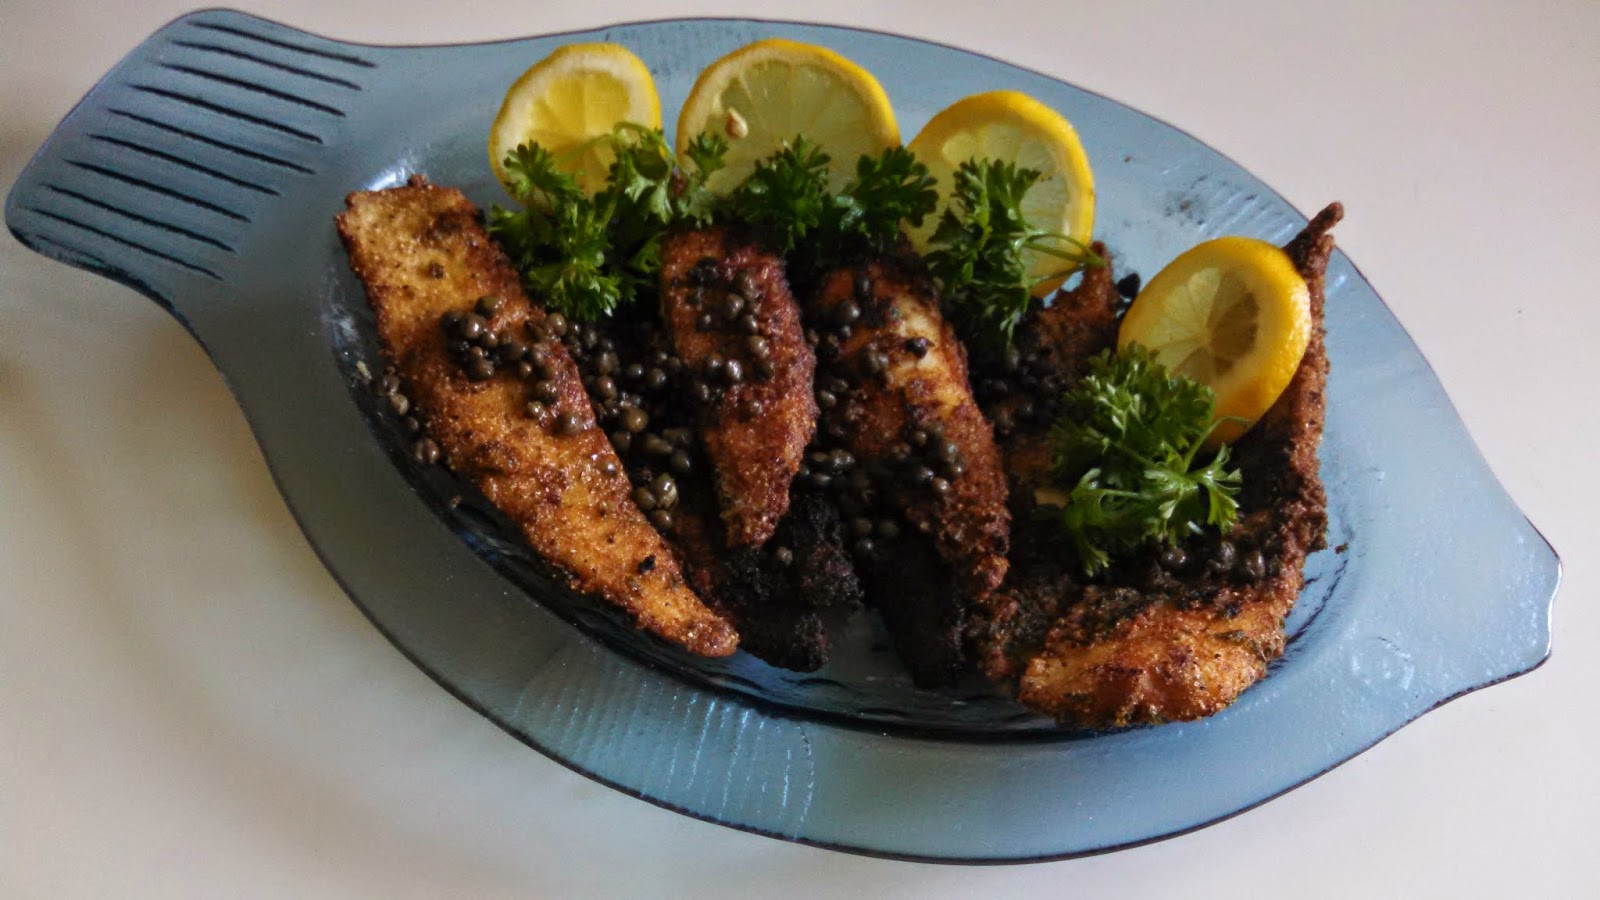
Swordfish Steaks in Lemon Sauce – Island Style

Back in the old neighborhood, swordfish was a mainstay in our diet. Reason was that, now as then, in  the island of Puerto Rico swordfish was readily available. This transferred over to our time in Spanish Harlem. In the marqueta, the market place on 116th street, swordfish was cheap, and it was cooked in every way possible. One of our favorite recipes was swordfish steaks cooked in lemon sauce (lemons were also very cheap and it made for an exceptional dish). Pez de Espada con Salsa de Limón, as my parents termed it, could be done today on a barbeque grill as well. We didn’t barbecue in the Barrio, we just grilled these suckers in the oven.

 One of the complaints I’ve gotten is that, in our cooking, it is traditional to pound the fresh herbs in a mortar and pestle. These, either wood, metal, or ceramic, can be found in almost any hardware or kitchen store. For those of you who don’t have a mortar and pestle (think of the kind used by old pharmacists), you can substitute by pounding the seasonings between sheets of wax paper, using a cleaver or mallet. Just make sure the edges of the wax paper are rolled up so you don’t have spices flying all over the kitchen.

In the old days the usual accompaniment to this dish was rice or potatoes. I recently did it with millet, an ancient grain common to Asia and Africa that is also rich ion iron, phosphorous and B-vitamins. It’s also quite tasty, and it goes great with pez de espada. Let me add, this swordfish recipe and others like it can be found in my first cookbook, Puerto Rican Cuisine in America (Avalon Books – Running Press).

PEZ DE ESPADA CON SALSA DE LIMÓN
      (Swordfish Steaks in Lemon Sauce)

4 swordfish steaks, 6 to 8 ounces each (can substitute halibut or any other white fish steak)
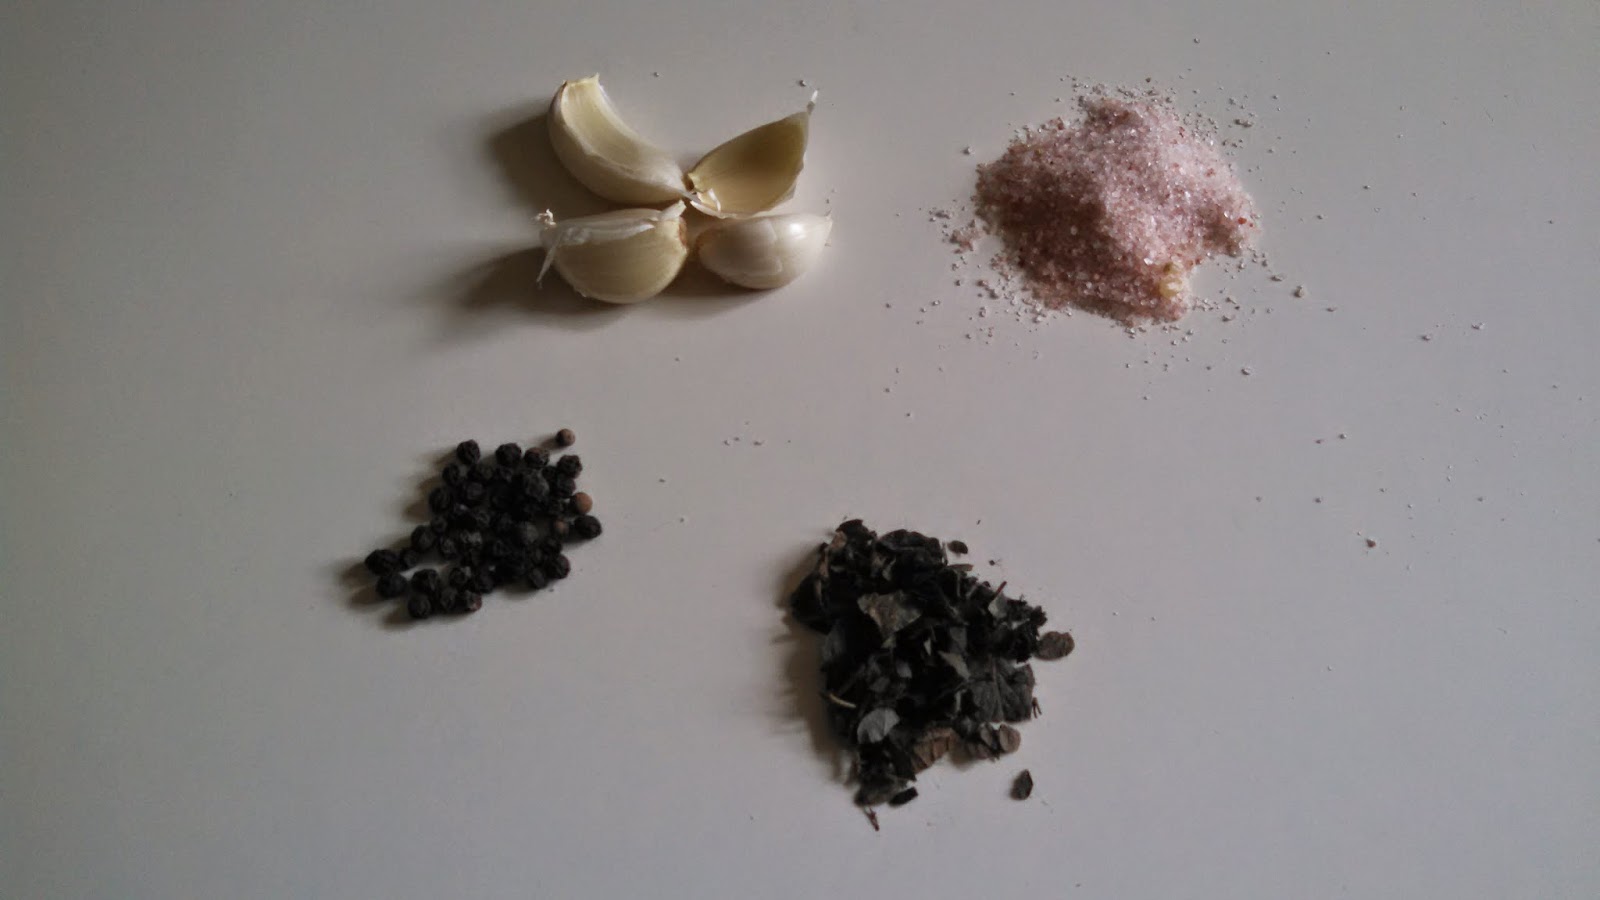
7-8 whole black peppercorns
2 cloves garlic, peeled
1 teaspoon dried oregano
1/4 teaspoon fresh or dried basil
1/2 teaspoon salt
1/3 cup lemon juice
3 tablespoons olive oil

1. Wash steaks under cold running water and pat dry with paper towels.
2. In a mortar, crush peppercorns, garlic, oregano, basil and salt. Add lemon juice and olive oil.
3. Place fish in a shallow dish. Add marinade; turn to coat both sides of fish.
4. Cover and set aside for 1 hour, turning once.
5. Place fish on a greased broiling pan (I prefer cast-iron) and broil at a distance of about 4 inches from heat source. Broil 5 to 6 minutes per side, brushing frequently with marinade.
    Yield: 4 servings.

Enhanced by Zemanta

Colcannon – The Saint Paddy’s Day Special

Four years ago I posted a recipe for Saint Patrick’s Day, and here it is again: Colcannon. I decided to reprise the recipe because, apart from the usual corned beef and cabbage, it’s the dish I most enjoy on Saint Paddy’s day.  It’s mainly spuds, and you cant get more Irish that that. A homey delight that could be called mashed potatoes plus. But it’s far richer and tastier than ordinary mashed potatoes. Along with a few slices of Irish bacon or smoke ham, and a bottle of Guinness, it’s heaven.

COLCANNON

8 large mealy potatoes
8 small white onions, peeled
3 scallions, washed and trimmed
1 cup half and half  milk
1 1/2 cups boiled, chopped Savoy cabbage
3 tablespoons melted butter
Pinch of grated or ground nutmeg
Salt and ground black pepper to tatse

1. Boil potatoes, peel and smash. Place in a large bowl and set aside.
2. Put half and half in a small pan or skillet. Add onions and scallions and cook over medium-low heat  until tender. Strain, reserving liquid. Mince onions and scallions.
3. Add the onions, scallions, and half and half liquid to the potatoes. Mix well and whip until fluffy. Add more half and half milk as needed. Stir in all other ingredients and blend well.
    Yield: 6 servings. 

Enhanced by Zemanta

Roasted Turkey Breast

In the Rivera family, roasted turkey breast was one of those special occasion dishes. Mainly we had a whole turkey during the Thanksgiving holiday. Turkey breast was that optional treat instead of the Sunday beef or pork roast. We liked it because our family rendition came out moist and juicy; and the whole thing could be done in about an hour or so depending on the size. Figure it this way: a small turkey breast weighing 3 to 4 pounds requires, on average, 1 to 1 1/2 hours cooking time. A larger breast weighing 6 to 7 pounds cooks in 2 1/2 to 3 1/2 hours. In all cases, after roasting, always allow the breast to sit 15 to 20 minutes so that the juices have time to be absorbed throughout the meat. So, surprise the family or your significant other for that special dinner. You’ll get deserved applause.

ROASTED BONELESS TURKEY BREAST

1 4-5 pound turkey breast, skin on
3 tablespoons olive oil
1/4 teaspoon salt
1 teaspoon freshly ground black pepper
1 teaspoon dried oregano
1 teaspoon garlic powder
1/2 lemon
3-4 tablespoons all-purpose flour
1/4 cup red wine or brandy
2-3 cups chicken broth
2 tablespoons butter
Salt and ground black pepper to taste

1. Rinse the turkey breast under cold running water. Drain and pat dry with paper towels.
2. Place the turkey breast on a plate and spear all over with a fork. Drizzle with the olive oil and rub thoroughly with the salt, pepper, oregano and garlic powder.  Pat the seasonings well into the skin. Place the breast in a plastic zip-lock bag; and skirt with the juice from the lemon. Shake the bag until the breast is thoroughly coated with the marinade.
3. Place the turkey breast in the refrigerator and let it marinate overnight.
4. Next day, preheat the oven to 450 degrees F. Place the breast on a roasting pan (I prefer cast-iron). Roast for 45 minutes to 1 hour.
5. Insert a meat thermometer into the thickest part of the breast, and remove the breast from the oven when the temperature reaches 155 degrees. Cover the breast with aluminum foil and allow to rest for 10 minutes. During this time the internal temperature of the meat will continue to rise approximately 5 to 6 degrees higher. Increasing the temperature over 170 degrees will probably result in a dry and tough turkey breast—and you don’t want that.
6. While the turkey breast is resting, you can make the gravy: put the roasting pan over one of the range burners on medium heat. Sprinkle the flour into the pan juices, stirring for a few minutes. Add the red wine or brandy, and scrape the pan to lift bits that are stuck to the bottom. Cook for a minute or so to burn off the alcohol content. Pour in the chicken broth, stirring constantly. Bring to a simmer, add the butter and stir until thickened. Season with salt and pepper to taste.
7. Slice the turkey breast on the diagonal and serve with the gravy.
    Yield: 6-8 servings.

Enhanced by Zemanta

Gallina al Horno – Roast Cornish Hens

This is one of our family favorites. I think it was Uncle Phillip who first got us into Cornish hens. I have never seen Cornish game hens on menus in Ponce, Puerto Rico (my parent’s birthplace). Although they’re probably served in the fancy joints in San Juan. Nevertheless, good ole Uncle Phillip, worldly-wise bon vivant that he was, introduced us to this great dish. In the island, guinea hens are the usual fowl cooked and served. In the Rivera family during out time in Spanish Harlem we came to love game hens and in our soirées we sometimes had to apportion two to a person. We served them two ways: stewed, or as given below, roasted. With an elegant white wine such  as a Sauvignon Blanc, or a
fruity, lightly chilled Bardolino, you can’t go wrong with this one.

GALLINA AL HORNO
 (Roast Cornish Hens)

4 Cornish game hens (about 1 pound each)
2 teaspoons fresh thyme (can substitute dried if fresh not available)
4 medium Idaho or Maine potatoes, peeled and quartered (I prefer them unpeeled if organic)
2 cloves garlic peeled
8 whole black peppercorns
1 teaspoon dried oregano
1/2 cup olive oil (some prefer extra-virgin, I prefer a full-bodied one)
1 tablespoon red wine vinegar
Salt to taste
8 bacon strips

1. Preheat oven to 350 degree F.
2. Rinse Cornish hens inside and out under cold running water and pat dry with paper towels.
3. Sprinkle half a teaspoon thyme in the cavity of each hen. Fold back the wings and tie legs securely with kitchen string. Place hens in a shallow foiled lined roasted pan with the foil lightly greased. Surround the hens with the potatoes and scatter the gizzards, necks and hearts around the hens. Reserve livers for some other use (unless you prefer livers that are charred or half burnt).
4. In a mortar, pound the garlic, peppercorns and oregano.
5. In a small bowl, combine the olive oil, vinegar, crushed garlic, peppercorns, oregano and salt. Pour over the hens and potatoes, turning so that both hens and potatoes are coated with the mixture. Next, line each hen with two strips of bacon.
6. Roast for 30 minutes. Turn potatoes and continue roasting for another 30 minutes, basting frequently until hens are fork-tender and potatoes are golden brown.
    Yield; 4 servings.

Enhanced by Zemanta

Fish Fillets Baked in Sour Cream

Sometimes the best meals are those that are created on the spot. You know, where you just get inspired at that moment, mainly because you don’t have the luxury of time or preparation. That occurred to me recently when my wife invited a mutual friend to dinner. This was a last minute thing and I had an hour to come up with something inventive. I checked the fridge and discovered we had some cod fillets and a pint of sour cream. I also had some whole wheat spaghetti on hand. And the result was the recipe given which resulted in a quick, fast, and delicious meal.

Let me state that for this meal you can use any firm-flesh fish fillets: cod, haddock, turbot, perch, etc. But you can also use frozen fillets. Just let them defrost overnight in the fridge or let them thaw out at room temperature in the kitchen. If you’re pressed for time you can speed up the process by letting cold water run over them. This is a quick no mess, no fuss endeavor. In my effort, I served the fillets with their sauce over the whole wheat pasta.

FISH FILLETS BAKED IN SOUR CREAM

2 pounds fish fillets
1/4 fourth cup butter
1/2 cup grated Parmesan cheese
One cup sour cream

1. Preheat oven to 400 degrees F.
2. Lay fillets on a greased shallow baking pan or baking dish (again, I prefer cast-iron).
3. In a small saucepan, melt butter and stir in the Parmesan cheese and sour cream.
4. Spoon sauce over fish, covering evenly. Place in oven and bake for 20 minutes to 1/2 hour until sauce topping is golden brown and fish flakes easily with a fork. Serve over pasta of your choice, or over rice, or with boiled potatoes.
    Yield: 4 servings.

Enhanced by Zemanta

Pollo Frito – Puerto Rican Fried Chicken

Everyone loves fried chicken (at least almost everyone). It’s one of the few dishes that if you have kids in the house, won’t create any problems in terms of picky eaters. We Puerto Ricans have our own unique take on fried chicken. Our version is fairly simple, but it’s more seasoned compared to other recipes. We also have plain fried chicken where you can skip the flour and cook the chicken in butter or olive oil instead of vegetable oil. The recipe given here is the classic floured chicken which is ubiquitous (I love those $20 words) in the fried chicken universe. Paired with mashed potatoes, some green veggies, and a good bottle of wine, you can’t go wrong.

Let me get in a plug here. This recipe is from my first cookbook, Puerto Rican Cuisine in America (Perseus Books – Running Press). Actually, in that book I give two versions of  Puerto Rican fried chicken: one is with plain flour (as in the recipe below) and the second version is cooking the chicken in its marinade combined with bouillon or broth, lending to a more heady flavor. Want that recipe—buy the book.

POLLO FRITO
(Fried Chicken)

1 fryer chicken, about 2 1/2 pounds, cut into generous bite-sized pieces
2 cloves garlic, crushed or 1/2 teaspoon garlic powder
Salt and ground black pepper to taste
1 teaspoon dried oregano
1/4 teaspoon onion powder (optional)
3 tablespoons olive oil
1 tablespoon vinegar
Vegetable oil for frying
1 cup all-purpose flour

1. Rinse chicken pieces under cold running water and pat dry with paper towels.
2. Place chicken in a bowl and rub with crushed garlic. Sprinkle with salt, pepper, oregano and onion powder. Rub seasoning well into chicken pieces. Drizzle with olive oil and vinegar. Mix to combine. Cover and set aside for 15 minutes. It you really want strong flavors, refrigerate overnight.
3. Heat a generous amount of oil (1-inch to 1 1/2-inch deep) to medium temperature (about 340 degrees F.) in a heavy-bottomed pot, large skillet or deep fryer.
4. Remove chicken from marinade and dust lightly with flour. Use your hands to toss and coat each piece thoroughly.
5. Add chicken pieces to hot oil, a few at a time and deep-fry until golden brown and crisp (3 to 5 minutes). Remove and drain on absorbent paper towels. Serve piping hot.
    Yield: 4 servings.

Enhanced by Zemanta

Broiled Fish with Orange and Anchovies

This is a recipe I discovered years ago. And it comes from Spain. That, I’m pretty sure of.  This dish  definitely harks back to the Islamic reign in Spain which lasted 700 years. Paella; the use of saffron; the cold soup, gazpacho; almond torte; flan; albondigas (meatballs); escabeche (cold marinated fish); can all be traced back to Moorish cooking. They also introduced citrus such as lemons and Seville oranges, as well as cooking with anchovies—and here you get fish fillets with orange  and anchovies.

In this dish I use red snapper but you can use any good firm-fleshed fish fillets (haddock, scrod, cod, halibut, etc.). It calls for the zest, that is, flaked skin, of a lemon and an orange. You can use a fruit zester for this, or scrape the fruit skin using a grater; either works well. The dish has a nice citrusy undertone, but the other spices and the butter balance it off so that you get a succulent dish. It’s a recipe that is easy, but made to impress.

BROILED FISH WITH ORANGES AND ANCHOVIES

4 five-ounce fish fillets
6 tablespoons olive oil
Salt and ground black pepper to taste
3 tablespoons minced shallots
2 cloves garlic, peeled and thinly sliced
Zest of 1/2 a lemon, grated
Zest of 1/2 orange, grated
Pinch of red pepper flakes (or more, if you want it spicier)
6-ounce can? anchovy fillets, rinsed, patted dry and finely chopped
1/2 cup orange juice
1 tablespoon butter
1 orange (preferably Seville orange), sectioned
1/2 lemon

1. Heat broiler on high. Brush both sides of fillets with 3 tablespoons of the olive oil and season with salt and pepper.
2. Place fillets in a oven-proof dish on top of rack. If using red snapper, place them skin side up. Cook until skin is blistered and fish is almost cooked through, about 3-5 minutes—be careful not to burn the fish. Transfer to a warm plate and set aside.
3. Heat remaining olive oil in a medium skillet or fry pan over high heat. Add shallots, garlic, fruit zests, pepper flakes and anchovies. Cook until sizzling.
4. Add orange juice and bring to a boil. Reduce heat to low and cook for about 3 minutes or until thickened.
5. Turn off heat and swirl in the butter. Gently stir in the orange sections, and add a squirt of lemon juice from the 1/2 lemon.
6. Top the fish fillets with orange-anchovy sauce and serve.
    Yield: 4 servings.

Danish Stuffed Cabbage

Stuffed Cabbage, as we know it, has been around for a while. It was popular in Ancient Rome and Ancient Greece. It is part of the diet of Poles and Russians; and almost every country in Europe has some version of the dish. In Jewish cuisine its been around for 2,000 years and is traditionally served on the holiday Simchat Torah, or the annual celebration that concludes the public readings of the Torah (the first five books of the Jewish bible). Yet of all the stuffed cabbage dishes I have come across, my favorite is Danish stuffed cabbage. Whether it’s Danish or not is open to interpretation. Some Swedes claim they were the first to concoct the idea of stuffing a whole cabbage and not just the cabbage leaves. I love the dish because not only is it delicious but it makes a great presentation. And I discovered a long time ago that in good cooking the eye may be just as important as the taste.

Danish stuffed cabbage is also simple to make. It doesn’t normally include cooked rice as in most stuffed cabbage recipes. It doesn’t include tomatoes either; though in my version I add tomato paste to it—or you can skip it altogether. Like all such dishes, it can include ground veal, ground pork, ground beef or a combination thereof. I keep it simple and economical and use ground chuck, This is not a fancy dish, but if you want to use veal or a more expensive cut of meat, go right ahead. Note that traditionally this dish contains a lot of butter. If you’re worried about the butter content you can use olive oil to brown the meat and the follow the rest of the recipe as is.

DANISH STUFFED CABBAGE

1 medium firm green cabbage
1 1/2 cups soft bread crumbs (without crusts)
3/4 cup milk
2 eggs
Salt and ground black pepper to taste
1/4 teaspoon ground sage
1/2 stick plus 3 tablespoons butter
1 pound ground chuck
2 tablespoons tomato paste

1. Remove loose outer leaves from the cabbage. Cut a deep slice from the stem end of the cabbage (this slice will be used as a lid during cooking). Then, using a knife and spoon, hollow out the cabbage, leaving a wall about the thickness of six-seven leaves. You can save the hollowed out cabbage parts for another use such as cabbage soup or stir-fry, or other.
2. In a bowl combine 1 cup bread crumbs and the milk and soak until soft. Add the eggs, salt, pepper and sage to the soaked crumbs. set aside.
3. In a medium frying pan or skillet, heat 1/2 stick  of butter, add the ground meat and cook over medium heat until meat loses its red color. Stir in the tomato paste and cook 2-3 minutes more. Add the soaked crumbs and mix well. Stuff the cabbage shell with the mixture. Depending on the size of the cabbage you may have some meat leftover which you can use for another occasion.
4. Place the sliced lid over the cabbage and meat. Next, place the cabbage, standing up, in a saucepan and surround with boiling water about halfway up from the head. Cover, reduce heat to low, and simmer for about two hours. Check periodically to make sure you have enough water in the pan. You do not want the water to boil off and the pan to burn. Add more water if needed.
5. Remove the cabbage lid. In the frying pan brown the remaining 1/2 cup bread crumbs in the remaining 3 tablespoons butter, and pour this mix over the top of the cabbage. To serve, cut the cabbage with its stuffing into wedges, and enjoy!
     Yield: 4-5 servings.

Enhanced by Zemanta

Kielbasa and Potatoes

 
No matter what the climate deniers may claim, the Polar Vortex is still with us, and it ain’t going nowhere. This calls for hearty food and drink. Forget about summer salads. One of my favorite dishes for this type of weather is kielbasa and potatoes—simple, hearty peasant cooking that fills the bill, and  is delicious to boot. Kielbasa, also known as Polish or Ukrainian sausage is a staple of Central and Eastern European cooking. It’s also very popular in the East and Midwest regions of the U.S. where large congregations of Eastern Europeans have settled. Raised in New York, I came upon kielbasa sausage early in. And I love it, whether cooked with onions, or peppers, or with kasha (buckwheat groats) or over rice. But my favorite is with potatoes. Nothing fancy, just spuds and red bell peppers and some bacon on  top. Can’t go wrong with this treat.

KIELBASA AND POTATOES

6 slices thick-sliced bacon, diced
1 large onion, peeled and sliced into thin rings
4 large potatoes, cooked (I like them with the skin on, but just cook them until just tender or semi-hard), and cut into 1-inch cubes.
1 Polish kielbasa or 1 pound Italian sweet sausage
1 red bell pepper, cut into 1-inch squares
Salt and ground black pepper to taste

1. In a large skillet, fry bacon until brown and crisp. Remove and set aside.
2. Add onion to drippings and sauté until golden brown. Add potato cubes and stir over low heat until potatoes are slightly browned, about 15 minutes.
3. Cook kielbasa in boiling water for 15 minutes. Drain and cut into 1/2-inch slices. If using sausages, brown on all sides in another skillet; cut into 1-inch slices.
4. Add kielbasa or sausages to potatoes. Add red pepper and stir over low heat for another 10 minutes. Season to taste with salt and pepper.
5. Pile on a serving platter and sprinkle with reserved bacon strips.
    Yield: 4 servings.

Enhanced by Zemanta

Texas Hash with Rice

Another cold snap here in the Northeast. For this kind of weather you need stick to the ribs food. And one of the best recipes I’ve had for years is Texas Hash with Rice. I acquired this gem back in the 1970s when it appeared in the Scripps Howard News Service, which is no longer in business. It’s a filling, tasty, and inexpensive no-frills antidote to the cold weather blues. I’ve modified the recipe according to the Rivera family palate.

You can make this recipe as hot and as spicy as you want depending upon how much chili powder you add to it. The original recipe called for 1 to 2 tablespoons chili powder. That is a lot. But, if you like 3-alarm chili hash, go right ahead. Also, it called for 1 tablespoon of salt, which is quite a bit of salt. Use as much as you like, but be judicious. It also had as an ingredient, garlic powder. I prefer fresh whole garlic for a more distinctive taste. Another note: kids love this hash—and you don’t have to be a Texan to appreciate it.

TEXAS HASH WITH RICE

3 tablespoons olive oil

1 medium onion, peeled and thinly sliced
1 small-to-medium green bell pepper, cut into small slices, then cut the slices in half
1 pound lean ground beef
1/2 teaspoon chili powder (or more to taste)

Salt and ground black pepper to taste
1 clove garlic, peeled and finely minced
1 14.5-ounce can tomatoes
2 cups cooked rice

1. Preheat oven to 350 degrees F. 
2. Heat olive oil in a cast-iron skillet. Add onion and green bell pepper, and saute 2-3 minutes.
3. Add beef, chili powder, salt, pepper and garlic. Cook until meat is no longer pink.
4. Add canned tomatoes (with their liquid), and rice.
6. Place skillet in oven and bake for 25 minutes or until heated through. Note: If you don’t have a cast-iron skillet, you can use whatever skillet you have on hand then transfer the hash-rice mixture to a  baking dish and bake as required.
    Yield: 4 servings or more

Enhanced by Zemanta
Older posts Newer posts

© 2025 Oswald Rivera

Theme by Anders NorenUp ↑