Oswald Rivera

Author, Warrior, and Teacher

Author: Oswald Rivera (page 63 of 83)

The Joy of Eels

‘Catching the legendary eel at Tangahoe’

Mention eels to most anyone, and the first response is “Yuck.” But this seafood is prized in other parts of the world. In Asia and Europe ells are considered a delicacy, smoked eels in particular. Okay, so you say, “Convince me.” Well, let’s start with the fish itself. Eels come in two varieties: freshwater and marine. Freshwater versions such as the European eel and the American eel are eaten in the U.S. and Europe. Marine eels, such as conger and anago are popular in Japanese and Chinese cuisine. And they ain’t cheap. In Hong Kong, prices for select eel dishes range from $129 to $645 per kilogram (2.2 pounds). So, its a royal dish. Not to be out done, there’s even an American alternative rock band called the “Eels.”

We are more fortunate in that we can find eels at reasonable prices at the local fish store, Asian or Caribbean market. All I’m saying is give it a chance. You’ll discover how delicious and versatile they are. Yes, they look like snakes, and they’re slimy. But don’t let that deter you. Cook the suckers and you’re in for a treat. I recall that in the movie version of German author Guntar Grass’ book The Tim Drum, the main character, Oskar (who’s a dwarf, by the way), goes on an outing at the beach with his parents. On the shore they come across a horse’s head (yes, a decapitated horse’s head) that is swarming with eels crawling out of its snout, eyes and ears. The mother immediately gets sickened by the sight.  The father, being more practical, takes the eels home, cleans them up and prepares a marvelous dinner. A smart man.

Given below are two simple recipes for cooking eels. Like Oskar’s family, you won’t be disappointed.

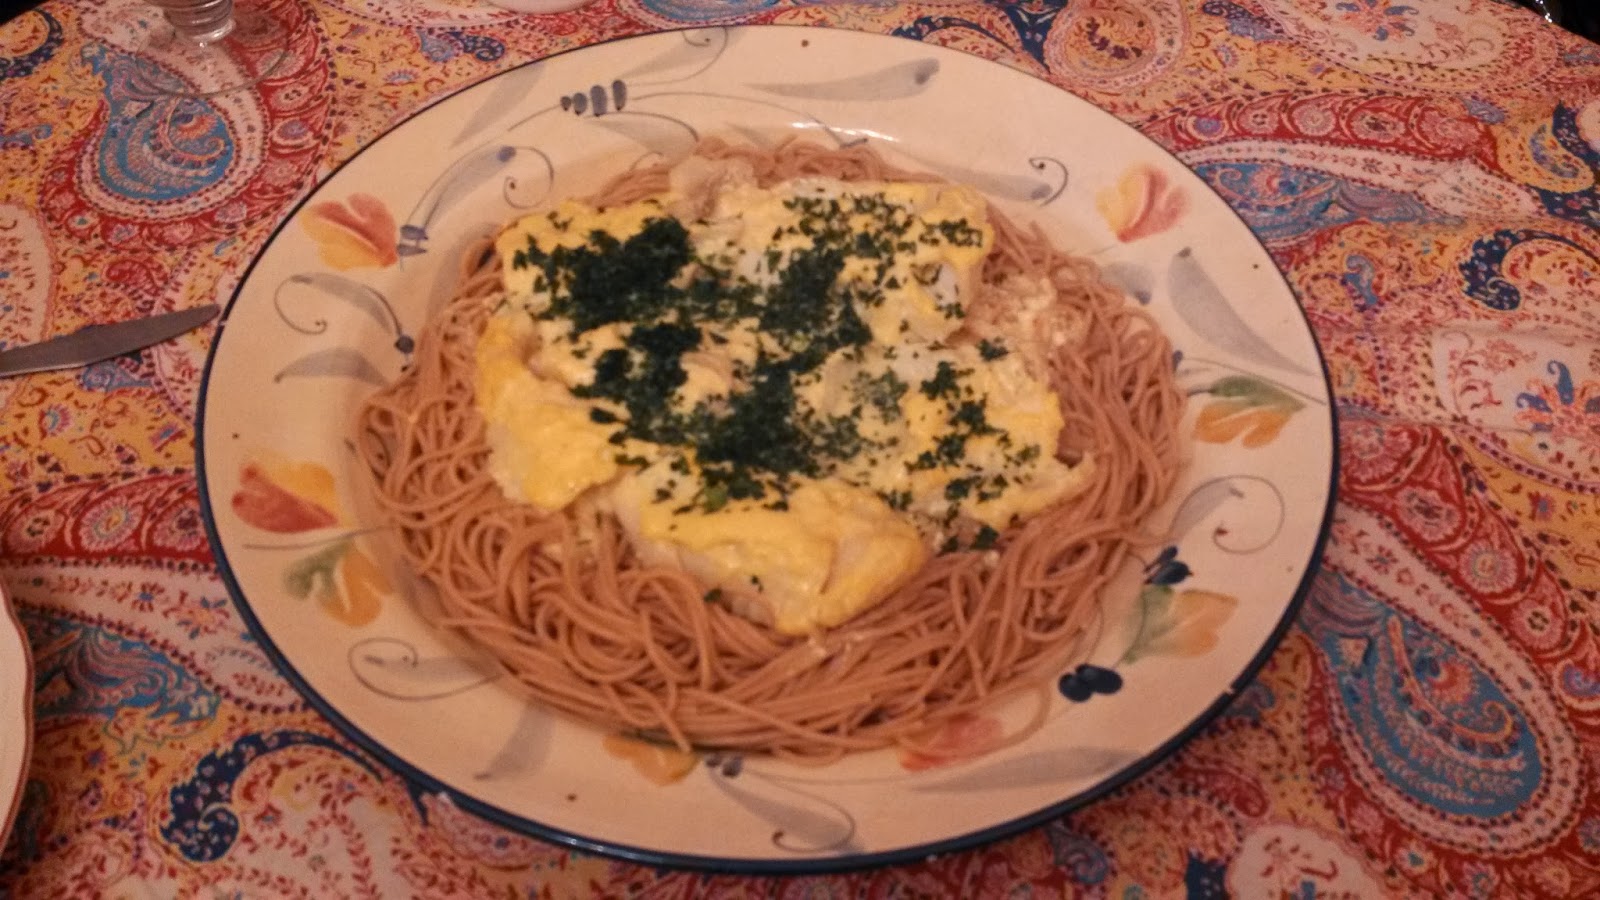
BROILED EEL WITH MUSTARD BUTTER

The eel:
     1 1/4-to-1 1/2 pound skinned eel (cleaned weight)
     2 tablespoons butter
     Salt and freshly ground pepper to taste
The mustard butter:
      4 tablespoons butter at room temperature
      3 teaspoons mustard, preferably Dijon or Dusseldorf
      3 tablespoons finely chopped parsley
      1/4 teaspoon Worcestershire sauce
      Tabasco sauce to taste
      Salt and freshly ground pepper to taste

1. Preheat broiler to its highest setting.
2. Using a sharp knife, score the eel flesh top and bottom. To do this, make shallow 1/8-inch parallel incisions at 1/2-inch intervals. Cut the eels into 6-inch lengths.
3. In a baking dish, gently melt the butter and add eel pieces. Sprinkle with salt and pepper and turn the eel pieces in the butter until coated all over.
4. Place the dish of eel about 4 to 5 inches from the source of heat and broil about 1 and a 1/2 minutes. Turn the pieces and cook about 2 to 3 minutes longer. Pour off all the fat that has accumulated in the pan. Serve immediately with the mustard butter. 
5. To make the mustard butter, combine all the ingredients for the butter and beat rapidly with a whisk or wooden spoon until well blended. Spoon equal amounts of the unmelted butter over the fish sections and serve immediately.
    Yield: 6 servings.

EEL A L’ITALIENNE

My favorite eel recipe: cut about 1 1/2 pounds of eel or eels into chunks, season with salt and pepper and fry briskly in olive oil for a short time, just enough to stiffen the fish. Remove from the pan and in the same oil, brown 2 tablespoons of chopped onion. When the onion is nearly done, add a tablespoon of chopped shallots, and a 1/4-pound mushrooms, diced small. Put the eel back in the pan, add 1/3 cup white wine and 3/4 cup of tomato sauce. Simmer, with the lid on, for 1/2 hour. Place in a shallow platter, sprinkle with chopped parsley and tarragon, and serve.

Caption: courtesy of The Encyclopedia of New Zealand: Te hopu tuna – eeling

Enhanced by Zemanta

Fish Bilbaina Style

This recipe is a contribution from my late Uncle Phillip, von vivant, raconteur and ladies’ man extraordinair. Phillip was the black sheep of our family, mainly because of his lust for life. You could describe him as a lovable rogue; and he was a fabulous cook. According to him, the origin of this recipe is Bilbao, Spain, in the Basque country. Whether they prepare it this way in Bilbao, I do not know. But Uncle Phillip always stated they did.

Like most of his generation, Uncle Phillip had this thing about Spain and its culture. To a lot of older folk on the island of Puerto Rico, Spain is still regarded as the “mother country.” In fact, La Borinqueña,” the unofficial island anthem, has a phrase in it about the “Spanish motherland.” To us New York bred Puerto Ricans, or Nuyoricans, these sentiments are rather quaint. I have never been to Bilboa. Im sure I’d feel more at home in Lancaster, PA than in Bilboa any day. But I doubt I could find a genuine recipe for Bilbaina style fish in Lancaster, PA, or most parts of the U.S. for that matter.

Let me add that the recipe is from my first cookbook, Puerto Rican Cuisine in America (Perseus Books – Running Press). There are more like it in that tome. Enjoy.

PEZ A LA BILBAINA
 (Fish Bilbaina Style)

1 2-1/2 to 3 pound striped bass, cleaned and scale but with head and tail still attached (can substitute
   any other firm fleshed fish)
2 tablespoons olive oil
1 medium onion, peeled and thinly sliced
2 medium ripe tomatoes, thinly sliced
1 medium green bell pepper, cored, seeded and cut into 1/4-inch strips
1 8-ounce can tomato sauce
2 cloves garlic, peeled and finely minced
Salt and black ground pepper to taste

1. Preheat oven to 370 degrees F.
2. Wash fish, inside and out, and pat dry with paper towels.
3. With a sharp knife, make 3 to 4 vertical slits on both sides of fish.
4. Heat olive oil in a frying pan or skillet and lightly brown fish over moderate heat on both sides.
5. Remove fish to a baking dish large enough to hold it comfortably. Top fish with onions. Then layer with tomatoes, and finally with the green pepper strips.
6. Pour tomato sauce over the fish, and sprinkle with minced garlic. Season with salt and pepper.
7. Bake uncovered, for about 30 minutes or until fish flakes easily with a fork.
    Yield: 4 servings.

Caption: courtesy of ian brodie

Enhanced by Zemanta

Rice Cake, Glazed and Ornamented


Marie Antoine Careme is regarded as the leader of what is called la grande cuisine Francaise. That is, the classic French style of cooking heavy on sauces, heavy on creams, heavy on decoration, heavy on everything. Careme had an impressive resume. At various times he was chef de cuisine to Czar Alexander I and the Rothschilds. But his recipes are daunting. Most are difficult to emulate, even in a modern kitchen. Case in point are his famous chartreuse dishes such as Chartreuse printuniere (Sping Chartreuse), Chartreuse à la parisienne, en surprise, and Chartruese de perdreaux, which he called “the queen of all entrees.”  These were molded dishes using an assortment of vegetables, fowl, wild game, sausages, and a host of other stuff. His Paris Chartreuse even has truffles, pullets, fillets, forcemeat (meat mixture with fat), and lobster tail all baked in a cylindrical mold.

I took one look at these recipe and said, No way. It would take forever to do one of these things. But you have to give credit to the man. His list of classic French dishes is exhaustive. With such works as L’art de la cuisine au dix-neuvième siècle (The Art of the Kitchen at the XIX Century) and Le mâitre d’hôtel francais (The Mâitre d’ of the French Hotel) he not only discussed garnishes and accessories, but also took on such topics as the provisioning and organization of the kitchen. All that said, I did manage to find one recipe which I can identify with. And which under the circumstances, is not that difficult to make.  So, kiddies, here’s your chance to create something on the grande mode of classical cuisine. This will surely impress family and friends. You’ll become the Julia Child of your set. The recipe is Rice Cake Glazed and Ornamented. I give it exactly as noted by Monsieur Careme.

RICE CAKE, GLAZED AND ORNAMENTED

Put 8 ounces of rice, boiled as usual, with the addition of a clove of vanilla, in a semi-globular mold, buttered; then turn it on a dish, and when cold, mask it all over with transparent apricot-marmalade. Decorate the top and the sides, according to your fancy, with pistachios, angelica, currants, verjus grapes, and preserved cherries. Serve it up, either hot or cold.

   Yield: about 4 servings

Note: Verjus grapes are unripe, green grapes. You can substitute seedless green grapes if convenient.

Caption: courtesy of exclassics

Enhanced by Zemanta

Duxelles


So you’re asking, What the hell are duxelles? Simple: think of chopped mushrooms cooked in butter with shallots and wine. They’re cousins to stuffed mushrooms. Some describe them as a mushroom confit. Okay, what’s a confit?  Confit is a term for various foods that are coked in oil or sugar and preserved. Often they are sealed and stored for future use. The term originated in the Middle Ages when fruits were cooked and preserved in sugar. Duxelles can be cooked and stored in this way as well.

All this mishigas can be ascribed to one Pierre Francois de la Verenne. He is recognized as the first great French chef of the modern era. He was the first to codify the Franco-Italian cuisine that had evolved into la grande cuisine Francaise or classic French cooking. His cookbook, Le Cuisinier Francois, was published in 1650, and is regarded as a landmark in the history of European cuisine. He was the first to describe stuffed mushrooms and (you guessed it) duxelles. Don’t let the fancy French moniker scare you. Duxelles are very easy to make, and they are delicious when added to sauces and vegetable. They also make great fillings for omelets, fish or meat dishes.

DUXELLES

1 stick butter
2 pounds fresh mushrooms, washed, drained, and finely chopped (stems and caps included)
2 shallots, finely chopped
3 tablespoons dry sherry or Marsala wine
Salt and ground black pepper to taste

1. In a medium saucepan or skillet, melt the butter over low heat (being careful not to burn it). Add mushrooms and shallots, and cook over low heat, stirring constantly until the mushrooms give up most of their liquid. Add more butter as needed.
2. Add dry sherry and cook about 5 minutes longer until the mushrooms are black in color. You want the mushrooms to be somewhat dry but not bone dry. Season with salt and pepper. You can serve as is or store in a tight jar or container. They’ll be good for 1-2 weeks in the fridge.
    Yield: About 4 cups.

Note: Italians make duxelles as little differently. If you prefer the Italian style, add 1 teaspoon of lemon  juice to the shallots and mushrooms and cook 4-5 minutes over moderate heat. Add 3 ounces of diced boiled ham, cook 5 minutes more, add 1/4 cup dry Madeira wine or brandy. Stir to mix until heated through.

Caption: courtesy of 500 Tasty Sandwiches

Enhanced by Zemanta

Rice with Crabmeat

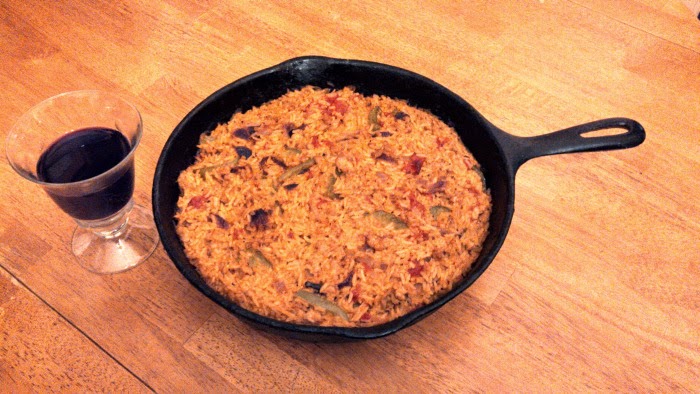
In our culture we love crabmeat, what we call “jueyes.” In our family, my father’s favorite rice mix was rice with crabmeat. Whether living in Spanish Harlem or Puerto Rico, my father would spend countless hours seeking a restaurant with the best recipe. However, none compared to my mother’s arros con jueyes.

Let me state that, if desired, you can prepare the crabmeat from scratch; and it’s best to use Caribbean crabs. Such a recipe is given in my cookbook Puerto Rican Cuisine in America p. 192-193 (Perseus Books – Running Press). But if you’re press for time and don’t want to bother with preparing the thing, you can use canned crabmeat. No one is going to fault you for it.

ARROZ CON JUEYES
 (Rice with Crabmeat)

2 cups rice
1 tablespoon olive oil
2 ounces lean cured ham or salt pork, rinsed and diced
1 small green bell pepper, cored, seeded and chopped
1/2 cup finely chopped onions
1 clove garlic, peeled and finely chopped
3 sweet chili peppers (aji dulce), seeded and chopped (found in any Asian or Caribbean market)
1/2 cup tomato sauce
6 pimento stuffed Spanish olives
1 1/2 cups crabmeat
1 packet sasón accent (Goya makes a good one with coriander and annatto)
Salt and ground black pepper to taste
Water to cover rice

1. Wash rice under cold running water, and drain.
2. Heat oil in a heavy kettle or Dutch oven and brown ham over moderate heat.
3. Add bell pepper, onions, garlic and sweet chili peppers. Sauté for about 3 minutes.
4. Add tomato sauce, olives, and mix well.
5. Stir in rice, crabmeat and sasón accent.
6. Add water to cover contents in kettle by 1/4 to 1/2 inch above level of rice. Adjust salt and pepper to taste.
7. Bring to a boil. Cover tightly and simmer on low heat until water is absorbed and rice is tender ((about 20 minutes).
8. Uncover and simmer 5 minutes more if drier rice is preferred.
     Yield: 6 servings.

Photo: courtesy of ifood.tv

Enhanced by Zemanta

Stuffed Eggs Seville Style

When I was growing up, one of the favorite dishes we had in the family was stuffed eggs (think of deviled eggs). But our method was called stuffed eggs “Seville style.” My Uncle Phillip, of late memory, swore that this was the way they prepared eggs in Seville. I have no historical proof of this. We just took him at his word. We know that Seville (Sevilla – “Seh-Vee-Yah” in Spanish) is a city in Southern Spain. It was under Muslim rule for over 400 years and it could have been the Muslims who introduced this type of dish to the region. Again, this is all conjecture on my part. If somebody out there has more accurate information, please let me know.

The dish itself is very easy to prepare. All you need is eggs, olives, onion, mayo and Worcestershire sauce. That’s it. It’s quick and convenient and will impress family and company. The recipe is from my first cookbook, Puerto Rican Cuisine in America  (Perseus Books – Running Press). Enjoy.
 HUEVOS RELLENOS A LA SEVILLA
       (Stuffed Eggs Seville Style) 

8 hard boiled eggs
1/2 cup chopped pimento stuffed olives
1/2 cup finely chopped onion
1/4 cup mayonnaise
1/2 teaspoon Dijon mustard
2 teaspoon Worcestershire sauce

1. Slice eggs in half lengthwise and remove yolks. Set the hollow whites aside.
2. In a bowl, combine yolks, olives, onions, mayonnaise, mustard and Worcestershire sauce. Mix well.
3. Stuff the hollow egg whites with the egg-yolk mixture.
4. Place in a serving dish the refrigerator and chill.
    Yield: 4 to 6 servings.

Photo: courtesy of Real Simple – Life Made Easier

Enhanced by Zemanta

Indian Pudding

 I didn’t know anything about Indian Pudding until I began research for my second cookbook The Pharaoh’s Feast (Published in the UK under the title Feasting with the Ancestors). This book traced cooking through the ages, from prehistory to the present. I discovered that in 1796, a Miss Amelia Simmons published the first genuine American cookbook, American Cookery. Prior to this time, the few American housewives who had access to cookbooks would have used European books published under an American Imprint. This book featured some unique American recipes. Among them, recipes for slapjacks, pumpkin pudding and spruce beer (alcoholic or non-alcoholic beverage flavored with the buds and needles of spruce trees).  For the first time such words as cookie and slaw appeared in print.

Amelia Simmons was a self-described “American orphan.” She worked as a domestic during the colonial period, and this gave her hands-on experience in preparing a good meal. She lays out simple guidelines that are as applicable today as they were in her time. For example, use only the freshest ingredients; and to determine freshness of fish, poultry or meat, go by their smell.

American cuisine owes a lot to Miss Simmons. One of the recipes in her book was a colonial favorite, Indian Pudding. Amelia Simmons gives three recipes for “A Nice Indian Pudding.” Two recipes call for baking the Indian pudding, and one advises to boil the ingredients for twelve hours in a “brass or bell metal vessel, stone or earthen pot.” I’ll stick to the baking. Today Indian Pudding is usually served with whipped cream or vanilla ice cream.

INDIAN PUDDING

4 cups milk
1/2 cup yellow cornmeal
1/3 cup dark molasses
1 teaspoon salt
3 tablespoons sugar
3 tablespoons butter
1 teaspoon ground cinnamon
1 egg, beaten
1/2 cup raisins

1. Preheat oven to 300 degrees F.
2. Ina double boiler or heavy saucepan, bring the milk to a rolling boil over high heat. Add the cornmeal, stirring constantly for about 3 minutes. Reduce the heat to low and cook, stirring often for another minute. The cornmeal should be softened but slightly sticky.
3. Add the molasses and mix well. Remove from heat and stir in the remaining ingredients.
4. Butter or grease an 8-to-9-inch baking dish. Pour the pudding mixture into the dish and bake for about 2 hours. The pudding should be brown on top with a dark crust in the center. The pudding can be served hot, warm, or at room temperature.
    Yield: 6 to 8 servings.

photo: courtesy of Yankee Magazine

Enhanced by Zemanta

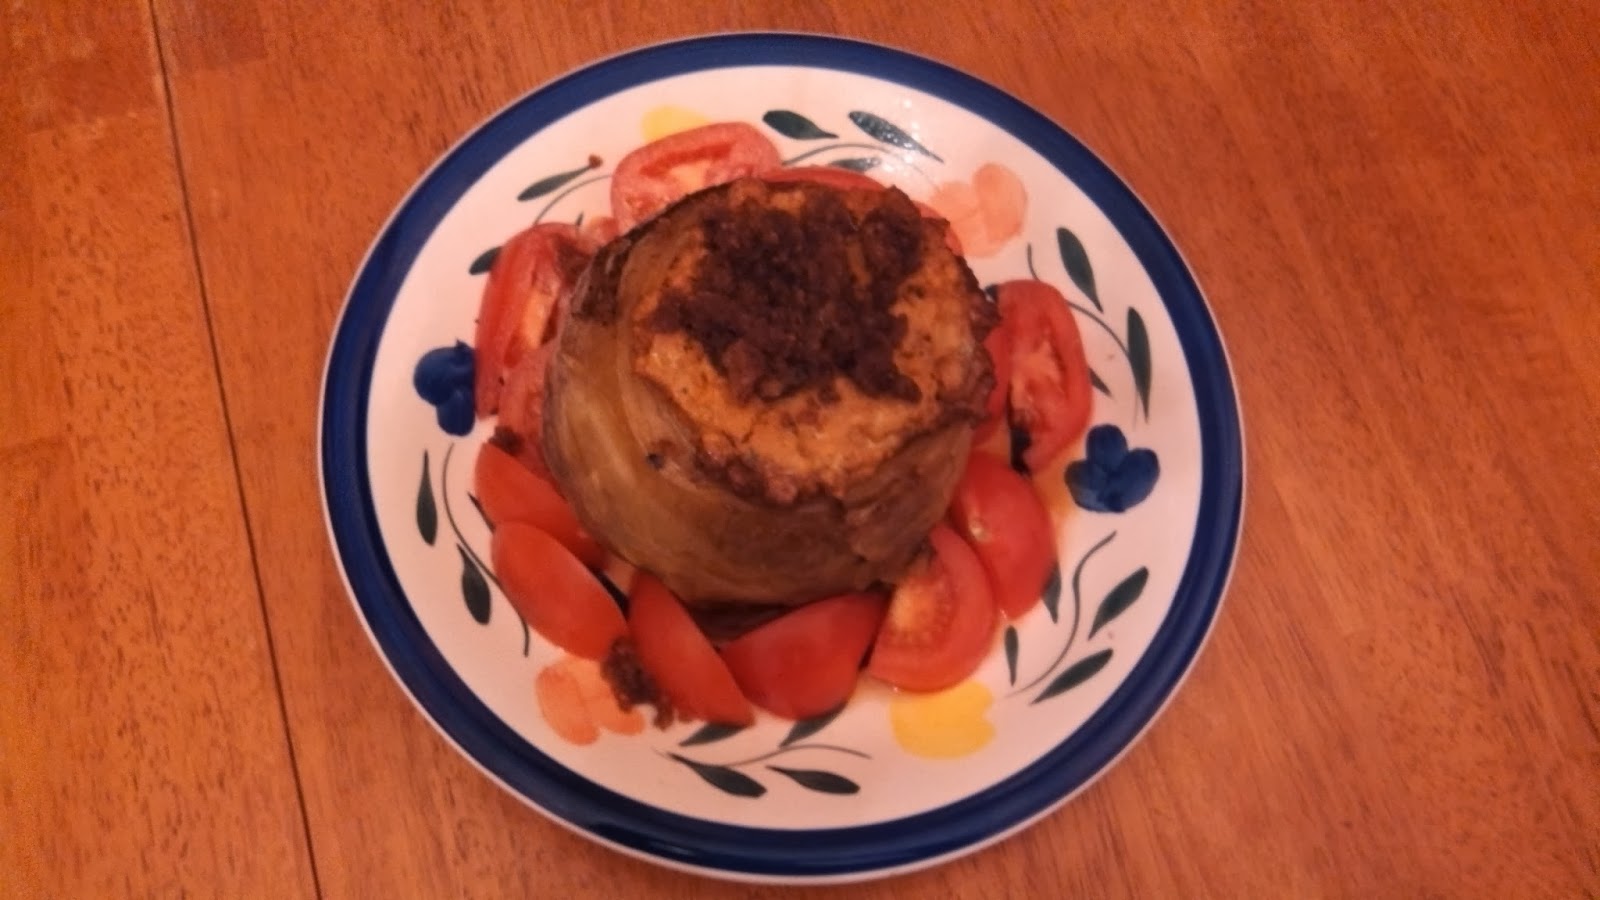
Pimientos Rellenos (Stuffed Peppers)

In the Jewish Calendar, this week commemorates the beginning of the holiday known as Sukkot. This is the harvest festival that follows the solemn holiday of Yom Kippur, or the Day of Atonement. Among the traditional foods served on this occasion are stuffed vegetables. It is noted that stuffed foods represent a bountiful harvest. Think of a cornucopia of veggies and fruit. Thus, in celebration, I’m putting out my pimientos rellenos recipe from my first cookbook, Puerto Rican Cuisine in America (Perseus Books Group—Running Press). So, my Jewish friends and colleagues, liven up the occasion with stuffed peppers Puerto Rican style. And for those of you who are not Jewish, it’s still a great dish to enjoy anytime.

Let me add that the recipe calls for shredded cheddar cheese on top. You can either omit or add it to the mix.

PIMIENTOS RELLENOS
     (Stuffed Peppers)

4 medium green or red bell peppers
6 whole black peppercorns
2 cloves garlic, peeled
1/4 teaspoon dried oregano
1/4 teaspoon salt
1 tablespoon olive oil
1/2 teaspoon white vinegar
1 pound lean ground beef
1 medium onion, peeled and chopped
1 cup dry bread crumbs
2 medium tomatoes, cored and diced
1 8-ounce can tomato sauce
1/2 cup shredded cheddar cheese (optional)

1. Preheat oven to 350 degrees F.
2. Slice the top off the peppers. Remove and discard the seeds and white veins.
3. Drop peppers into boiling water to cover and boil for 3 minutes. Remove, drain and set aside.
4. In a mortar, crush peppercorns, garlic, oregano and salt. Blend in olive oil and vinegar.
5. In a bowl, combine meat with seasoning.
6. Brown meat in a very hot skillet (no extra oil is necessary).
7. Add onion, bread crumbs, tomatoes and tomato sauce. Cook, stirring constantly, for 5 minutes.
8. Stuff the peppers with beef-tomato filling and place in a shallow baking dish. Top with shredded cheese, if desired, and bake 20-25 minutes.
    Yield: 4 servings.

photo: courtesy of Andicakes

Enhanced by Zemanta

Kreplach: Jewish Wontons


Kreplach (or kreplakh) are meat-filled dumplings often served in a clear soup. They are similar to tortellini or Chinese wontons. That’s why they are also referred to as “Jewish wontons.” They are a traditional pre-fast meal before Yom Kipper, or the Day of Atonement. They are also eaten on Simchat Torah and Purim. Not being very religious, I like to eat them all year round. According to the experts, kreplach may have evolved among Ashkenazi (Eastern European) Jews in Germany during the 14th century, who got the idea about stuffing dumplings from Jews in Venice, who got the idea from stuffed pasta.

Ground meat can used as the filling for kreplach; but in my circle most of my Jewish friends use ground chicken. I have no problems with whatever meat filling may be used. However, in my experience, the key to great tasting kreplach is an onion cooked with the meat, using not oil but schmaltz, rendered chicken fat.  I know, you’re rolling your eyes and saying “Chicken Fat!”  But, yep, there’s no way getting around it. You can buy schmaltz in any supermarket these days; or you can make your own. I know it’s time consuming, but I prefer to make my own. You can use the same chicken for the meat filling as well as making the schmaltz.

Kreplach, like all good things (think of Puerto Rican pasteles), takes time and patience. Yet the rewards are infinite when you eat the suckers. 

KREPLACH

Filling:

3 tablespoons schmaltz (see recipe)
1 medium onion, peeled and finely chopped
3/4 pound ground chicken, cooked
1 egg
Salt and black ground pepper to taste

Dough:

3 eggs
1/4 teaspoon salt
1/4 teaspoon pepper
2 tablespoons water
2 cups all-purpose flour

Schmaltz:

Take 1 chicken (4-5 pounds), and cut away fatty skin and other fat particles into small pieces. Place pieces in a pot, cover with cold water, bring to a boil. Lower heat to medium-low and cook until water evaporates. Add 1 medium diced onion, and cook on low heat until onions are brown. The fat, or schmaltz, is now done. Let cool and remove onion pieces. Store schmaltz in covered jars. The jars can be frozen or kept in the refrigerator.
       Note: You can cook the leftover chicken by boiling or broiling, and use it for the rest of the recipe.

1. In a medium fry-pan or skillet, heat the schmaltz and saute the onion with the ground chicken. Pour off excess fat and let cool slightly. Mix in the egg and salt and pepper. Set aside.

2. For the dough: In a large bowl, beat together the eggs, salt and pepper. Add  water and gradually beat in enough flour to form a stiff dough. Using your hands, knead well and quickly. Then divide dough into 2 balls; and cover each ball with a moist towel.
3. Using a rolling pin, roll out one ball of dough very thin, and cut into 6 strips, each about 1 1/2 inches wide. Now cut the pieces into 1 1/2 inches square.
4. Place about 1/2 teaspoon of meat mixture in center of each dough square. Dampen edges and fold over to form a triangle. Press the edges together firmly, using additional flour if necessary to make them stick. Repeat procedure with the second ball of dough.
5. Bring a large pot of salted water to a boil, drop kreplach into boiling water and simmer on low heat for about 15 minutes. Remove carefully with a slotted spoon. You can also drop kreplach into hot soup and cook them that way. Or you can brown them in the oven or a skillet, and serve as a side dish.
    Yield: About 50-60 kreplach depending on  size.

Photo: courtesy Joy of Kosher

Enhanced by Zemanta

How to Cook Beans


Beans, beans are good for the heart; the more you eat, the more you . . .” Well, we all know the rest to that ditty. Fact is, beans are good for the heart. The lowly bean (or legumes—the fancy word) is a good source of thiamine, niacin and other components of the vitamin B complex series. They are also great comfort food. Think of a hearty French cassoulet casserole; Mexican refried beans; Boston bake beans; the three bean salad for barbecues; and the Middle Eastern hummus. Life would be sad indeed without beans. But how to cook the suckers? Easy enough to open up a can of beans but, for real flavor and texture, nothing beats fresh beans or the more common dry beans you find in 1 pound packages at the store. Be aware that the dry beans you get at the supermarket could be older (and drier) than last year’s leftover meatloaf. Thus they need to be soaked beforehand in water. And the more soaking time, the more tender the final product. That’s why I recommend overnight soaking rather than the quick soaking method where you cover the beans in water, bring to a boil, then cook uncover over moderate heat for approximately 2 minutes; and afterward let them soak for an hour.

The overnight method involves placing beans in a colander, discarding any broken or shriveled ones, and rinsing in cold running water. Then you place the beans in a pot with water to cover at least 2 inches.  Never use warm or hot water. In extremely hot weather it’s a good idea to soak the beans in the fridge. Ideally, one should change the water several times to prevent the beans from fermenting. After overnight or quick-soaking, drain beans and place in a heavy kettle or Dutch over with 2 quarts (8 cups) water and bring to a boil. Cover and boil over moderate-low heat until beans are tender (about 1 hour). From hear on you can finish up with any of the three basic bean recipes given below. Let me add, the recipes are good for almost any kind of legumes: black beans, red kidney beans, pigeon peas, small red beans, Lima beans, pinto beans, black-eyed peas, pink beans, chick peas, etc.

 BASIC BEAN RECIPE

A. Sofrito Method:
This method uses sofrito, an aromatic mix of herbs and spices which is used a a base for cooking countless Caribbean dishes. You can buy prepared sofrito in most supermarkets or Asian and Caribbean markets. If you want to make it from scratch then you can check my blog post of  11/08/10 which gives an easy sofrito recipe. Or, better still (for me), get it from my cookbook, Puerto Rican Cuisine in America  (Perseus Books Group—Running Press)

1. To the soaked beans, add 1 large potato, peeled and cut into 1-inch cubes; 3 tablespoons sofrito; 1 beef bouillon cube; 1 teaspoon salt; 1/2 teaspoon dried oregano; and 1/4 cup tomato sauce. (My mother, of blessed memory, would add 2 tablespoons dry red wine at this point—a tip she got from a Cuban friend). Mix well.
2. Cover and cook over high heat until water is boiling. This should take 5 to 10 minutes.
3. Lower heat and simmer, covered, for 30 minutes or until beans are completely tender and sauce has thickened somewhat.

B. Skillet Method:
1. Place the beans in a pot and boil in 2 quarts water as outlined above; but add half a medium green bell pepper, seeded, to water.
2. In a skillet or frying pan, heat 2 tablespoons olive oil. Add 1 medium onion, peeled and chopped; 1 clove garlic, crushed; 1 teaspoon dried oregano; 1/2 cup tomato sauce; and 1 tablespoon tomato paste. Saute on moderate heat for 5 minutes.
3. Add skillet contents to beans plus 1 large potato, peeled an cubed, and 1/2 teaspoon salt. Mix well.
4. Cover and cook over high heat until water is boiling (5-10 minutes).
5. Lower heat and simmer, covered, for 30 minutes or until beans are completely tender sauce has thickened.

C. Oven Method:
This is an oven method that is very popular in Italy, particularly in Tuscany. The beans are soaked overnight in the same manner, then rinsed and place in a pot or casserole. The rest of the recipe is as follows:

1. Preheat oven to 275 degrees F.
2. Add 1 small onion, peeled and chopped, to beans and water to cover by 1/2 inch.
3. Cover and bring the water to a near boil over low heat.
4. Place the pot in oven and bake until beans are tender (45 minutes to 1 hour). Make sure the water does not evaporate during cooking to below the level of the beans.
5. Remove from oven and add salt and pepper to taste. Let stand for about 10 minutes.
6. Drizzle a tablespoon or two of olive oil over beans and serve.

Note: the above recipes yield from 6 to 8 servings.

photo: courtesy of NewlyWed Nutrition

Older posts Newer posts

© 2025 Oswald Rivera

Theme by Anders NorenUp ↑