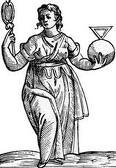
 One of the things that confirmed my atheism, and at a very early age I might add, was how the three major religions treat women. In general they treat them like shit. Except for some runaway Protestant denominations, women are still considered inferior and the vessels of sin. It’s an antiquated outlook that still permeates our religious establishments. The Catholic Church regards the ordination of women as anathema. They are there to submit and obey. In the Hasidim branch of Judaism, women are not even allowed to pray in the same room as men. They have to wear wigs; only husbands can see their true hair. In Muslin theocracies, such as Iran and Saudi Arabia, women can be stoned to death for such infractions as adultery while, in most cases, the men get off free.
This sad commentary comes to mind when one considers the tale of Hypatia of Alexandria. Her story exemplifies this nutty mind-set as much today as it did in antiquity when Hypatia was around. She was an extraordinary woman who live in Roman Egypt in the late 4th and early 5th centuries. Hypatia was a woman ahead of her time and, perhaps, the first feminist. She was a genius, plain and simple: mathematician, philosopher and astronomer. In the study of geometry she was instrumental in the theorem that divides cones into sections by a plane, thereby developing the concepts of hyperbolas, parabolas and ellipses. She wrote many books on mathematics, including a 13 volume of commentary on the Arithmetica of Diophanyus, the “father of algebra.” She also wrote a text, “The Astronomical cannon” which includes the charting of celestial bodies.
Her philosophy was that of pure reason, akin to Transcendentalism, where the ideal is obtained through individual intuition rather than established religious doctrine. She is credited with the invention of the hydrometer, a devise used to determine density and gravity in liquids; and also the astrolabe, used to locate the positions of the planets and stars, and determine latitudes on land.
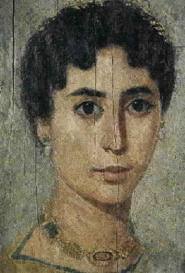
A Christian Church historian, Socrates Scholasticus, remarks that Hypatia “made such attainments in literature and science, as far as to surpass all the philosophers of the time.” She was a renowned teacher and scholar, and many flocked to her seminars. She is also described as being very “beautiful and shapely.” So much so that one of her students fell in love with her and could not control his public shows of affection. It’s said that Hypatia cured him of his puppy love by showing him rags that had been stained during her period, telling him, “This is what you love, young man, and isn’t it beautiful!’ The young suitor experienced a change of heart on the spot and went away (one would presume a wiser man).
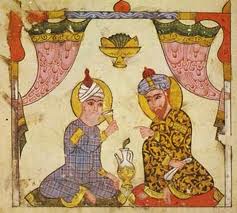
Her independence, her brilliance, and her open mind is what got her in trouble with (you guessed it) the Church. She had studied with her father, Theon, a famous Greek teacher of mathematics with the Museum of Alexandria. In time, she eclipsed her father in terms of knowledge and philosophy; which was okay by him, since he encouraged her talents. Not all men in Alexandria were that forward thinking. Especially the clergy. Christianity, at this time, was gaining a hold in the Roman Empire. It was a perceived alien religion about to gain dominance in the existing political order. Clashes between pagans and Christians were very common. Into this mix comes the villain of the piece, Cyril, who became Bishop of Alexandria in 412 C.E. He was determined to make Christianity dominant in Alexandria; and he sought to rid the city of pagans and Jews. He was power hungry, and was determined to eliminate any group that did not follow his beliefs. And his main target became Hypatia.
She represented everything abhorred by the Church. She spoke out against Cyril’s policy to exile the Jews of Alexandria. More galling, she dressed in the clothing of a scholar or teacher, rather than in woman’s clothing. But most troubling of all, she disputed the reigning Aristotelian premise that the sun revolved around the earth. This made the earth the center of the universe, and it was hallowed Church doctrine. Anyone who disputed it, did so at their own peril. What complicated the matter was that Hypatia had the mathematical proofs that affirmed her thesis. But to the Christians, astronomy and mathematics allied her with “black magic” and divination.
And, she refused to be baptized.
At that time, just as in the present day in Iran and other fundamentalist regimes, there were groups of men who roamed the streets. They were the “purity police,” and ensured that everyone, especially women, followed protocol. They were merciless fanatics, imbued with fierce and bigoted zeal. Sound familiar? It was a group of these terrorists, during the time of Lent, of course, who waylaid her chariot on her way home. They stripped her naked and scraped the flesh off her bones with sharp oyster shells and pot shards. Then they tore her body apart and scattered the pieces through the streets, before finally burning the body parts.
Though none of her writings survive, modern science regards Hypatia in high esteem. A main belt of asteroids has been named after her (238 Hypatia). There is also a lunar crater called Hypatia. The German mathematician and astronomer, Johannes Kepler, in the 16th century would affirm what is known as the Heliocentric Model of the world using concepts first espoused by Hypatia of Alexandria.
As for Cyril, the Bishop of Alexandria, the monster who incited the mob that killed Hypatia. He was later canonized as a saint by the Catholic Church. Some things never change.