Oswald Rivera

Author, Warrior, and Teacher

Category: poultry (page 1 of 7)

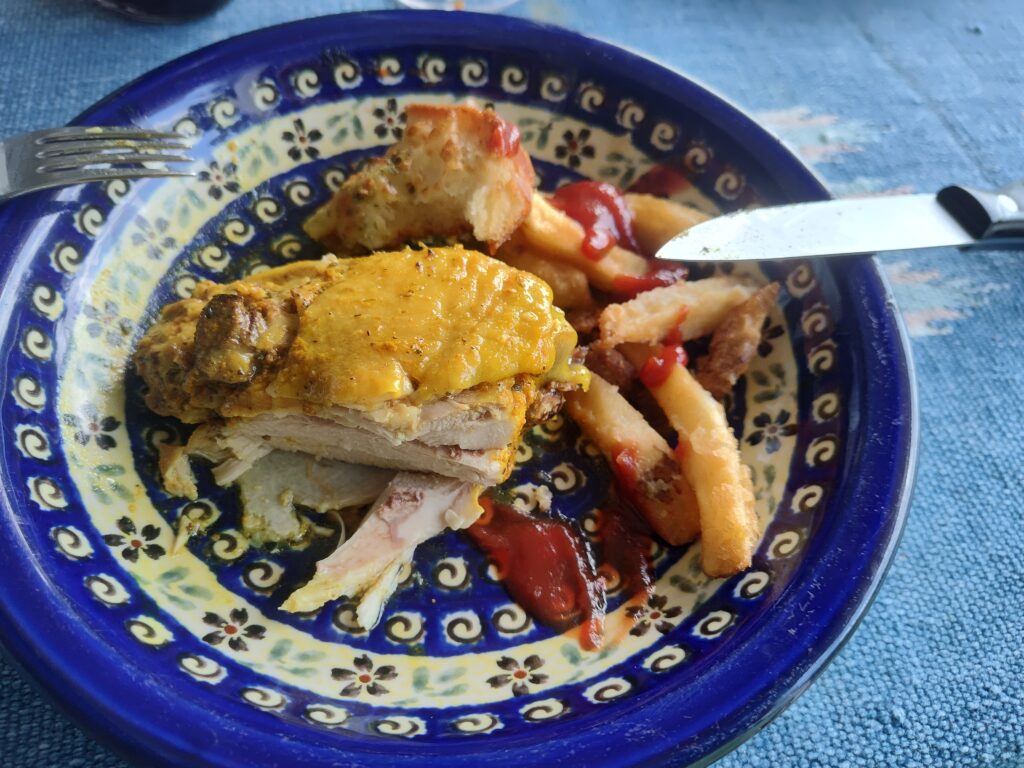
STEAMED TURMERIC CHICKEN


In 07/20/23 I posted a recipe, Chicken with Turmeric. The recipe itself involved seasoning a whole cut up chicken with red wine vinegar, salt, pepper, oregano and garlic powder. Then making a roux with butter, flour, and adding chicken broth to thicken it. Lastly, adding the  cut-up chicken pieces to the broth along with tomato paste and turmeric powder. Finally, you cover and cook the whole thing until the chicken is tender, It was a good enough recipe and quite tasty. But then I got the idea of simplifying the procedure. Instead of a whole chicken, why not take chicken thighs, season them and then steaming them. A much easier procedure and just as tasty. Also, note that you can substitute chicken breasts in place of chicken thighs, if desired.

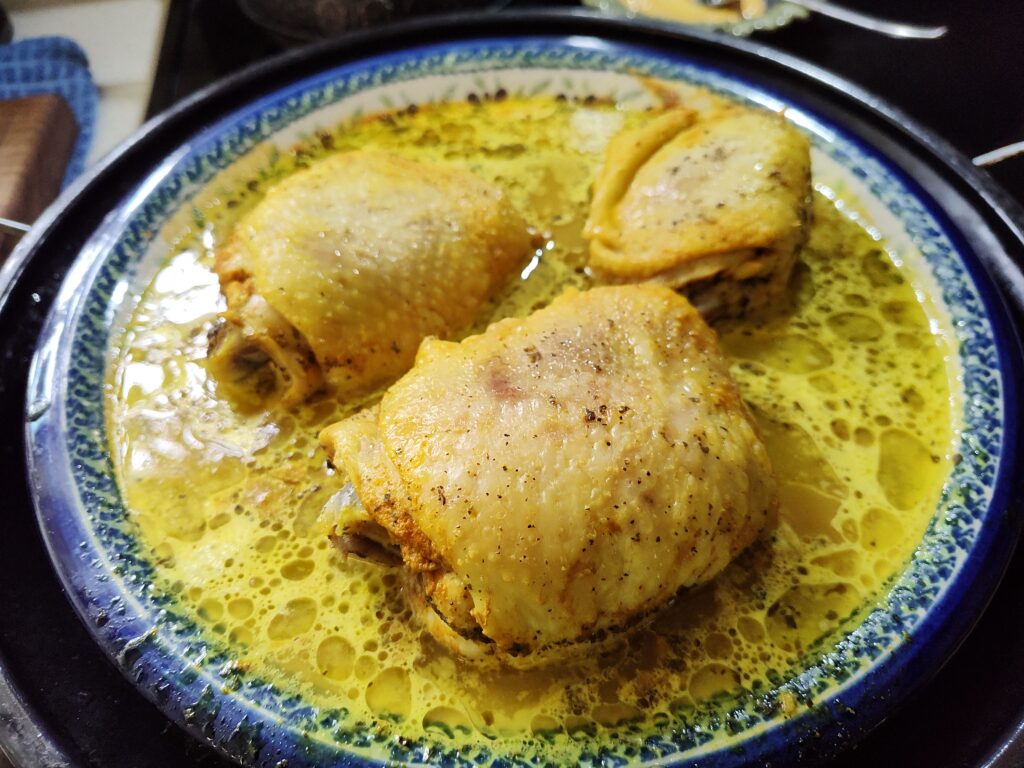
Yes, the recipe today is just a simpler version of Chicken with Turmeric. The difficulty may come with the steaming. If you have a wok with a steamed attachment, or a regular steamer, be it bamboo or metal, then it’s not a problem. If you don’t have a steamer, then you’ll need to improvise. And it’s not as difficult as you may think. Simply take a big pot, or one where a plate that can fit in, fill it up with about 2 inches of water, place a 15-ounce can inside; top it with a plate of chicken seasoned with turmeric, and steam for 15-20 minutes or until the chicken pieces are tender. That’s it, now you have Steamed Turmeric Chicken.  No need to make a roux or a separate sauce or whatever. And, like any good chicken dish, you can serve it with pasta, rice or potatoes. We served it with French fried and garlic bread.
It was delicious.
STEAMED TURMERIC CHICKEN

Ingredients:

4 chicken thighs (or breasts)
1 tablespoon garlic powder
Salt and ground black pepper to taste
¾ teaspoon dried basil
¼ cup chicken broth
1 tablespoon ground turmeric
2 tablespoons heavy cream
Butter

Instructions:

1, Place chicken thighs in a plate. Season with garlic, salt, pepper and basil.
2. In a cup or small bowl, mix chicken broth with turmeric, and pour over chicken.
3. Drizzle with cream
4. Pat each chicken thigh with a tablespoon of butter
5. Put plate on a steamer, cover and steam 15-20 minutes or until thighs are soft and tender.
Yield: 4 servings.


CHICKEN MAYONNAISE

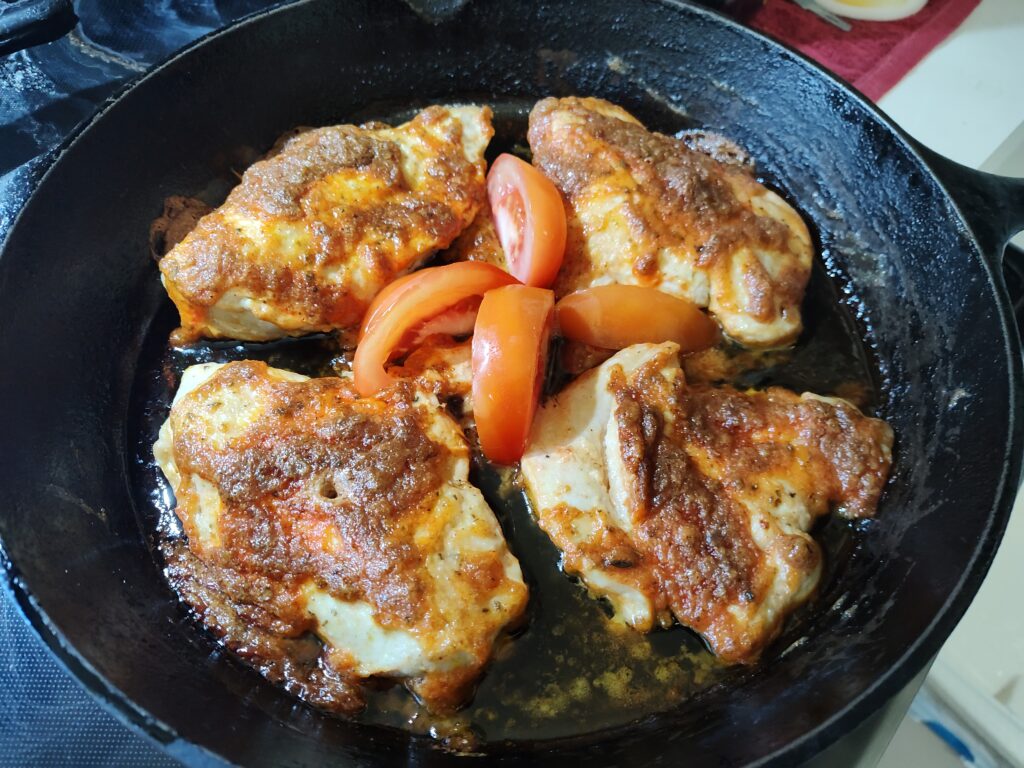
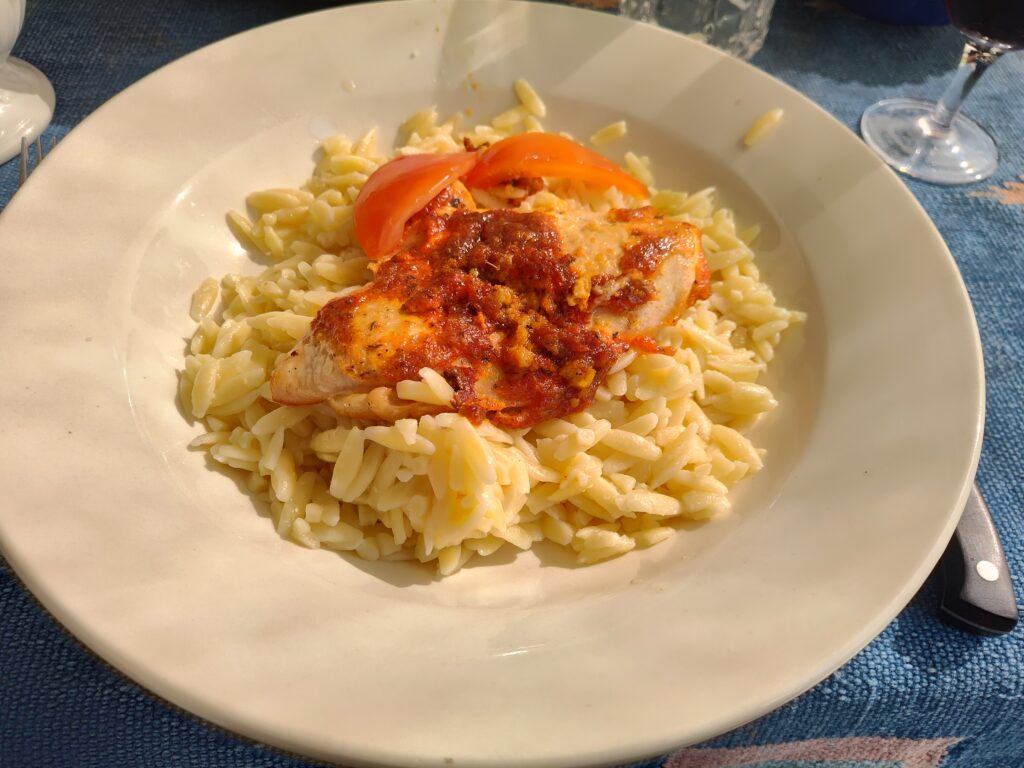
One of the most famous restaurants in American history is Delmonico’s, which gained its fame during the so-called Gilded Age (from about the late 1870s to the late 1890s). At that time, Delmonico’s was and is a place where the rich and the famous came to dine and be seen. By the way, it is still around at its historic location at 56 Beaver Street (at the corner of Beaver and William streets).  During the 1880’s its head chef was Charles Ranhofer, who created several famous dishes. Among these are Lobster Newberg, Eggs benedict and the Delmonico Steak (a thick cut of ribeye). Yet one of the unique dishes in the April 1899 Delmoinico’s menu held by the New York Public Library is ‘Chicken Mayonnaise.’ When you come to think of it, it’s a great combo: chicken breasts lathered with mayo then baked. Nothing could be simpler or more satisfying. A rich, delicious entrée.

The recipe itself is simple enough, but I tweaked it since my purview is Puerto Rican cuisine. I omitted the cheese (either Parmesan or cheddar) that is usually listed in the recipe and instead added sazón (or sasón), an ingredient popular in Puerto Rican and Latino cuisine. Goya products make a pretty good version as does Sa-són Ac’cent and Bodega Badia. It usually comes in 0.17-ounce packets If you don’t have or cannot find sazôn, you can substitute a ¼ teaspoon of turmeric. Also, in some recipes the chicken is pounded with a mallet between two sheets of plastic wrap to flatten them. I do not flatten the chicken breasts. Instead, I slice them in half lengthwise and then bake. Which means you have four servings using two breasts. Or eight servings using four chicken breasts. Your choice, depending on how many people you’re feeding at a given time.

Let me add, for the record, that I came across this historical tidbit from the Winter edition of Repast Magazine, a quarterly publication of the Culinary Historians of Ann Arbor (https//culinaryhistoriansannarbor.org). They are a wonderful organization that record almost anything and everything that has to do with fine food.

So, enjoy this recipe. I served it with orzo, a small pasta that resembles a large shape of rice. If you prefer rice, then go with that. Or you can substitute any favorite grain such as quinoa, millet or couscous. Have fun.

MAYONNAISE CHICKEN (Nuyorican version)

Ingredients:

4 (4-oz) boneless, skinless chicken breasts
1 teaspoon garlic powder
1 teaspoon Italian seasoning
¼ teaspoon black pepper or to taste
1 packet  sazôn seasoning

Instructions:

  1. Preheat oven to 425 degrees F.
  2. Rinse chicken breasts under cold running water and pat dry with paper towels. Place them in a lightly greased baking dish (we prefer cast-iron)
  3. In a small bowl, combine the mayonnaise, garlic powder, Italian seasoning, black pepper and sazón.
  4.  Spread the mayonnaise mixture evenly over the top of each chicken breast.
  5. Bake for 20-30 minutes, or until an instant-read thermometer inserted in the center of a breast reads 165 degrees F.
    Yield: 6-8 servings (see above).

BROWN DERBY PAPRIKA CHICKEN

As noted in the title caption, this recipe hails from the famous restaurant in Los Angeles, The Brown Derby, which closed gradually in the 1980s, with the famous Vine Street location shutting down in April 1985 due to lease issues. Other locations like the Wilshire Blvd one closed earlier (around 1980) or later, with the last original ones gone by the mid-80s. In its time, The Brown Derby was host to the rich and the famous inclusive of movie stars, celebrities and other prominent customers. It’s brown derby hat atop the restaurant made it an iconic spot to dine and be seen.

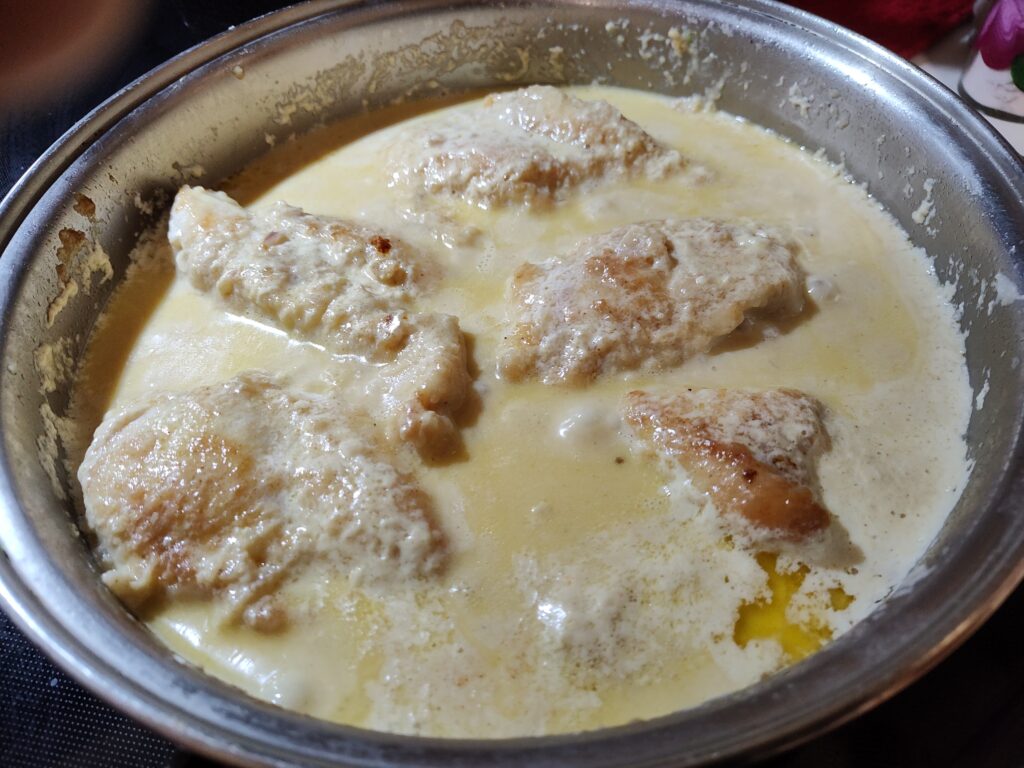
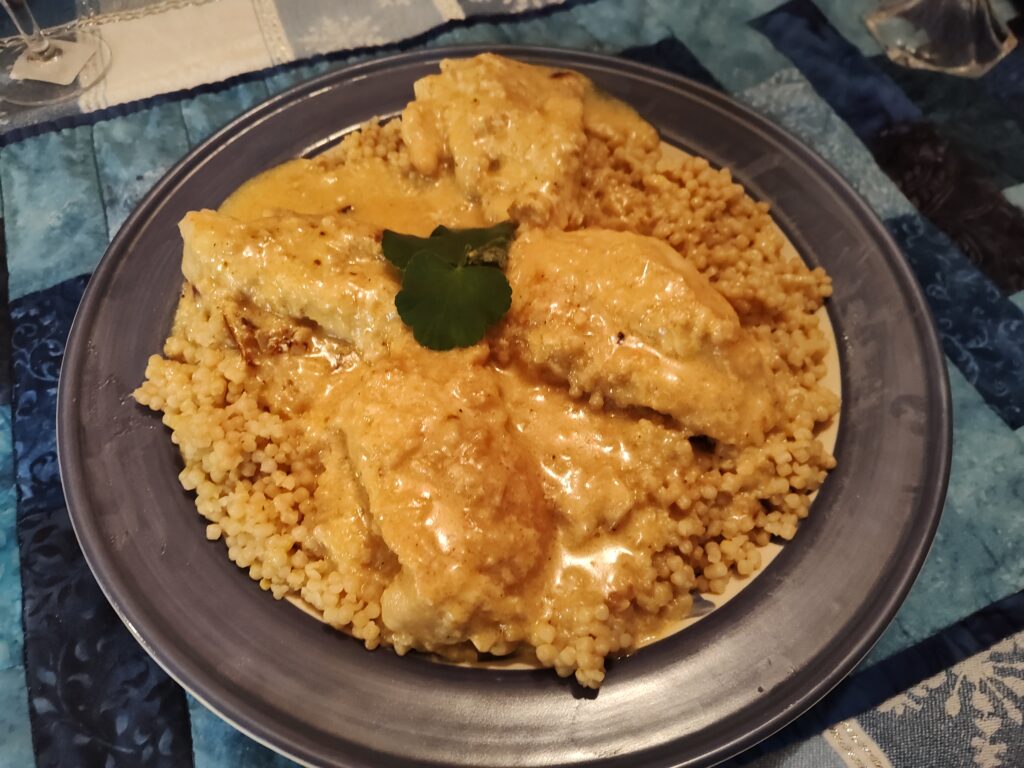
Paprika Chicken, as prepared in this recipe is similar to the famous Hungarian d8sh, Chicken Paprikash, only difference being that the Brown Derby recipe does not contain tomatoes, garlic, bell peppers and sour cream, which made Chicken Paprikash famous. Also, in the original Paprika Chicken, a whole broiler chicken is used. Chicken Paprikash normally uses chicken parts. In the recipe given, chicken breasts are what’s used. So, my friends, enjoy a piece of Hollywood lore, as well as a great dish, tasty, rich and delicious.

For full disclosure, this recipe comes from the Summer 2025 issue of Repast magazine, a quarterly publication of the Culinary Historians of Ann Arbor, Michigan. For more great recipes you can visit their website: https//culinaryhistoriansannarbor.org

BROWN DERBY PAPRIKA CHICKEN

Serves 4

4 medium chicken breasts
¼ cup all-purpose flour
Salt
ground pepper
3 Tbsp unsalted butter
1 Tbsp onion, finely chopped
1 tsp sweet paprika
1 cup heavy cream
1 cup chicken stock
¼ tsp celery salt

1, Dredge chicken in flour, salt and pepper on both sides in a shallow dish.

2, Heat butter in a heavy skillet and sauté chicken until golden brown on both sides. Add onion and sauté another 2 minutes. A dd
paprika and blend well. Add cream. stock, and celery salt. Cover and allow to simmer for about 18 minutes on low heat.

Note: The sauce should be reduced to a thick sauce. If necessary, you can add additional stock to thin it down.

Serving suggestions: On a bed of rice or thick pasta noodles.


LENTEJAS CON SALCHICHA

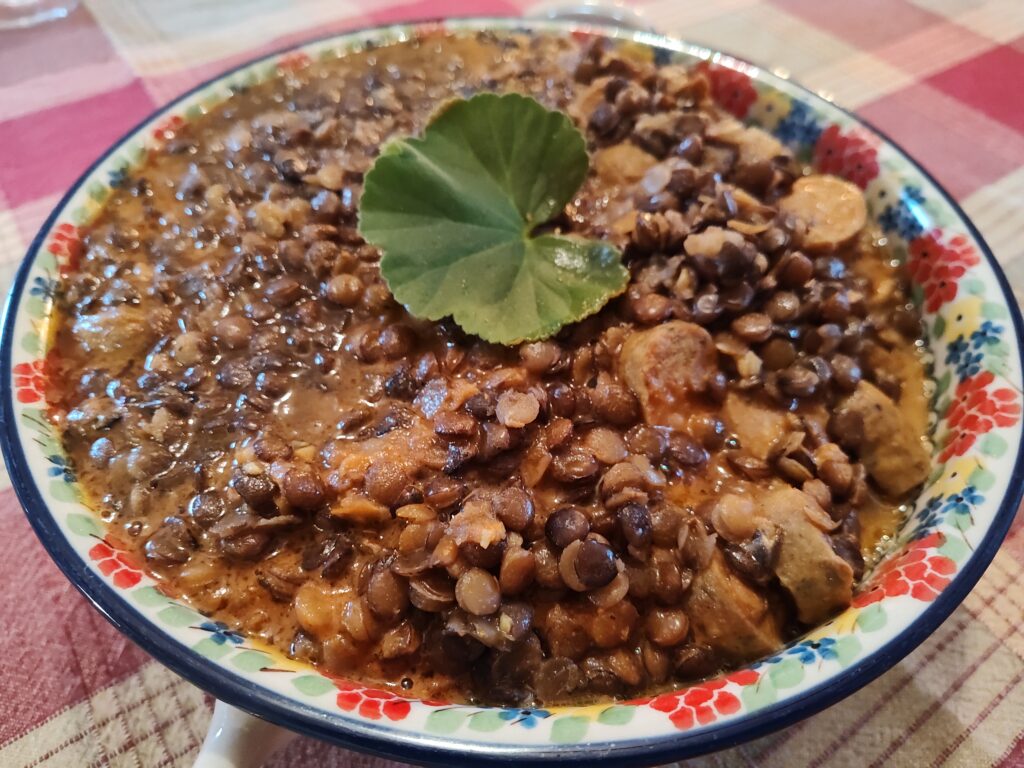
This recipe combines two Nuyorican favorites: lentils and sausage. Now, the lentils can be brown, green or red lentils. In terms of the sausage, it can be beef, turkey, smoked or Italian sausage. Even the Vienna sausage out of the can cane be used. We don’t stand on formality here. Some folks prefer Spanish chorizo sausage common to our cuisine. And normally that would be our preference. Except that we had a package of chicken sausage links on hand, and we went with that. Also, for this recipe we used brown lentils which, depending on how old they are, will take 30 to 40 minutes to cook. Red lentils cook fast, maybe simmering 10 minutes or so in water. Green lentils take about 15-20 to cook at a slow simmer. Just use the taste test. That is, they should be tender with a slight crunchiness but not mushy.

When cooking with sausage note that some variety of sausage comes with a casing that has to be removed before cooking. To do this, make a cut along the sausage with a knife, peel off the casing and then slice the meat.

Normally with this dish, we would serve it with boiled rice.  This time around we paired it with wild rice which is not a true rice. It is a native North American grain. You can also pair it with couscous, quinoa or a small pasta such as orzo or radiatori. Even on its own, Lentejas con Salchicha makes for a great dinner.

LENTEJAS CON SALCHICHA
(Lentils with Sausage)

Ingredients:

1½ cups dried brown lentils (can use green or red lentils, see above)
4 cups water or broth
1 bay leaf
1 (12 -16 ounce) package sausage, cut diagonally into ¼-inch slices
3 tablespoons olive oil
1 small onion, peeled and chopped
2 cloves garlic, peeled and minced
1 (8-oz) can tomato sauce
Salt and ground black pepper to taste
¾ teaspoon dried oregano

Instructions:

  1. Rince lentils in a fine-mesh strainer under cold, running water.
  2. Place lentils to a medium-sized saucepan. Add water or broth plus bay leaf. Bring the liquid to a rolling boil over high heat. Immediately reduce the heat to a very gentle simmer and cover. Cook until tender (30-40 minutes). If using red or green lentils, see above.
  3.  While lentils are cooking, heat olive oil over medium-high heat in a fry pan or skillet. Add onion and garlic and sauté until onion is soft and translucent.
  4. Add sausage and cook over medium heat until browned on all sides.
  5.  Add tomato sauce, stir to combine, cover and simmer on low heat for 10 minutes.
  6. Drain any excess liquid from the lentils. Stir in the sausage with the tomato sauce. Serve over rice, pasta or favorite grain.
    Yield: 4-6 servings.


PECHUGAS DE POLLO CON VINO (Chicken Breasts with Wine)

This is one of those favorites from back on the block. During my youth in Spanish Harlem (today, East Harlem), times were hard. So, we had to be innovative with dinners. Chicken Breasts, like rice, was a common staple—because it was cheap. And it supplied magic when it was prepared, as we’re doing today, by adding a bit of white wine. Pechugas de Pollo con Vino or, Chicken Breasts with White Wine, is a sumptuous dish. In terms of the wine used, I recommend a white wine like Pinot Grigio, Sauvignon Blank, Chardonnay, Chablis or Riesling. If you want to give it a distinct nutty taste and aroma, you can substitute a dry sherry for the white wine. The rest is as easy as pie. Just seasoned the breasts with typical Nuyorican herbs, fry the suckers and serve, Naturally, we serve it with rice, but any favorite grain or even, pasta, will do. Friends and family will yell for more. This is your show. So go at it.

Let me add that, when cooking chicken breasts, there is a minor difference between cooking bone-in chicken breasts and boneless, skinless chicken breasts. In our family, we were contrarians. We prefer bone-in chicken breasts. Again, it was partly a matter of price. Simply, they were cheaper. Also, since they had skin on, they were juicer and, to us, that meant a better taste. Be aware that boneless take less time to cook than bone-in. With boneless it’s about 2-3 minutes to fry per side. With bone-in it’s about 3-4 minutes per side. When you add the wine, the breasts are steamed until done. The finish product will still be delicious.

Pechugas de Pollo con Vino
(Chicken Breasts with Wine)

Ingredients

4 chicken breasts, bone-in or boneless (see above)
Salt and ground black pepper to taste
¼ teaspoon dried oregano
3 tablespoons olive oil
1 small to medium red onion, peeled and chopped
2 cloves garlic, peeled and minced
¼ teaspoon cumin
½ cup white wine
1/3 cup chicken broth or bouillon

Instructions:

  1. Wash chicken breasts under cold running water and pat dry with paper towels.
  2. Place chicken breasts on a large plate. Prick them all over with a fork, about 1/8 inch deep. Flip the breasts and repeat pricking the other side.
  3. Heat olive oil in a large frypan or skillet over medium-high heat.
  4.  Add onion and garlic and cook until onion is soft and translucent.
  5.  Add chicken breasts and cook until browned.  Again, 2-3 minutes for boneless and 3-4 minutes for bone-in.
  6.  Add cumin, wine and water. Stir to combine. Reduce heat to medium-low, cover and cook for 25 minutes. Remove lid and continue cooking until chicken is deep golden brown and juices run clear, About 4-5 minutes more.
    Yield: 4 servings.


This is for bone-in: fry chicken until browned, 2 to 3 minutes per side. Reduce the heat to medium-low, cover, and cook for 25 minutes. Remove the lid and increase the heat to medium-high; continue cooking until chicken is deep golden brown and the juices run clear, about 5 more minutes.

PATAS DE POLLO EN SALSA DE HONGO (Chicken Legs in Mushroom Sauce)

Chicken is beloved in our family and, when combined with mushrooms, it’s a meal fit for royalty. It was so when we lived in Harlem, and it so today. Patas de Pollo en Salsa de Hongo, or Chicken Legs in a Mushroom Sauce epitomizes this ethos. Among other things, with chicken it gives added protein, and, with mushrooms, it enhances the immune system. Also, it’s meal that’s rich and comforting. You can’t go wrong with this one. It pairs well with rice or a good loaf of bread or, as we did it, with spaghetti. However you serve it, this is a dish that’s versatile and delicious. What more could you want?

PATAS DE POLLO EN SALSA DE HONGO
(Chicken Legs in Mushroom Sauce)

Ingredients:

4 chicken legs, about 3 pounds
Salt and black ground pepper to taste
1 tablespoon dried oregano
4 tablespoons olive oil
1 medium onion, peeled and slice thinly
2 cloves garlic, peeled and minced
1 red pepper (pimento), washed and sliced thinly
1-pound mushrooms, washed and sliced thinly
½ cup   chicken broth
1 teaspoon cornstarch
1 tablespoon heavy cream

instructions:

1. Rinse chicken legs under cold running pat dry with paper towels.
2. Rub legs with salt pepper and oregano
3. Heat olive oil in large skillet or frypan over medium heat.
4.  Add chicken legs and cook skin side down until well browned, about 6 minutes. Turn chicken and cook on opposite sides until browned, about 5 minutes longer.
5. Add onion and garlic and cook until onion is soft and translucent.
6. Add red pepper and cook for about 2 minutes. Add mushrooms and stir-fry until they’re browned.
7. Mix chicken broth and cornstarch and add to skillet. Cook, stirring, until thickened. Note that, during this
this time, the mushroom will also release their moisture. That’s why we’re using only ½ cup liquid. If sauce  has not thickened enough, you can add more cornstarch mixed with more water, if desired.
8.  Add cream, lower heat and cook until chicken legs are tender and soft, about 10-15 minutes more.
Yield: 4 servings.


.

BASIL HONEY ROASTED CHICKEN (OR TURKEY))


This is one of those recipes where you can use either chicken or turkey breasts. So, whatever is convenient or available, go for it. The two main ingredients to this dish are basil and honey. Combined, they give a flavor texture that is a delight. Basil is a member of the mint family; and when paired with honey it makes a combination that is truly wonderful. And nothing could be simpler and easier to make, and delicious.

In Nuyorican cuisine we pair this dish with rice and, sometimes, pasta. This time around we did it with couscous, and it was great. That’s the beauty of this recipe: you can pair it with your favorite grain, or even mashed or boiled potatoes. The possibilities are endless, and you’re the boss.

BASIL HOENY ROASTED CHICKEN OR TURKEY

Ingredients:

4 chicken or turkey breasts
1 tablespoons olive oil
Salt and ground black pepper to taste
½ cup honey
2 tablespoons red wine vinegar
3 tablespoons soy sauce
¼ cup orange juice
2 tablespoons fresh basil or 1 teaspoon dried

Instructions:

  1. Preheat oven to 350 degrees F.
  2.  Lightly oil, salt and pepper chicken or turkey,
  3.  Place breasts on roasting pan or cookie sheet and bake for 15 minutes. Let me state that we prefer roasting in a cast iron, but any good roasting pan will do.
  4.  While the chicken or turkey is roasting, add all the other ingredients except basil in a small saucepan. Bring to a simmer for 3 minutes.  Allow it to cool for a minute and add the basil.
  5. When the chicken or turkey comes out of the oven, brush with the honey glaze.
  6.  Turn oven down to 250 degrees and bake for 7 minutes or until meat reaches 160 degrees (using an oven meat thermometer). Allow breasts to rest for a few minutes before serving.
    Yield: 4-6 servings.

PECHUGA DE PATO (Duck Breasts)

Duck is a special  meal to us, particularly duck breasts. Back on the block it wasn’t something we had often. It was usually reserved for when we wanted something ‘grand.’  In our family, when we cooked duck breasts, we liked it cooked medium or medium-well. Then I discovered that most people, especially gourmet types, like it medium-rare. I could never understand that. To me, medium-rare duck breasts meant they were still soaking in blood on the plate. To us that was a turn-off. We usually cooked duck breasts to about 140 degrees F. And it worked for us. If you like it rare or medium-rare then cook it to that temperature, normally 135 degrees F.  We’re all in agreement that if your duck breasts hits a temperature above 145 degrees or 150°, the meat will be too dry and resemble shoe leather. Although, believe it or not, I’ve come across individuals who like it well done. To each his own.

This time we serve the duck atop parsley rice, and it was perfect. Some like it with roasted potatoes. Whatever accompaniment you use, it will definitely satisfy.

PECHUGA DE PATO
(Duck Breasts)

Ingredients:

4 duck breasts (4 to 6 ounces each)
Salt and pepper to taste
3 tablespoons dry white wine

Instructions:

  1. About an hour before cooking, remove the duck breasts from the refrigerator and their packaging. Rinse under cold running water and pat dry with paper towels. Using a sharp knife, make 3 to 4 parallel shallow cuts into the skin, but not through it, in one direction. Then make 3 to 4 shallow cuts in the opposite direction, making a cross hatch or diamond pattern.
  2. Sprinkle salt over the duck breasts and then massage it onto the skin and into all the cuts . Flip it over and season the meat side with both salt and pepper.
  3. Place  duck breasts skin side down  in a cold cast-iron pan.  Starting in a cold pan helps the fat render out without burning the skin. Note: Do not  use non-stick pans, as they don’t like the high temperatures you want to sear meat with. Cast iron or steel, in this case, is the best.,
  4. Get the pan on the stove on medium heat. We won’t need to add any oil because the duck will cook in its own fat. Cook on the first side for 6 to 8 minutes. After 6 to 8 minutes, the pan will have filled with an amount of fat from the skin. The skin should be a  dark golden-brown.
  5. Flip the breasts and cook for 3 to 4 minutes more. Cook until the breasts are plump and register 135°F (for medium-rare) or 140° (for medium) in the thickest part of the breasts. Also, at this point I like to add 3 tablespoons dry white wine and cook it for a minute more. I find that this really enhances the flavor of the duck breasts. If you prefer medium-rare, you can skip this part.
  6. Remove the duck breasts to a clean plate or cutting board and let rest skin side up for about 5 minutes. A duck breast is just like a steak,  resting allows the juices to redistribute and the meat to reach the correct temperature.
  7. Slice the duck breasts on the diagonal and serve with any accumulated juices on the resting plate. You will also note  that there will be some duck fat left on the pan. Some aficionados consider this “liquid gold” that can be used in other dishes where a rich sauce is indicated. For example, cooking vegetables such as potatoes in the duck fat will render a delicious and savory dish. You can also add it to  a grain, like rice or couscous, to give it that extra “oomph.”
    Yield: 4 servings.


MEDITERRANEAN CHICKEN BREASTS

This recipe is simply chicken breasts cooked with three  ingredients popular in Mediterranean and Middle Eastern Cuisine: cumin, coriander and turmeric. For lack of a better name, I call it Mediterranean Chicken Breasts. I guess you could also named it Middle Estern Chicken Breasts. Your choice. It’s all the same, chicken seasoned with the three ingredients.  It’s my own idea, although I recon somebody else out there may have thought of it before I did. If so, more power to them.

The dish is easy enough: seasoned chicken breasts with the cumin, coriander and turmeric and cook in olive oil and butter. Finally, add a little wine to it. I prefer red wine, but I figure white wine will be just as good. It’s a matter of what flavor you like. I served this dish with rice, but any  grain will do, or even your favorite type of pasta, be it stringed or tubular.

So, impress family and friends with this one. It will be a festive meal, and a festive table.

MEDITERRANEAN CHICKEN BREASTS

Ingredients:

4 chicken breasts, about 8-10 oz. each
½ teaspoon ground cumin
½ teaspoon ground coriander
½ teaspoon ground turmeric
3 tablespoons olive oil
2 tablespoons butter
2 tablespoons red wine (can use white wine, if preferred)

Instructions:

  1. Rinse breasts under cold running water and pat dry with paper towels.
  2. Season with  cumin, coriander and turmeric, rubbing ingredients well into the skin.
  3. In a large skillet or sauté pan, heat olive oil and butter over medium heat. Add chicken breasts and cook 5 to 8 minutes per side until brown and cooked through
  4.  Add wine and cook over medium-high heat 2 minutes more.
  5.  Transfer to a serving platter and serve with pan juices.
    Yield: 4 servings.


MEATBALLS IN GRAVY

Most Americans are familiar with meatballs but mainly as a pasta dish, as in spaghetti with meatballs. Yet have you ever considered meatballs without the  tomato sauce? And this is where today’s recipe comes in. It’s Meatballs  with Gravy. Simple, enjoyable, and quite delicious. You can serve this dish with buttered egg noodles, or give it an Asian slant and serve it over chow mein noodles. In our crowd, we prefer it with yellow Spanish rice. Either way you’ll have  a great lunch or dinner.

When preparing this entrée, forming the meatballs is what requires thought. In our family we love  BIG meatballs. By that, I mean the size of Spaulding hand balls. Some people like them even bigger. The size of the suckers depends on how large you want them. The recipe given below will  render 48 balls about 1-inch diameter. It will give you 17 balls if you prefer them larger, say 2-inch in diameter. You’re the boss. You you can make them as big as you like. It’s your show.

MEATBALLS IN GRAVY

Ingredients:

1½ pounds ground beef, chicken or turkey
1 medium onion, peeled and finely chopped
2 cloves garlic, peeled and minced
¾ cup bread crumbs
1 egg, slightly beaten
¾ teaspoon caraway seed
Salt and ground black pepper to taste
½ cup butter
¼ cup flour
3 bouillon cubes (chicken or beef)
2 cups water

Instructions:

1. In a bowl, combine meat, onion, garlic. bread crumbs, egg, caraway seed, salt and pepper. Mix well, and shape into meatballs whatever size you want (see reference above). I’ve discovered that the best way to form the meatballs is by shaping with wet hands. So, keep hands wet by dipping in water or rinsing under the faucet while making the meat balls.
2. Melt butter in a large skillet. Add meat balls and brown slowly over medium-low heat turning or shaking frequently to brown balls. Depending on size of meat balls, you may have to do this in batches. Once done, remove balls from skillet. Do not clean skillet, leave remaining butter in.
3. Stir flour into skillet. Add bouillon cubes and water.  Cook over medium-low heat until thickened and smooth. Add meatballs, cover, reduce heat and simmer for 5-8 minutes until meat balls are hot. Serve immediately with rice or pasta.
Yield: 6-8 servings.


Older posts

© 2026 Oswald Rivera

Theme by Anders NorenUp ↑