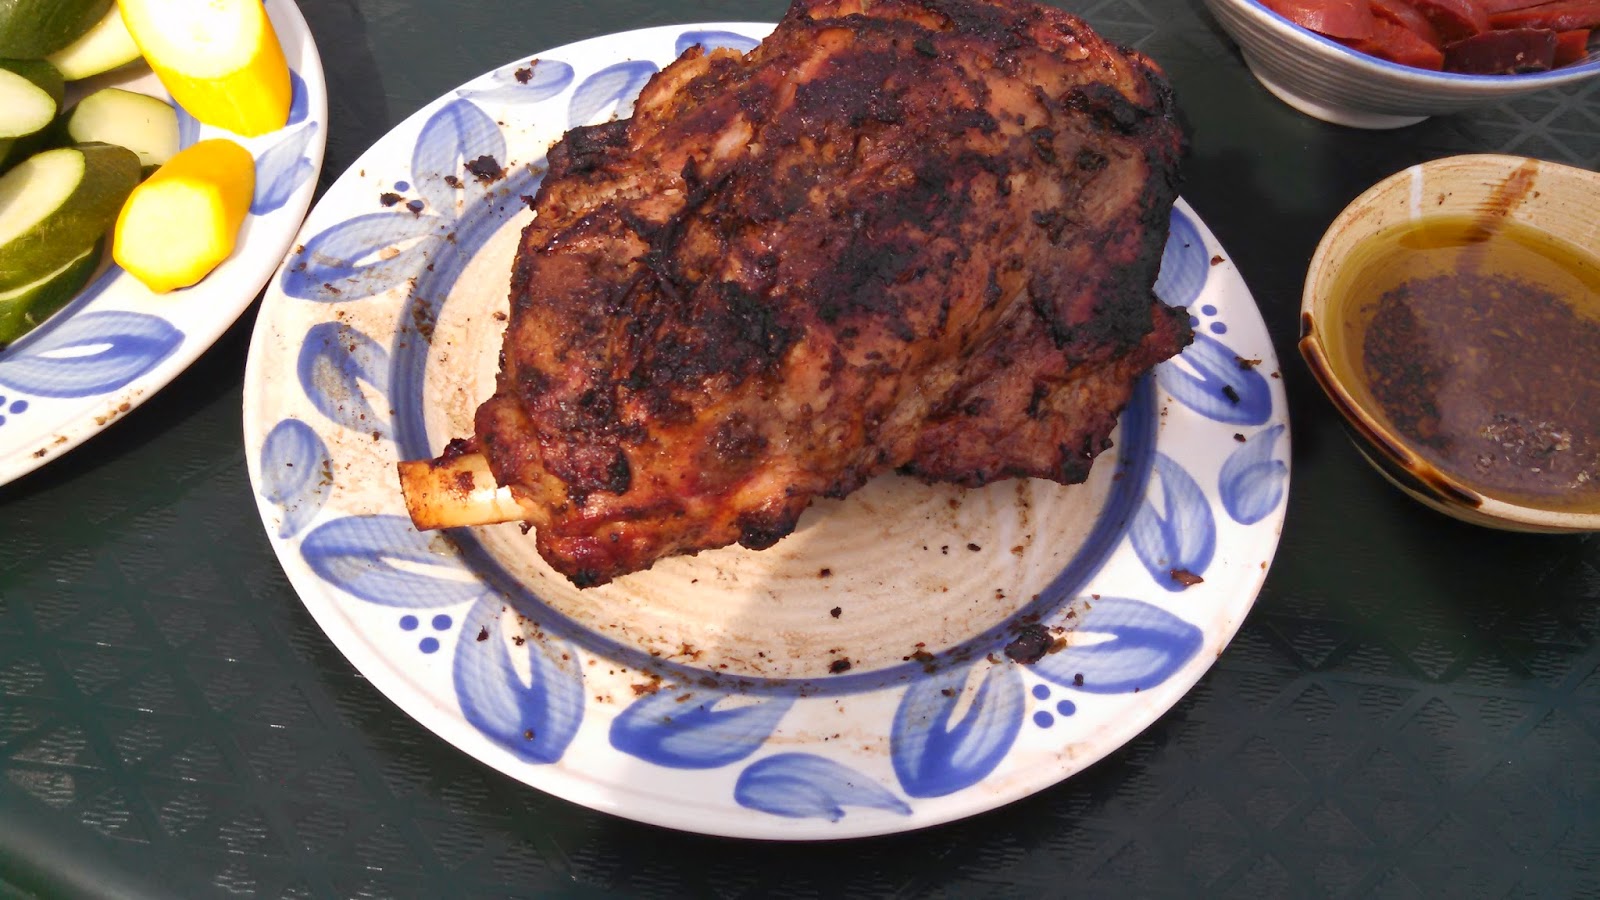
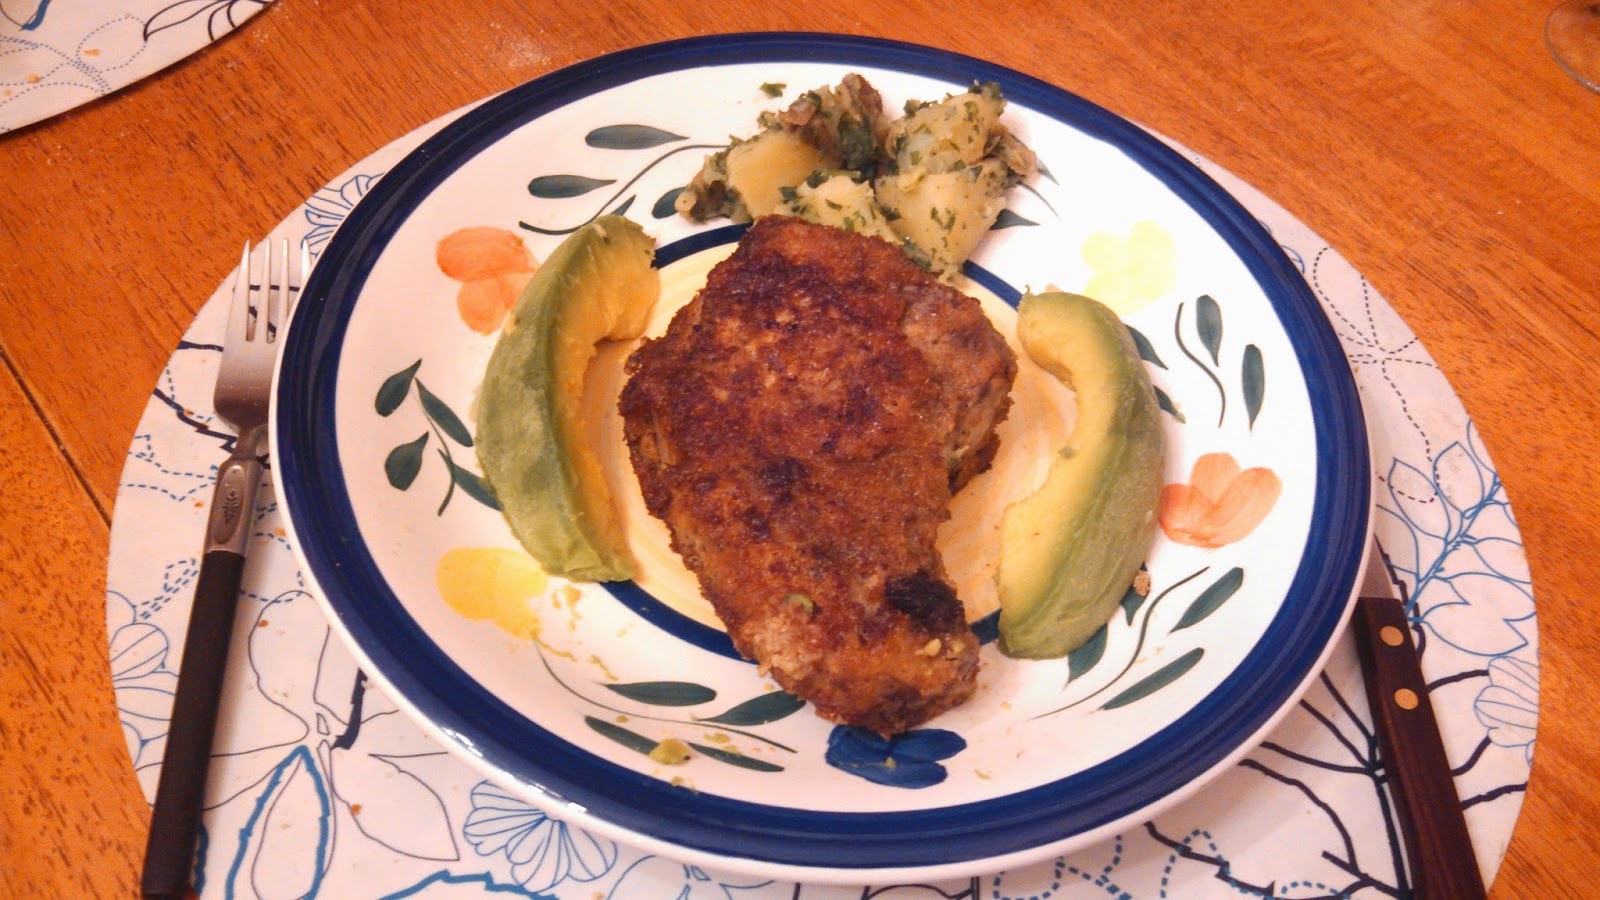
Oswald Rivera

Author, Warrior, and Teacher

Author: Oswald Rivera (page 60 of 83)

Broiled Lamb Chops – Puerto Rican Style

In my family we love lamb, especially lamb chops. And we have the Nuyorican way of cooking it, quick, easy, and no fuss. The only suggestion I have is that, when buying lamb chops, get the best quality, preferably from the leg of the lamb. In terms of seasoning, we use the normal Boricua staples (peppercorns, oregano, etc.) My kitchen colleagues are divided on this. Some claim that lamb chops should be broiled with nothing more than salt, pepper and a little oil. On the other hand I have friends from the Mediterranean basin who sprinkle cumin and coriander on them, rather than strong seasonings. Another acquaintance sprinkles lemon juice on the chops after broiling. They all agree on the time element: 3-4 minutes per side for rare chops; 7-8 minutes for well done.

The recipe below is from my cookbook, Puerto Rican Cuisine in America, soon to be re-issued by Avalon Press, Running Books, in a new, revised and improved format.

CHULETAS DE CORNERO A LA PARRILLA
                (Broiled Lamb Chops)

4 lamb chops, about 1-inch thick
8-10 whole black peppercorns
2 cloves garlic, peeled
1 teaspoon dried oregano
1/2 teaspoon salt
2 tablespoons olive oil

1. Preheat broiler to high.
2. Wash chops under cold running water and pat dry with paper towels.
3. Place peppercorns, garlic, oregano and salt in a mortar, and pound until crushed.
4. Rub chops with the seasoning, pressing into the meat with fingers and palm of hand.
5. Arrange chops on a shallow baking pan or, preferably, on a rack with a pan under it. Broil 3 inches from heat source, turning after 3 or 7 minutes depending on preference. Broil second side (3-4 minutes for medium, 5 minutes or more for well done). Serve with potatoes, a tossed salad, or tostones (fried green plantains—for a recipe: see the blog and video from September 9th 2010).
     Yield: 4 servings.

Enhanced by Zemanta

Lebanese Duck

I’ve been a fan of Middle Eastern cuisine for a long while. I grew up with typical Caribbean fare; but once my horizons expanded, food from the Middle East, inclusive of Israeli cooking, became among my favorites. This includes dishes from Lebanon. And one of the modern favorites from this land is duck cooked with orange juice. Now, you’re probably thinking of the French duck a l’orange. Some say that  this Lebanese dish owes its inspiration to its French counterpart. Or, perhaps the opposite is true. Maybe the French version owes its genesis to the Lebanese version. I honestly don’t know. But I do know that this Lebanese treat is easier to prepare than canard a l’orange, and it is just as tasty.Served with Lebanese style rice, it makes for a great Middle Eastern dinner. Think of it this way, this is your time to impress family and loved ones with a unique repast—the Oooh’s and the Aaah’s will be worth it.

     LEBANESE DUCK
(Duck with Orange Juice)

1 duck (about 5-6 pounds)
1 large onion, peeled and cut into thin rings
3-4 tablespoons butter
2 cups orange juice
Salt and black pepper to taste
2 tablespoons finely fresh chopped parsley

1. Wash the duck under cold running water and pat dry with paper towels.
2. Heat butter over medium heat in a pan large enough to hold the duck, and fry the onion until soft and translucent.
3. Brown the duck in the same fat used to cook the onions, turning it occasionally to brown it all over.
4. Add the orange juice along with the salt and pepper. Cover, lower heat and simmer for about 1 hour. If the liquid starts to dissipate, you may add a ladleful of water from time to time, and turning the duck occasionally.
5. Remove the duck from the pan and let it cool. Cut into serving pieces and return to the pan. Continue to simmer the duck until it is very tender and had fully absorbed the flavor of the orange juice. Serve sprinkled with the parsley.

LEBANESE STYLE RICE

What I discovered is that rice cooked the Lebanese way is very similar to the way we cook rice in our house. Only difference is that we add olive oil instead of butter while the rice is cooking.

2 cups long grain rice
4 cups water (if you prefer a drier type of rice with individual grains then make it 1 1/4 cup water for 
   each cup of rice).
Salt to taste
4-6 tablespoons butter

 1. Place the water, salt and butter in a pot or saucepan and bring to a boil.
2. Add the rice and boil vigorously for 2 minutes. Lower heat, cover tightly and simmer for 20 minutes. Do not disturb, let it simmer until the rice is tender. You know it’s done when little holes appear on the surface of the rice—and never stir while it’s cooking.
3. Turn off heat and allow the rice to rest for another 10 minutes before serving.
    Yield: 4 to 6 servings.

Enhanced by Zemanta

Fried Tofu with Sichuan Peppercorn

One of my favorite cuisines is Asian, in all its variations. This began years ago when the family lived in Spanish Harlem. We would trek down to the Hong Fat restaurant in Chinatown. Anybody recall Hong Fat’s? It was on Mott Street for over 30 years. Now it’s long since gone. But those memorable Friday night meals remain with me. It was American-Chinese cooking; and It wasn’t till my palate expanded that I discovered the joys of genuine Chinese cuisine in all its glory (and not just bland Cantonese fare). I also discovered other Asian cooking: Thai, Korean, Japanese, Vietnamese, etc. Today I experiment with them all.

Along the way I came across Tofu, or bean curd. I’ve been an aficionado of it ever since. The recipe given below is simple friend tofu with a chili-Sichuan peppercorn mix. Sichuan is a style of Chinese cooking noted for its emphasis on spice, specifically peppercorn. You can find Sichuan peppercorn in any Asian market. The recipe also calls for gochu garu, Korean red pepper powder. Also available in most Asian markets.  Gochu garu is a Korean national treasure. It is normally used as dip or garnish for poached chicken and steamed vegetables. In this recipe I team it up with the fried tofu. This is a quick endeavor. It takes maybe 5 minutes to prepare the peppercorn mix, and maybe 10 minutes to cook up the tofu. Served with steamed white or brown rice, it can’t be beat So, what to experience something different? Here’s you chance for a unique Asian meal.

Chili-Sichuan Peppercorn Mix
3 tablespoons gocho garu
1 teaspoon Sichuan peppercorn, toasted and ground
3/4 teaspoon white sesame seeds
1/2 teaspoon salt
3 tablespoons canola or peanut oil
1/2 teaspoon sugar

1. In a small bowl, combine Korean red pepper powder, Sichuan peppercorn, sesame seeds and salt. Put the oil in a small saucepan or skillet and heat over medium-high heat until just smoking.
2. Pour half the oil over chili powder mixture. This will render a foaming action in the mixture. Give it a quick stir with a spoon. Pour in remaining oil, and continue stirring to moisten ingredients. Finally, stir in sugar.
3. Let it cool a few minutes, taste and adjust the flavor with extra salt or sugar if needed. The mixture is now ready to use. You can store remainder in an airtight container at room temperature for up to 2 days or refrigerate for up to a week.

FRIED TOFU
1 block (14-oz) extra firm tofu, sliced into 1/2-inch cubes
1/2 cup unbleached flour
2 teaspoons garlic powder
1/4 teaspoon salt
2 tablespoons chopped fresh parsley
3 tablespoons olive oil

1. In a small bowl, combine tofu with remaining ingredients except for the olive oil. Toss gently to coat tofu well. Or place ingredients (again, except for olive oil) in a zip-lock bag or covered container and shake well to coat.
2. In a large skillet or fry pan, heat oil over medium-high heat and add the tofu. Cook for 4-6 minutes, turning occasionally, until golden and lightly crispy. Serve with chili-Sichuan peppercorn mix and steamed rice.
    Yield: 2 servings.
Note: You can double the recipe to serve 4 or more.

Enhanced by Zemanta

Sautéed Cod with Spinach

One of my favorite seafood is cod fillets. And one of my favored veggies is spinach (I’m like Popeye, I love the stuff). And whenever I get the chance I like to combine the two. It’s a delicious and healthy combo. So here’s my latest creation in that regard. And it has a Asian spin to it since among the ingredients there is soy sauce and ginger. It’s an easy enough recipe: first you whisk up the vinaigrette, then you cook the spinach, roast the fish, and finally serve the mix with the vinaigrette spooned around the spinach. The mild, sweet flavor of the cod is a perfect match for  the spinach and dressing.

SAUTÉED COD WITH SPINACH

3 tablespoons olive oil
3 tablespoons fresh lime juice
2 tablespoons soy sauce
1 teaspoon fresh grated ginger
1 teaspoon plus 1 small shallot, finely minced
3 tablespoons olive oil
3 bunches spinach, washed and dried
3 cloves garlic, peeled and minced
1 tablespoon butter
Salt to taste
4 (6-ounce) cod fillets, about 1 1/2-inch thick, rinsed and pat dried with paper towels
Freshly ground black pepper to taste

1. Preheat oven to 350 degrees F.
2. In a small bowl, combine olive oil, lime juice, soy sauce, ginger, and 1 teaspoon minced shallot. Whisk to combine, and set aside.
3. Heat 1 tablespoon olive oil in a large skillet or fry-pan over high heat. Add spinach, tossing until wilted, about 2 minutes. Add garlic, rest of minced shallot and butter. Sauté until soften, about 2-3 minutes. Once spinach is tender (about 5 minutes total) season with salt. Set aside and keep warm.
4. Set a large ovenproof pan over medium heat (I prefer cast-iron for this part). Meanwhile, season cod fillets lightly with salt and pepper. Pour remaining olive oil into the pan, and once oil begins to shimmer, lay fillets, flat-side down, into the hot pan. Once a thick golden crust forms on the underside of the cod (about 5 minutes), transfer pan to the oven and roast until fish turns white all the way through (about 4 minutes).
5. Remove pan from oven. Securing the top of each fillet with your hand or a fork, and the bottom with a spatula, gently flip the fillets. Return pan to the oven and roast 1 minute more.
6. Divide spinach among four plates, and top with spinach and fillets. Whisk vinaigrette once more and spoon it around spinach. Or, if desired, you can place fillets on a large serving bowl (or leave it in the pan), top with spinach and pour vinaigrette over and around it. Its your call whether to serve individually or  in separate plates.
    Yield: 4 servings.

Enhanced by Zemanta

Spinach and Roasted Cauliflower Salad

I’m a salad guy. I love salads. And not just for summer. I like salads all year round. One of my fantasies is that someday I’ll find an eatery that just serves salads, all types, nothing else. If there is such a place, please let me know. In the interim, one of my favorite vegetables is cauliflower. Now, cauliflower, like broccoli is something you either love or hate, and I love both. Broccoli is fairly easy to deal with; you can fry it, sauté it, steam it, braise it, etc. But what about cauliflower? Other than quick boiling, what else is there?  Well, there are various ways to prepare; but for a salad I prefer roasted cauliflower with whatever greens are available. I also happen to like spinach, just like Popeye. So here’s a salad that combines both. And it’s easy to make: just whisk up the vinaigrette dressing ingredients and pour over the roasted cauliflower. Nothing could be simpler, or more tasty.

SPINACH AND ROASTED CAULIFLOWER SALAD

1 large head cauliflower, broken into florets
3 tablespoons olive oil
Salt and freshly ground pepper to tatse
3 bunches spinach, washed and dried
2/3 cup grated Pecorino, Parmesan, or Gruyére cheese

For the Dressing:
3 tablespoons dry sherry or white wine
Salt and freshly ground pepper to taste
1 teaspoon dried oregano
2 cloves garlic, crushed
2 teaspoons mustard (preferably Dijon)
1/2 cup olive oil

1. Preheat oven to 400 degrees F.
2. In an oven proof dish, mix cauliflower with olive oil, salt and pepper. Place in oven and roast 35-40 minutes until cauliflower is tender and golden. Remove from  oven, let cool, and cut into small pieces.
3. Meanwhile, while cauliflower is roasting, whisk all dressing ingredients in a small bowl or jar.
4. Place cauliflower in a salad bowl, pour dressing over it and toss. Serve with crusty bread.
    Yield: 6-8 servings.

Enhanced by Zemanta

Chicken and Dumplings – PR Style

Chicken and dumplings is one of the ultimate comfort foods. It’s great any time of the season, and it warms the heart and stomach. In Puerto Rican cuisine we have domplines (dumplings—pronounced dom-plee-ness) and pollo frito (fried chicken), and it’s a great combination. In our tribe, the person who made the best dumplings was my grandmother, Adelaida, known to all as Doña Lala. She would make domplines for breakfast with ham and eggs, or for dinner with the fried chicken. She had it down to a science and could whip up a batch of dumplings in minutes. The domplines recipe given below is her magic creation. The fried chicken recipe is my mom’s—and she cooked it too ways. The first variation was simply marinated chicken pieces which are floured and then deep-fried. That’s the second recipe noted. She also had another variation in which the chicken is cooked in  its own marinade combined with chicken bouillon or broth, lending a more heady flavor. It you want that recipe, then get my cookbook Puerto Rican Cuisine in America (Avalon Books – Running Press) where both versions are highlighted along with a host of other Nuyorican wonders. 

         DOMPLINES
(Puerto Rican Dumplings)

4 cups flour
1 teaspoon baking powder
2 tablespoons shortening
1 cup lukewarm water
1/2 teaspoon salt
Vegetable oil for frying

1. Combine flour, baking powder and shortening in a glass bowl.
2. Add salt to water and add to flour, a bit at a time, while mixing with a wooden spoon until it forms a doughy consistency.
3. Remove the dough to a lightly floured surface and knead continuously with hands until soft.
4. Form kneaded dough into a horseshoe shape and set aside.
5. Fill a cast-iron or heavy bottomed skillet halfway with vegetable oil. Heat until oil is very hot. Break off a small piece of dough and shape into a round patty. Dip patty into skillet and stir-fry until golden (about 5 minutes). Repeat until dough is all gone. Remove and drain on adsorbent paper towels.
    Yield: About 20 dumplings.
Note: If a little color is desired, 4 or 5 tablespoons of achiote (annatto seeds cooked in olive oil—again, recipe in cookbook) can be added to the flour during the first step. This will reder truly golden-yellow dumplings.

POLLO FRITO
(Fried Chicken)

1 fryer chicken, about 2 1/2 pounds, cut into generous bite-sized pieces
2 cloves garlic, crushed or 1/2 teaspoon garlic powder
Salt and ground black pepper to taste
1 teaspoon dried oregano
1/4 teaspoon onion powder (optional)
3 tablespoons olive oil
1 tablespoon vinegar
Vegetable oil for frying
1 cup flour

1. Rinse chicken pieces under cold, running water and pat dry with paper towels.
2. Place chicken in a bowl and rub with crushed garlic. Sprinkle with salt, pepper, oregano and onion powder. Rub seasoning well into chicken pieces. Drizzle with olive oil and vinegar. Mix to combine. Cover and set aside for 15 minutes. If you really want strong flavors, refrigerate overnight.

3. Heat a generous amount of oil (1″ to 1 1/2″ deep) to medium temperature (about 340°) in a heavy bottomed pot, large skillet or deep fryer.
4. Remove chicken from marinade and dust lightly with flour. Use your hands to toss and coat each piece thorougly.
5. Add chicken pieces to hot oil, a few at a time and deep-fry until golden brown and crisp (3 to 5 minutes),  turning the individual pieces as they cook. Remove and drain on absorbent paper towels. Serve piping hot with the domplines.
    Yield: 4 servings.
Enhanced by Zemanta

Pescado en Escabeche – Pickled Fish

Pickled fish has long been a mainstay in our culture. It was my father’s favorite seafood snack. When my mother prepared this gem she always used kingfish steaks. Her reasoning was that this particular fish has one center bone, so one doesn’t need to worry about bones sticking in your throat. If you don’t want or can’t find kingfish, swordfish may be substituted. This dish is unique in that it taste better the day after. The longer it marinates in a  jar or bowl the more flavorful it becomes. When my mom prepared it back in the old neighborhood she made enough so that we had pickled fish sandwiches to last the entire week.

In my family we make escabeche either of two ways. In one method we first brown the fish steaks lightly. Then we cook the onions and remaining condiments in another skillet. Finally, we add the precooked fish to this sauce and simmer the whole thing over low heat for half an hour or so. The other more traditional way of making escabeche is to fry the fish steaks until they’re done. Then, in the same or a different pan, we cook the onion sauce. In the final step we alternate layers of steak and sauce in a jar, and marinate till ready to eat. Both methods work equally well. In the recipe given we’ve used the second method, which is the most common for preparing escabeche Nuyorican style.

PESCADO EN ESCABECHE
           (Pickled Fish)

8 kingfish steaks, 6 or 8 ounces each (can substitute swordfish steaks, if desired)
12 whole black peppercorns
3 cloves garlic, peeled
1 teaspoon dried oregano
1/4 teaspoon dried basil
1/2 teaspoon salt
1 cup olive oil
3 tablespoons vinegar
1 cup vegetable or corn oil
3 medium onions, peeled and thinly sliced
1 bay leaf

1. Rinse fish steaks and pat dry with paper towels.
2. In a mortar, crush peppercorns, 2 cloves garlic, oregano, basil and salt.
3. Rub fish steaks thoroughly with seasoning, and place in a bowl.
4. Combine 1/2 cup of the olive oil with 1 tablespoon of the vinegar, and pour over fish steaks. Cover bowl and place in refrigerator for 1 hour.
5. In a heavy saucepan or skillet, heat vegetable oil and lightly brown fish steaks over moderate heat on both sides. Reduce heat to low and cook the fish until done (about 15 minutes or so). Depending on how large the skillet, this may be done in batches. Drain on absorbent paper towels,
6. In a frying pan, heat the rest of the olive oil and add remaining garlic clove (crushed). Remove garlic when it is brown. Add onions, bay leaf and remaining vinegar. Cook on low heat until tender.
7. In a deep glass jar or dish, arrange alternate layers of onions and fish steaks.  Make sure you begin and end with the onion sauce.
8. Cover and set aside in the refrigerator for 24 hours or more. Serve cold or at room temperature
    Yield: 8 servings.

Limonia

I came across this recipe while I was researching my second cookbook, The Pharaoh’s Feast, also published in the United Kingdom as Feasting with the Ancestors (Sutton Publishing). In this tome I traced the history of cooking from prehistoric times to the present. This particular recipe comes from a fourteenth century anonymous manuscript containing two different recipe sections, known respectively as Book A and Book B. The actual book title was Anonymous Southerner (Anonimo Meridionale), because the author used southern Italian expressions, especially from Naples. Limonia is from Book A, which contains 164 recipes.

Limonia was a popular dish in medieval and Renaissance Italy. Different recipe collections term it lumonia, limonia, or limonea. It may have made its way to Europe via the Arab world. Arab texts as far back as the thirteenth century have recipes for laymuwiya, which are very similar to the one given here. According to the Anonymous Southerner, to make Limonia, all one has to do is brown chicken lard together with chopped onions and almonds. Stir in more pork lard and spices, and cook. Add lemon juice when it’s done, and serve. This sounds very much like modern day chicken piccata, although I’ve never heard of almonds being added to it. In the original recipe, lard would give it the flavor. These days, olive oil is a healthier alternative. I like this dish served over steamed white or brown rice.

LIMONIA

2 to 3 tablespoons olive oil
1 1/2 pounds boneless chicken thighs, cut into 1-inch cubes
Juice of one small lemon
1/4 cup blanched almonds*
2 tablespoons butter
Salt and ground black pepper to taste

1. In a large skillet, heat the olive oil over medium-high heat. Add the chicken cubes and cook until lightly browned. Reduce heat to low and cook, covered, for a minute or two.
2. Using a wooden spoon, stir in the lemon juice and almonds. Stir well to dissolve brown particles in the bottom of the pan. Add butter, blending it well into the sauce.
3. Season with salt and pepper, and serve.
    Yield: 4 servings.

    *To blanch almonds, simply drop the shelled almonds (with their brown skin) into boiling water to cover. Boil exactly one minute. Drain. Press the almonds between your fingers until the almonds slip out of their skins, and pat dry.

Enhanced by Zemanta

Braised Lamb Shanks

In the Rivera clan we love lamb, especially lamb shanks. Usually we cook them Caribbean style (Muslo Cornero a la Caribe)—as noted in my cookbook, Puerto Rican Cuisine in America. The shanks are dusted with flour, then browned, and finally slow cooked in a tomato-based sauce with lots of herbs. But we also love Braised Lamb Shanks, which are baked in a casserole or Dutch oven. It has a  different flavor than the tomato-based kind since the sauce includes red wine along with the usual herbs.

This recipe is easy to prepare. All you need is patience. It’s great for that special dinner for that special someone. Or just, just for the hell of it, giving the family a treat from the usual weekday supper. In my family we serve this dish with yellow rice with pigeon peas (Arroz con Gandules—this recipe is also in my cookbook). Add a loaf of crusty bread, and a good red wine (Cabernet Sauvignon, Pinot Noir, Zinfandel, etc., or whatever you desire, even beer if you don’t want wine. There are no set rules when it comes to one’s palette). 

BRAISED LAMB SHANKS

6 lamb shanks (about 3 1/2 pounds)
Flour for dredging (about 1/2 cup)
Salt and freshly ground black pepper to taste
1/2 teaspoon dried oregano
1/4 teaspoon paprika
1/3 cup vegetable oil
2 tablespoons butter
1 large onion, thinly sliced
3 cloves garlic, peeled and finely chopped
1/4 teaspoon fresh thyme (or a pinch dried)
1/4 teaspoon fresh rosemary, chopped (or a pinch dried)
3/4 cup dry red wine
3/4 cup beef bouillon
Fresh parsley for garnish

1. Preheat oven to 350 degrees F.
2. Wash lamb shanks under cold running water and pat dry with paper towels.
3. On a plate, combine flour, salt, pepper, oregano and paprika. Dredge lamb shanks with the seasoned flour.
4. Heat the oil and butter over medium-high heat in an oven-proof casserole or Dutch oven (I prefer a large cast-iron pot or pan). Sauté the meat until browned on all sides. Remove to a plate and set aside.
5. Add the onion, garlic, thyme and rosemary to the pot and cook over medium heat, stirring, for 5 minutes. Return the lamb shanks to the pot, and add the wine and beef bouillon. Cover, place in the oven and bake 1 1/2 hours or until the meat is tender.
6. Remove the meat from the pot. Whisk together 2 tablespoons flour with 1/3 cup water and add to the juices in the pot. Cook, stirring constantly over medium-high heat until the gravy thickens and comes to a boil. Reduce heat to a simmer and cook 2-3 minutes more.
7. Serve the shanks with the gravy poured over the meat and garnish with fresh parsley.
    Yield: 6 servings.

Enhanced by Zemanta

New Orleans Red Beans and Rice

I’ve always enjoyed Creole cooking. This is a style of cuisine that originated with the descendants of colonial settlers in Louisiana, mainly of French, Spanish and African descent. They have given us such popular entrées as Gumbo (a seafood stew), Jambalaya (a mix of meat, vegetables, rice and seafood) and Crayfish Étouffée (shellfish over rice). Add to that, my favorite: Red Beans and Rice (a standby in New Orleans). I daresay there as as many versions of this dish as there are chefs in New Orleans.

Traditionalists claim that New Orleans Red Beans and Rice should be made with small red beans. I’m all for tradition, but I prefer using red kidney beans. This is what I grew up on, along with black beans for Puerto Rican style black beans and rice or, as they term it in Spain and Latin America, “Moros y Cristianos” (Moors and Christians). New Orleans red beans and rice calls for Andouille sausages (a spicy sausage associated with Cajun cuisine). But you can substitute smoked sausages, or (my preference) Spanish chorizo. My version also includes salt pork rather than bacon grease which is normally used for frying. You can find salted pork in almost any market these days. They usually come in 12-ounce packages and give a heartier flavor to stir-fry dishes.

Note that the traditional way to serve this dish is to ladle the beans onto a plate, add a scoop of rice on top and season with a squirt or two of Tabasco. This is the correct procedure, sworn so by New Orleans residents. Diverge from this procedure and you will incur the wrath of the gods.

NEW ORLEANS RED BEANS AND RICE

1 pound dried red beans
1/2 cup salt pork, washed and diced
1/2 cup chopped ham
1 large yellow onion, peeled and thinly sliced
Salt and fresh ground black pepper to taste
1 medium green bell pepper, chopped
Pinch of cayenne pepper (or more to taste if you like it spicy)
3 bay leaves
3 tablespoons fresh chopped parsley
2 teaspoons fresh thyme
1/2 pound chorizo or smoked sausage, split in half lengthwise and cut into 1-inch pieces
1 pound smoked ham hocks
3 cloves garlic, peeled and finely chopped
10 cups chicken stock
Cooked white rice (about 4-6 cups)
1/2 cup chopped scallions

1. Place beans in a pot or Dutch oven cover with water by 2 inches.  Let soak overnight. Drain, place in a bowl and set aside.
2. In the same pot or Dutch oven as before, heat the salt pork over medium high heat. Add the ham and cook, stirring, until pork pieces are well browned (3-4 minutes).
3. Stir in the onion, bell pepper, and cayenne. Cook, stirring, until the onion and bell pepper are soft (about 4 minutes).
4. Add bay leaves, parsley, thyme, chorizo, and ham hocks. Cook, stirring, until chorizo and ham hocks are brown (about 4 minutes). Add the garlic and cook for 1 minute.
5. Add the beans and chicken stock. Stir to mix, and bring to a boil. Reduce heat to medium-low and simmer, uncovered, stirring occasionally until the beans are tender and the liquid starts to thicken. This should take at least 2 hours or more. If the beans become too thick and dry, you can add more water, 1/4 cup at a time.
6. Remove pot from heat and with the back of a heavy spoon, mash about 1/4 cup of the beans against the side of the pot. Put back on the burner and continue to cook over low heat until the beans are tender and creamy (about 15 minutes more). Remove the bay leaves and serve with the rice, garnished with scallions.
    Yield: 6 servings.

Enhanced by Zemanta
Older posts Newer posts

© 2025 Oswald Rivera

Theme by Anders NorenUp ↑