Oswald Rivera

Author, Warrior, and Teacher

Author: Oswald Rivera (page 62 of 83)

Fish Fillets Baked in Sour Cream

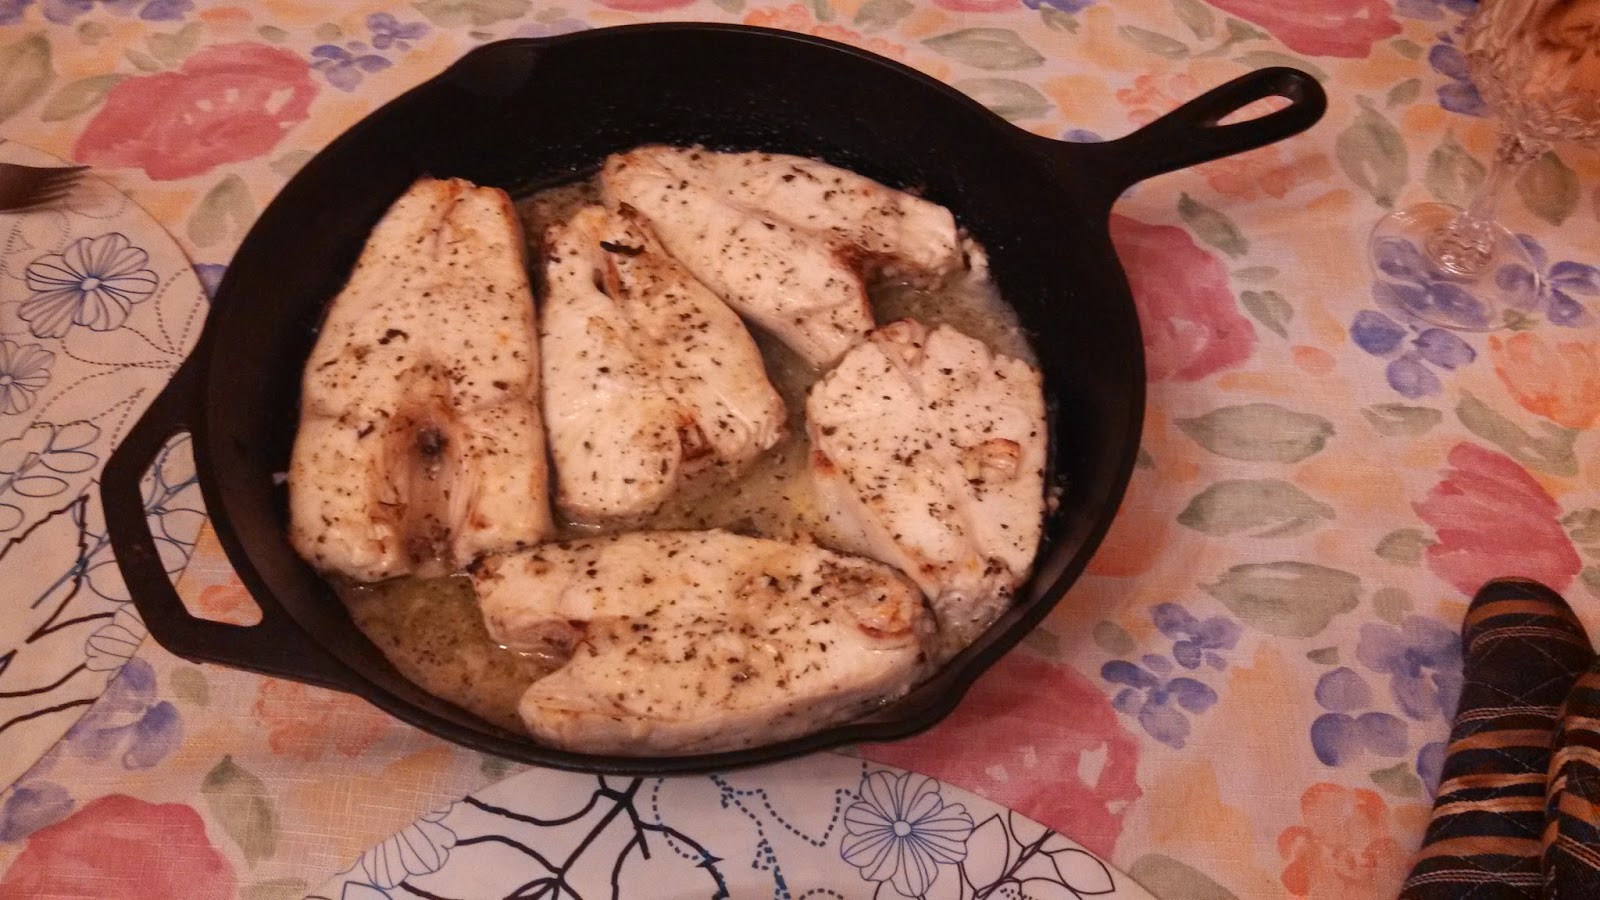
Sometimes the best meals are those that are created on the spot. You know, where you just get inspired at that moment, mainly because you don’t have the luxury of time or preparation. That occurred to me recently when my wife invited a mutual friend to dinner. This was a last minute thing and I had an hour to come up with something inventive. I checked the fridge and discovered we had some cod fillets and a pint of sour cream. I also had some whole wheat spaghetti on hand. And the result was the recipe given which resulted in a quick, fast, and delicious meal.

Let me state that for this meal you can use any firm-flesh fish fillets: cod, haddock, turbot, perch, etc. But you can also use frozen fillets. Just let them defrost overnight in the fridge or let them thaw out at room temperature in the kitchen. If you’re pressed for time you can speed up the process by letting cold water run over them. This is a quick no mess, no fuss endeavor. In my effort, I served the fillets with their sauce over the whole wheat pasta.

FISH FILLETS BAKED IN SOUR CREAM

2 pounds fish fillets
1/4 fourth cup butter
1/2 cup grated Parmesan cheese
One cup sour cream

1. Preheat oven to 400 degrees F.
2. Lay fillets on a greased shallow baking pan or baking dish (again, I prefer cast-iron).
3. In a small saucepan, melt butter and stir in the Parmesan cheese and sour cream.
4. Spoon sauce over fish, covering evenly. Place in oven and bake for 20 minutes to 1/2 hour until sauce topping is golden brown and fish flakes easily with a fork. Serve over pasta of your choice, or over rice, or with boiled potatoes.
    Yield: 4 servings.

Enhanced by Zemanta

Pollo Frito – Puerto Rican Fried Chicken

Everyone loves fried chicken (at least almost everyone). It’s one of the few dishes that if you have kids in the house, won’t create any problems in terms of picky eaters. We Puerto Ricans have our own unique take on fried chicken. Our version is fairly simple, but it’s more seasoned compared to other recipes. We also have plain fried chicken where you can skip the flour and cook the chicken in butter or olive oil instead of vegetable oil. The recipe given here is the classic floured chicken which is ubiquitous (I love those $20 words) in the fried chicken universe. Paired with mashed potatoes, some green veggies, and a good bottle of wine, you can’t go wrong.

Let me get in a plug here. This recipe is from my first cookbook, Puerto Rican Cuisine in America (Perseus Books – Running Press). Actually, in that book I give two versions of  Puerto Rican fried chicken: one is with plain flour (as in the recipe below) and the second version is cooking the chicken in its marinade combined with bouillon or broth, lending to a more heady flavor. Want that recipe—buy the book.

POLLO FRITO
(Fried Chicken)

1 fryer chicken, about 2 1/2 pounds, cut into generous bite-sized pieces
2 cloves garlic, crushed or 1/2 teaspoon garlic powder
Salt and ground black pepper to taste
1 teaspoon dried oregano
1/4 teaspoon onion powder (optional)
3 tablespoons olive oil
1 tablespoon vinegar
Vegetable oil for frying
1 cup all-purpose flour

1. Rinse chicken pieces under cold running water and pat dry with paper towels.
2. Place chicken in a bowl and rub with crushed garlic. Sprinkle with salt, pepper, oregano and onion powder. Rub seasoning well into chicken pieces. Drizzle with olive oil and vinegar. Mix to combine. Cover and set aside for 15 minutes. It you really want strong flavors, refrigerate overnight.
3. Heat a generous amount of oil (1-inch to 1 1/2-inch deep) to medium temperature (about 340 degrees F.) in a heavy-bottomed pot, large skillet or deep fryer.
4. Remove chicken from marinade and dust lightly with flour. Use your hands to toss and coat each piece thoroughly.
5. Add chicken pieces to hot oil, a few at a time and deep-fry until golden brown and crisp (3 to 5 minutes). Remove and drain on absorbent paper towels. Serve piping hot.
    Yield: 4 servings.

Enhanced by Zemanta

Broiled Fish with Orange and Anchovies

This is a recipe I discovered years ago. And it comes from Spain. That, I’m pretty sure of.  This dish  definitely harks back to the Islamic reign in Spain which lasted 700 years. Paella; the use of saffron; the cold soup, gazpacho; almond torte; flan; albondigas (meatballs); escabeche (cold marinated fish); can all be traced back to Moorish cooking. They also introduced citrus such as lemons and Seville oranges, as well as cooking with anchovies—and here you get fish fillets with orange  and anchovies.

In this dish I use red snapper but you can use any good firm-fleshed fish fillets (haddock, scrod, cod, halibut, etc.). It calls for the zest, that is, flaked skin, of a lemon and an orange. You can use a fruit zester for this, or scrape the fruit skin using a grater; either works well. The dish has a nice citrusy undertone, but the other spices and the butter balance it off so that you get a succulent dish. It’s a recipe that is easy, but made to impress.

BROILED FISH WITH ORANGES AND ANCHOVIES

4 five-ounce fish fillets
6 tablespoons olive oil
Salt and ground black pepper to taste
3 tablespoons minced shallots
2 cloves garlic, peeled and thinly sliced
Zest of 1/2 a lemon, grated
Zest of 1/2 orange, grated
Pinch of red pepper flakes (or more, if you want it spicier)
6-ounce can? anchovy fillets, rinsed, patted dry and finely chopped
1/2 cup orange juice
1 tablespoon butter
1 orange (preferably Seville orange), sectioned
1/2 lemon

1. Heat broiler on high. Brush both sides of fillets with 3 tablespoons of the olive oil and season with salt and pepper.
2. Place fillets in a oven-proof dish on top of rack. If using red snapper, place them skin side up. Cook until skin is blistered and fish is almost cooked through, about 3-5 minutes—be careful not to burn the fish. Transfer to a warm plate and set aside.
3. Heat remaining olive oil in a medium skillet or fry pan over high heat. Add shallots, garlic, fruit zests, pepper flakes and anchovies. Cook until sizzling.
4. Add orange juice and bring to a boil. Reduce heat to low and cook for about 3 minutes or until thickened.
5. Turn off heat and swirl in the butter. Gently stir in the orange sections, and add a squirt of lemon juice from the 1/2 lemon.
6. Top the fish fillets with orange-anchovy sauce and serve.
    Yield: 4 servings.

Danish Stuffed Cabbage

Stuffed Cabbage, as we know it, has been around for a while. It was popular in Ancient Rome and Ancient Greece. It is part of the diet of Poles and Russians; and almost every country in Europe has some version of the dish. In Jewish cuisine its been around for 2,000 years and is traditionally served on the holiday Simchat Torah, or the annual celebration that concludes the public readings of the Torah (the first five books of the Jewish bible). Yet of all the stuffed cabbage dishes I have come across, my favorite is Danish stuffed cabbage. Whether it’s Danish or not is open to interpretation. Some Swedes claim they were the first to concoct the idea of stuffing a whole cabbage and not just the cabbage leaves. I love the dish because not only is it delicious but it makes a great presentation. And I discovered a long time ago that in good cooking the eye may be just as important as the taste.

Danish stuffed cabbage is also simple to make. It doesn’t normally include cooked rice as in most stuffed cabbage recipes. It doesn’t include tomatoes either; though in my version I add tomato paste to it—or you can skip it altogether. Like all such dishes, it can include ground veal, ground pork, ground beef or a combination thereof. I keep it simple and economical and use ground chuck, This is not a fancy dish, but if you want to use veal or a more expensive cut of meat, go right ahead. Note that traditionally this dish contains a lot of butter. If you’re worried about the butter content you can use olive oil to brown the meat and the follow the rest of the recipe as is.

DANISH STUFFED CABBAGE

1 medium firm green cabbage
1 1/2 cups soft bread crumbs (without crusts)
3/4 cup milk
2 eggs
Salt and ground black pepper to taste
1/4 teaspoon ground sage
1/2 stick plus 3 tablespoons butter
1 pound ground chuck
2 tablespoons tomato paste

1. Remove loose outer leaves from the cabbage. Cut a deep slice from the stem end of the cabbage (this slice will be used as a lid during cooking). Then, using a knife and spoon, hollow out the cabbage, leaving a wall about the thickness of six-seven leaves. You can save the hollowed out cabbage parts for another use such as cabbage soup or stir-fry, or other.
2. In a bowl combine 1 cup bread crumbs and the milk and soak until soft. Add the eggs, salt, pepper and sage to the soaked crumbs. set aside.
3. In a medium frying pan or skillet, heat 1/2 stick  of butter, add the ground meat and cook over medium heat until meat loses its red color. Stir in the tomato paste and cook 2-3 minutes more. Add the soaked crumbs and mix well. Stuff the cabbage shell with the mixture. Depending on the size of the cabbage you may have some meat leftover which you can use for another occasion.
4. Place the sliced lid over the cabbage and meat. Next, place the cabbage, standing up, in a saucepan and surround with boiling water about halfway up from the head. Cover, reduce heat to low, and simmer for about two hours. Check periodically to make sure you have enough water in the pan. You do not want the water to boil off and the pan to burn. Add more water if needed.
5. Remove the cabbage lid. In the frying pan brown the remaining 1/2 cup bread crumbs in the remaining 3 tablespoons butter, and pour this mix over the top of the cabbage. To serve, cut the cabbage with its stuffing into wedges, and enjoy!
     Yield: 4-5 servings.

Enhanced by Zemanta

Kielbasa and Potatoes

 
No matter what the climate deniers may claim, the Polar Vortex is still with us, and it ain’t going nowhere. This calls for hearty food and drink. Forget about summer salads. One of my favorite dishes for this type of weather is kielbasa and potatoes—simple, hearty peasant cooking that fills the bill, and  is delicious to boot. Kielbasa, also known as Polish or Ukrainian sausage is a staple of Central and Eastern European cooking. It’s also very popular in the East and Midwest regions of the U.S. where large congregations of Eastern Europeans have settled. Raised in New York, I came upon kielbasa sausage early in. And I love it, whether cooked with onions, or peppers, or with kasha (buckwheat groats) or over rice. But my favorite is with potatoes. Nothing fancy, just spuds and red bell peppers and some bacon on  top. Can’t go wrong with this treat.

KIELBASA AND POTATOES

6 slices thick-sliced bacon, diced
1 large onion, peeled and sliced into thin rings
4 large potatoes, cooked (I like them with the skin on, but just cook them until just tender or semi-hard), and cut into 1-inch cubes.
1 Polish kielbasa or 1 pound Italian sweet sausage
1 red bell pepper, cut into 1-inch squares
Salt and ground black pepper to taste

1. In a large skillet, fry bacon until brown and crisp. Remove and set aside.
2. Add onion to drippings and sauté until golden brown. Add potato cubes and stir over low heat until potatoes are slightly browned, about 15 minutes.
3. Cook kielbasa in boiling water for 15 minutes. Drain and cut into 1/2-inch slices. If using sausages, brown on all sides in another skillet; cut into 1-inch slices.
4. Add kielbasa or sausages to potatoes. Add red pepper and stir over low heat for another 10 minutes. Season to taste with salt and pepper.
5. Pile on a serving platter and sprinkle with reserved bacon strips.
    Yield: 4 servings.

Enhanced by Zemanta

Texas Hash with Rice

Another cold snap here in the Northeast. For this kind of weather you need stick to the ribs food. And one of the best recipes I’ve had for years is Texas Hash with Rice. I acquired this gem back in the 1970s when it appeared in the Scripps Howard News Service, which is no longer in business. It’s a filling, tasty, and inexpensive no-frills antidote to the cold weather blues. I’ve modified the recipe according to the Rivera family palate.

You can make this recipe as hot and as spicy as you want depending upon how much chili powder you add to it. The original recipe called for 1 to 2 tablespoons chili powder. That is a lot. But, if you like 3-alarm chili hash, go right ahead. Also, it called for 1 tablespoon of salt, which is quite a bit of salt. Use as much as you like, but be judicious. It also had as an ingredient, garlic powder. I prefer fresh whole garlic for a more distinctive taste. Another note: kids love this hash—and you don’t have to be a Texan to appreciate it.

TEXAS HASH WITH RICE

3 tablespoons olive oil

1 medium onion, peeled and thinly sliced
1 small-to-medium green bell pepper, cut into small slices, then cut the slices in half
1 pound lean ground beef
1/2 teaspoon chili powder (or more to taste)

Salt and ground black pepper to taste
1 clove garlic, peeled and finely minced
1 14.5-ounce can tomatoes
2 cups cooked rice

1. Preheat oven to 350 degrees F. 
2. Heat olive oil in a cast-iron skillet. Add onion and green bell pepper, and saute 2-3 minutes.
3. Add beef, chili powder, salt, pepper and garlic. Cook until meat is no longer pink.
4. Add canned tomatoes (with their liquid), and rice.
6. Place skillet in oven and bake for 25 minutes or until heated through. Note: If you don’t have a cast-iron skillet, you can use whatever skillet you have on hand then transfer the hash-rice mixture to a  baking dish and bake as required.
    Yield: 4 servings or more

Enhanced by Zemanta

Steak Flambé

Steak Flambé or, in our jargon, Biftec Flambé was a special dish that my Uncle Phillip, the black sheep in our family, would conjure up. And it could explain some of his success with woman. Uncle Phillip was a ladies’ man extraordinaire; and as such he was a devotee of spectacle. Part of this explains the flambeing, or flaming of food at the table. That and a good bottle of wine would win over any woman’s heart, or so he claimed.So, the next time you want to impress friends, family or your partner, give this recipe a try. Uncle Phillip would approve. It should be noted that a chafing dish or electric skillet can be used when preparing this dish; and it gives pizazz to any occasion.

If you’re flaming at the table, it’s prefer that you have the sauteed onions and seasoned steaks already to go beforehand. Then finish it off at the table. Also, let me add a plug here: this recipe is from my first cookbook, Puerto Rican Cuisine in America (Perseus Books – Running Press). If you want to get more of Uncle Phillip’s recipes or any of the other family gems, check it out.

BIFTEC FLAMBÉ

  (Steak Flambé)

4 club steaks (8 ounces per steak), about 1/2-inch thick
1 cup beef broth
1 medium onion, thinly sliced
1 clove garlic, peeled
1 teaspoon dried oregano
1/2 teaspoon salt
3 tablespoons brandy or dark Puerto Rican rum

1. Wash meat and pat dry with paper towels.
2. In a small dish, heat 2 tablespoons of broth. Sauté onions on medium heat, until tender (about 3-4 minutes).
3. Add the rest of the broth, but reserve 3 tablespoons. Lower heat, cover and simmer 10 minutes.
4. Meanwhile, in a mortar, crush peppercorns, garlic, oregano and salt.
5. Using heel of hand, press seasoning onto both sides of club steaks.
6. Heat remaining 3 tablespoons broth in a large skillet. Sauté steaks, over medium-high heat, for about 3 minutes on each side (for rare steaks).
7. Lower heat, pour brandy or rum over the meat. Stand back and touch a lighted match to the liquor.
8. Serve when flame goes out, with sauteed onions spooned over.
    Yield: 4 servings.

Note: Some experts contend it’s a good idea to heat the liquor before lighting in the dish. Uncle Phillip, for his part, just poured in the spirits and set it aflame. Use whatever way suits you.

Photo: Courtesy of The Literate Chef

Red Flannel Hash

My wife and I normally spend the holidays with friends in Vermont, where it gets COLD. And I mean COLD, like 30 degrees below zero F. at night. You figure that in a climate like this they like good, filling food. And one of the most popular dishes in Vermont, or so the locals tell me, is Red Flannel Hash. Now, I never heard of such fare until I came here. I know about corned beef hash, the great staple for Saint Patrick’s day; and Yankee hash. But, red flannel hash? According to the locals, red flannel hash is a hearty dish that was popular with Vermont farmers in the old days. All it is is corned beef  that is fried along with beets (yes, beets), and then you top the thing with eggs poached in the dish. Why is it called “Red Flannel Hash?” Well, the beets would add the red color. Also, according to legend, farmers would wear red flannel underwear back then to ward off the cold. This, along with  beets, gave it its name. I cannot vouch for the authenticity of this, but locals here swear by it.

RED FLANNEL HASH

1/3 cup butter
1 large onion, chopped
2 cups ground or chopped corned beef
3-4 potatoes (like like red potatoes), diced small (I like them with the skins on)
3 beets, peeled and diced small
Salt and ground black pepper to taste
1 teaspoon Worcestershire sauce
4-6 large eggs

1. Heat the butter in a a large skillet over medium heat (I prefer cast-iron for this task). Add onion and cook until onion is soft and translucent.
2. Add the corned beef, and cook for about 2-3 minutes. Add the potatoes, beets, salt, pepper, and Worcestershire sauce. Stir to mix, cover the pan and lower heat to medium-low. Cook for 10-12 minutes, stirring every few minutes until the beets become tender. As you stir, try to scrape the bottom of the pan so that the browned bits are included. Don’t worry if the potatoes begin to fall apart, that’s okay.
3. When the beets are tender, crack the eggs atop the pan. cover and let the eggs poach until done. Usually it takes about 5 minutes if you like runny eggs, or 7 minutes if you desire a firmer yolk. Remove from heat and serve, scooping onto plates.
     Yield: 4-6

Photo: courtesy of CHOW

Enhanced by Zemanta

Puerto Rican Beef Stew

This weather is tailor made for Carne Guisada, or beef stew Puerto Rican style. Carne guisada is prominent in what we call criollo cooking. That is, traditional Puerto Rican cooking derived from native Caribbean influences. As such, we Nuyoricans (New York Puerto Ricans, whether born or raised in New York City) love the dish; although it has countless variants. I’ve seen recipes where raisins and sweet peas, carrots and even squash are added. My cousin Yvonne used to boil the meat first then add the remaining ingredients. Some cooks add beef bones to the stew. Others cook the potatoes separately. Whatever method is used, the results are uniformly good.

This dish is not the standard beef stew found in the U.S. mainland and other parts of the world. It has more seasoning than the usual salt and pepper. It also includes achiote, that is, annatto seeds cooked in a little olive oil. The oil then acquires a deep red color that is added to the dish. If you don’t have the patience to prepare achiote, you get get a store bought variety in any Asian or Caribbean market (or, for that matter, most supermarkets these days). Or you can substitute sazón accent (Goya products makes a good version). Carne guisada is usually served with rice and tostones (deep fried plantains). Recipes for tostones and achiote can be found in my first cookbook,Puertio Rican Cuisine in America Perseus Books – Running Press).

CARNE GUISADA
     (Beef Stew)

2 pounds beef round steak, trimmed and cut into 1-inch chunks
1/4 cup olive oil or vegetable oil
1 medium onion, peeled and coarsely chopped
1 medium green bell pepper, seeded and coarsely chopped
1/2 teaspoon dried oregano
2 cloves garlic, peeled and chopped
1 teaspoon salt
1/2 tomato sauce
1 tablespoon achiote
10-12 pimento stuffed olives
1 tablespoon capers
1 bay lead
1/2 cup water
1 pound Maine or Idaho potatoes, peeled and cubed 

1. Wash meat and pat dry with paper towels.
2. In a Dutch oven or heavy kettle, heat the oil, add beef chunks, onion, bell pepper, oregano, garlic and stir-fry over moderate heat until meat is brown.
3. Add salt, tomato sauce, achiote, olives, capers and bay leaf. Mix and cook for 5 minutes.
4. Add water, bring to a rapid boil, cover and simmer over low hear for 30 minutes.
5. Add potatoes, stir to combine, and bring to a rapid boil. Cover and simmer for another 30 minutes.
6. Serve over steamed white or yellow rice.
    Yield: 5 servings.

Photo: courtesy of YELP – José Enrique: Photos

Western Chili Casserole

If you live in a northern climate, this time of year is perfect for chili. Now, here in the Americas (and I would add, world wide) we all know about chili. Some claim it originated with the early Texas trail drives where some enterprising trail cook served up buffalo meat, or cattle meat, or whatever meat was available and mixed it with chili peppers and onions, fed it to the cowpokes, and the rest is history. But history is more defining than that. Chili peppers were known to the Incas, Aztecs and Mayans long before Europeans settled on the American continent. Chili peppers even show up in the ancient cuisines of China, India and the Arab penninsula. So, chili peppers were here long before the Texas cowpokes got to it. That being said, the dish has been popularized throughout the Southwest and entered the American pantheon.

What we know as “chili” is simply chili con carne, or chili with meat. There are many variations of chili, depending upon the geographic region. Some include beans, and some do not. Some include tomatoes and some do not. Some eat it as is with tortilla chips, and some eat it over rice.  President Lyndon Johnson’s favorite chili recipe contained venison rather than beef; and he added tomatoes and onions to it. It was known as “Pedernales River Chili” popular in the Texas Hill country. My favorite chili recipe is a “chili casserole”—which to my southern friends would be akin to blasphemy. But I love the dish. I discovered it long ago in one of my old cookbooks: Quick and Easy Dishes published by the Favorite Recipes Press in 1968. The dish is credited to Charlyene Deck, of Exeter Union High School in Exeter, California. I don’t know is Ms. Deck is still around or not but, as a kid from Spanish Harlem on the other side of the continent, I salute her.

WESTERN CHILI CASSEROLE

1 pound ground beef
1 large onion, chopped
1/2 cup chopped celery
1 15-ounce can Mexican-style chili beans
1/2 teaspoon seasoned salt
1/2 teaspoon chili powder
2 cups corn chips, crushed
1 1/4 cup grated cheddar cheese
Pitted ripe olives

1. Brown meat in skillet; add onion and celery. Cook until tender.
2. Remove excess fat from skillet; add beans, salt and chili powder
3. Place layers of chips on bottom of 2-quart casserole. Alternate layers of chips, cheese and chili mixture, reserving 1/2 cup chips and 1/4 cup cheese for garnish. Sprinkle center with reserved cheese; place reserved chips around edge. Top with ripe pitted olives. Bake for 20 minutes at 350 degrees or until heated through.
    Yield: 6-8 servings.

Picture: courtesy of Bearcooks Food

Enhanced by Zemanta
Older posts Newer posts

© 2025 Oswald Rivera

Theme by Anders NorenUp ↑