Oswald Rivera

Author, Warrior, and Teacher

Category: all (page 70 of 78)

A Zucchini Summer

I spend my summers in Vermont, where every vegetable garden is overflowing with zucchini. It seems to grow in profusion almost everywhere. But even in my native New York it is a ubiquitous summer staple. But what to do with it? We see it in all kinds of salads, but how to liven it up? Over here they love zucchini. They eat it fresh, fried, steamed, and broiled. In my experimentation I’ve come across novel ways to prepare it. Following are two dishes that highlight zucchini as a summer salad. One is a simple creamy dill salad with lots of fresh dill; and the other entails fried zucchini slices. Either way, it’s a unique way to prepare this summer favorite.

CREAMY DILL ZUCCHINI SALAD
(Note that in this preparation you can have the zucchini, raw as is, for that crunchy texture. Or you can elect to steam the zucchini slices if you like a softer touch. Either way, it’s great.)

2 large zucchini
1 cup  thinly sliced red onion
Salt to taste
1/2 cup dill pickles, quartered and sliced into 1/2-slices
1/2 cup chopped fresh dill
1/2 cup sour cream or yogurt
Ground black pepper to taste

1. Wash zucchini and dry with paper towels. Slice zucchini diagonally into thin rounds, and cut larger rounds in half.
2. In a bowl, combine zucchini, onion, salt, pickle slices and dill. Mix in sour cream or yogurt. Season with pepper.
    Yield: 4 servings.

FRIED ZUCCHINI SALAD
(some might regard this as a variation on what is called a scapece salad, where a marinade is used for the zucchini. In this simpler version, the marinade is omitted.)

1/4 cup olive oil (preferably extra virgin)
1 teaspoon honey
Juice of 1 lemon
2 cloves garlic, peeled and finely minced
2 tablespoons toasted fennel seeds
Salt and ground black pepper to taste
Vegetable, canola, or olive oil for frying
3 to 4 medium zucchini, sliced into 1/4-inch rounds
1 bunch spinach (about 6 cups)
1/4 cup grated goat cheese such as manchego, or crumbled blue cheese

1. In a small bowl, which together the oil, honey, lemon juice, garlic and fennel seeds. Season with salt and pepper and set aside.
2. In a large skillet over medium heat (I prefer cast iron), heat about 1/4-inch oil until hot but not smoking. Place zucchini in a single layer, and fry, turning the slices once or twice with a fork. You may have to do this in batches since you do not want to crowd the skillet. Fry until the slices are golden (about 5 minutes). Transfer to a plate lined with kitchen towels and set aside.
4. In a large bowl, assemble the spinach. Place zucchini slices on top. Drizzle with the dressing and toss gently. Top with the grated goat cheese or blue cheese.
    Yield: 6 servings. 

Enhanced by Zemanta

Rum: The Summer Cocktail

When one thinks of summer cocktails, what comes to mind are the usual standbys: gin and tonic, or a a tom collins or, in you’re down south, a mint julip. Or else you think of all those sticky-sweet frozen drinks with little umbrellas sticking out of them. When hot weather rears its head, our libations change accordingly. You want some thing cool and icy, and quick. If you’re  like me, you don’t want to mess with blenders and such. You want something fast and refreshing, something more substantive than the usual white wine.This is where rum comes in. It’s the quintessential summer drunk. My forebears hail from the Caribbean where they have been battling hot summers with this elixir since time immemorial.

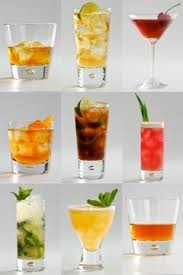
Now, in terms of rum, most people consider summery drinks as being daiquiris, mojitos or pina coladas. That’s great if you want to spend time fussing and blending. But summer rum drinks can be as invariably simple as a rum highball with soda or orange juice. Below are given some tropical rum drinks that are very easy to prepare. So, for that next BBQ or pool side party, or even while hanging out on the fire escape on a hot night, try some of these out.

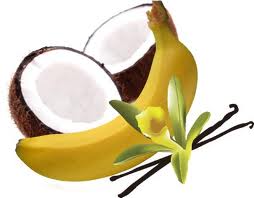
Be aware that rum, like fine wine or brandy, has different characteristics. Some connoisseurs prefer a dark aged anejo, some prefer rum that is sweet and heady with molasses-like flavor, and some prefer a light, dry variety. In general, rum comes in two types: white (or silver) and dark (or gold).  In terms of alcohol content, they usually come in 80 proof, and you can go up to 151 proof. The latter is not recommended for sipping. It is not a parlor drink. In my culture we use it to make coquito, a sort of high-powered egg nog that is definitely not a summer drink.

CUBA LIBRE:  Mix in a shaker with ice and and pour (unstrained) into a 10 ounce highball glass:  2 ounces white rum and juice of 1/2 lime. Fill glass with club soda or seltzer water.

HAVANA COCKTAIL:  Mix and shake well with ice: 2 ounces white rum, 1 ounce pineapple juice, and 1 teaspoon sugar. Strain into a cocktail glass. (Note: you can substitute, if desired, 1/4 ounce grenadine syrup in lieu of the sugar).
LIBERTY COCKTAIL: Mix and shake well with ice: 1 ounce dark rum, 2 ounces apple juice, and 1/4 ounce grenadine. Strain into a cocktail glass.
MADAGASCAR COCKTAIL:  Mix and shake well with ice: 1 ounce white rum, 2 ounce orange juice, 1/2 teaspoon lemon juice. Top with grated or powdered nutmeg.
MINT CRUSH: Mull 8 fresh mint leaves (washed and wipe clean) and 1/2 teaspoon powdered sugar in an old-fashioned glass (8 oz.) Add 3 ice cubes and 2 ounces dark rum. Fill with water and stir. Decorate with a mint sprig.
MONKEY WRENCH:  Pour 2 ounces white rum into a highball glass with ice. Fill with grapefruit juice and stir.
PINEAPPLE FIZZ: Shake well with ice and strain into a highball glass: 1 ounce white or dark rum, 2 tablespoons pineapple juice, and 1 teaspoon sugar. Fill with club soda or seltzer water.
RUM COBBLER: In a goblet or mug, dissolve 1 teaspoon powdered sugar in 2 ounces club soda. Fill with ice, add 2 ounces dark rum and stir. Serve with a straw.
RUM COLLINS: Pour 2 ounces white rum in a highball glass over ice. Add juice of 1/2 lemon and 1 teaspoon sugar. Stir well and add club soda, a maraschino cherry, and a slice or orange. This can also be done with dark rum. In which case you add the juice of a lime instead of lemon.
RUM FIZZ:  Mix and shake well with ice: 1 1/2 ounce white rum, juice of 1/2 lemon and 1 teaspoon powdered sugar. Pour (unstrained) into a highball glass and fill with club soda or seltzer.
RUM HIGHBALL: Into a highball glass filled with ice, pour 1 ounce white or dark rum. Fill with ginger ale, and add a slice of lemon or lime and stir.
RUM RICKEY: Squeeze juice of 1/2 lime into a 10 ounce glass. Add ice cubes and 2 ounces white rum. Fill with club soda or seltzer.
RUM SANGAREE: Mix and shake well: 2 ounces dark rum and 1 teaspoon powdered sugar. Pour into an 8 ounce glass with 3 ice cubes. Fill with club soda or seltzer and sprinkle some ground nutmeg on top.
RUM SOUR: Shake well with ice and strain into a 6 ounce whisky sour glass: 2 ounces dark rum, juice of 1/2 lemon and 1/2 teaspoon powdered sugar. Add a maraschino cherry and decorate with 1/2 orange slice. Or you can serve the drink on the rocks in an old-fashioned glass.
RUM SWIZZLE: Into a highball glass pour 2 ounces dark rum, juice of 1/2 lemon, 1 teaspoon sugar and 3 sprigs fresh mint. Fill with ice, club soda, and then use a swizzle stick until it froths over.
TRINIDAD COCKTAIL: Shake well with ice and strain into a cocktail glass: 2 ounces dark rum, juice of 1/2 lime, 2 dashes angostura bitters, and 1 ounce grenadine syrup. Serve with a twist of lemon peel.
TROPICAL COCKTAIL: (Created at New York’s Essex House, I’m told) Shake well with ice and strain into a cocktail glass: 1 ounce dark rum, juice of 1 lime, 2/3 teaspoon grenadine, and 1 teaspoon sugar. Garnish with pineapple slices.
WEST INDIAN SWIZZLE: Into a cocktail glass add 2 ice cubes, then pour 2 ounces dark rum (preferably West Indian rum), 1 lump sugar, 1 dash Angostura bitters, and 2 ounces club soda or seltzer. Swizzle with stick to froth.

There they are. Go out, experiment, explore, and have fun.

1 jigger light rum

Enhanced by Zemanta

Bananas with Coconut Cream

For every dinner, dessert is the crowning achievement. But ice cream, pie, and the usual fruit gets tiresome after a while. Here is a recipe that will wake everybody up. Its centerpiece is bananas. Yes, bananas. It’s the easiest thing to prepare, and it’s bound to impress your significant other or anybody else for that matter. Strikingly simple to make and scrumptious. Guys and gals, no fancy gimmicks here, Just sautee the bananas and serve with peach slices. Now, if you wan to exaggerate a bit, you can say how you slaved over the stove just to come up with this fancy-dan dessert. And who’s to know? At the end of the meal, your family and friends will sing your praises.

The recipe is from my first cookbook, Puerto Rican Cuisine in America (Avalon Books – Thunder’s Mouth Press). And it’s an example of how we dress up a basic fruit and make it glorious.

GUINEOS CON CREMA  DE COCO
      (Bananas with Coconut Cream)

2 tablespoons butter or margarine
2 ripe bananas, peeled and sliced in half lengthwise
1 tablespoon lime juice
1/2 cup cream of coconut
Fresh peach halves

1. Melt butter in a large pan or skillet
2. Add bananas and saute briefly until well coated
3. Sprinkle with lime juice.
4. Remove bananas to serving dish and spoon cream of coconut over them.
5. Garnish with peach halves and serve.
     Yield: 4 or more servings.

Enhanced by Zemanta

Cold Soups

Now that summer is here, cold soups are in order. That’s right, cold soups. Back in my youth, in Spanish Harlem, we never heard of cold soups, not even in summer. It was an alien concept to us. Soups were always hot and hardy, even on the warmest of days. Then in my early manhood I discovered Vichyssoise (pronounced “vish-ee-SWAHZ” or “vee-she-swahz), a rich and creamy potato-leak soup that’s served cold. Not being too well versed at the time, I assume that it was a French dish. Then I discovered that it was, in fact, American. It was conjured up by chef Louis Diat of the Ritz-Carlton in New York City in 1917. Still, we must give the French credit since the soup most likely evolved from the leek and potato soup very popular in France, potage bonne temme. In his book, Cooking a la Ritz, Mr. Diat himself sates that the name comes from Vichy, the French town near his childhood home. He called it Cream Vichyssoise Glacee.

Since discovering this gem I’ve become a fan of cold soups in general, especially when the humid, hot weather is upon us. Vichyssoise may incorporate its own ingredients but cold soups can be made with almost any vegetable. Or fruit, for that fact. Cold soups with vegetables just need cream and whatever herbs you prefer.  And all you need is a blender or food processor. Remember that you have to blend to a  nice smoothness. Now,  I like soups, hot or cold, on the thick side. Some prefer them a tad thinner. Just blend to the consistency you like. The important thing is the chilling—at least three hours in the fridge is essential. You can serve cold soups indoors or outdoors, even as a first course before grilling. If you want to be fancy about it, you can serve the soup in an iced tureen or chilled bowls. Or keep it cold in your thermos and chug it at work.

As for ingredients, the possibilities are endless: such greens as broccoli, spinach, zucchini, asparagus, etc.; or a white veggie such as cauliflower. Experiment—you won’t be disappointed. It’s the easiest thing to prepare.

EVERYDAY COLD SOUP

1 bunch of greens, such as asparagus, spinach, broccoli, leeks, etc. Or other vegetable such as a head of  
   cauliflower. The vegetables should be rinsed, drained, and cut into bite-sized pieces.
2 cups chicken broth (if you want a thinner soup, make it 3 cups)
1 clove garlic, crushed
1/8 teaspoon dried oregano or 1/4 teaspoon fresh
1/4 cup heavy cream
Salt and black ground pepper to taste.
1. Heat chicken broth in a pan, and bring to a boil. Add the vegetable, reduce heat, cover and cook 3 to 5 minutes depending upon thickness of veggie. They should be just tender.
2. Transfer to a blender or food processor. Add the garlic and oregano, and puree until just smooth.
3. Stir in the heavy cream and season to taste with salt and pepper. 
4. Chill in the fridge for at least 3 hours before serving.
     Yield: 4 servings.  

Enhanced by Zemanta

Bruschetta

Bruschetta (broo-sheh-tah) is just Italian bread drenched in olive oil and served with garlic and tomatoes. It goes back to at least the 15th century when folks where looking for a way to salvage stale bread. What better method than to drizzle it with olive oil and and top it with whatever was at hand? Apart from garlic and tomatoes, toppings may include basil, beans, and vegetables. According to the sources, bruschetta comes from the old Roman word bruscare (“to roast over coals”).

Some have compared bruschetta to plain garlic bread. But it’s more than that. It’s “garlic bread plus.” Now that summer is here and decent tomatoes are again available, bruschetta is a natural. I must admit that during the winter I survive on canned Italian tomatoes. Those measly specimens wrapped in cellophane just plain suck. And if you have a garden and grow your own tomatoes, you’re as close to heaven as you’ll ever be.

Bruschetta is commonly served as an appetizer (as in antipasto). But I’ve discovered you can serve it with almost any dish. I prefer it with steamed chicken—don’t know why, that’s just my thing. And since summer means grilling season, it goes great with any barbecue.

In the version given below,  I’ve added black olives and roasted peppers plus Pecorino or Parmesan cheese, whatever suits your palette.

BRUSCHETTA

5 to 6 ripe tomatoes, cut into large triangles
1 medium onion, thinly sliced
1/2 cup black olives
1/2 tablespoon fresh oregano (or 1 teaspoon dried)
Pecorino or Parmesan cheese to taste, grated or slivered
3 tablespoons olive oil
1 teaspoon red wine vinegar
1 loaf Italian bread, cut at an angle into slices about 1/2-inch thick
1 clove garlic, cut in half
1 can or 7-ounce jar roasted pepper (pimentos), sliced for garnish.

  1.  Preheat oven  to 375 degrees.
  2.  Place tomatoes in a big bowl.
  3 . Add onion, olives and oregano
  4.  Sprinkle with Pecorino or Parmesan cheese.
  5.  Add olive oil and vinegar, and mix to blend.
  7.  Rub bread slices with garlic halves on both sides.
  8 . Place on a cookie sheet or baking pan in the oven and bake until slices are slightly browned or golden.
  9.  Arrange bread slices on a platter, and top with tomato mixture.
10. Top with pimento slices and garnish around edge of platter with same.
      Yield: 4-5 servings.

Enhanced by Zemanta

In Praise of the Greasy Spoon

Back in my youth, such eateries as coffee shops and diners were known as “greasy spoons.” They were all over the place. I recall one at the corner of the elevated subway and Prospect Avenue in the Bronx. And which everyone in the neighborhood called “Los Griegos,” or “The Greeks,” since most diners, at the time, were Greek owned. There was another one on the corner of 110th street and Lexington Avenue, also called the same name by everyone around. Today there aren’t as many as before, although you can still find them in certain areas. Where I live on the East Side there is a local diner that my wife and I frequent, usually on Saturdays, when we do our errands. We have a set routine. We go to a nearby farmer’s market to get our produce, then to the Supermarket for the regular groceries, and so forth. At lunch time we have a bite to eat. I like eating at the dinner. I can get a bagel, or a tuna fish sandwich, or even an egg cream. It’s convenient, filling and cheap. Nothing fancy, just plain down-home edibles.

These days, however, we are also confronted by newer more “in” places, more “nutritionally correct” places. In my neighborhood recently, a new place has opened up that touts “organic burgers,” “organic salads,” and even “organic shakes.” It even boasts “organic wines and beer.” So this time around, my beloved wife suggested we try out the new place; that we eat “healthy” for once, rather than have the same old deal at the greasy spoon. I complied, curious to note how this new upscale place would compare. I’m always game for a new adventure.

Thus we sat in a comfortable booth in this new organic joint. The waiter or server, as they are known these days, a solicitous handsome young man, asked for our order. My wife knew what she wanted, she would try one of their organic bison burgers and a ginger ale. I ordered the usual for my Saturday noon meal, a bagel. “We have no bagels,” the server replied. This to me was weird. A New York eatery without bagels? That’s like a Catholic Church without incense. So I said, “O—kay, what have you got?” The server suggested one of their burgers, like my wife’s bison burger. Perusing down the menu I noticed they had  listed portobello mushrooms.  I decided on that. Then the server replied that they didn’t serve portobello burgers. “O—kay, I’ll have a portobello sandwich,” I said, and added, “on a roll.” We have no rolls,” the server informed. “You have a choice of a brioche or 2-grain bread.” Stumped, I said, “I’ll have the 2-grain bread.”

We had ordered, and we waited for our meal. My wife loved her bison burger. I, however, had a different experience. The minute I took a bite into the portobello sandwich, I couldn’t keep it down. It was the most salty thing I ever tasted. For health reasons, I avoid salt and sugar whenever I can. I seldom will grab the salt shaker at a table. This sandwich tasted like fatback. What looked like the manager of the place noticed my barely eaten sandwich on the table, and came over to ascertain what was wrong. I told him the sandwich was just too salty for my taste. He explained that could be because the portobellos had been.  dipped in balsamic vinegar before cooking. I cook with balsamic vinegar. I’ve never had this taste before. Something definitely was not right. The server came back and asked if I wanted something else. I figured I didn’t want to push my luck too far, so I ordered simplest thing I could think of: two pieces of buttered. “We have no butter,” the server said. “What?” I shook my head. “No butter?” “Yes,” the server elaborated, “we don’t use butter in this establishment.”

I sat there dumbfounded. Finally I just told him to bring me two pieces of 2-grain bread. And this was my lunch: two pieces of bread washed down by water. It called to mind those tales of prisoners on Devil’s Island subsisting on the same meal; or a young Edmund Dantes eating bread and water in his island prison before he became the Count of Monte Cristo. Had I known what was coming I would have ordered the organic wine or beer. At least I could have had a buzz while dining on bread and water.

The whole experience brings to mind an old adage by the writer Nelson Algren: “Never play cards with a man named ‘Doc’ or eat at a place called ‘Mom’s.” That says it all. Sometimes the best recourse is the old greasy spoons where you can get what you want without fuss or bother. I sing their praises every day of my life.

Enhanced by Zemanta

Polenta

One of my favorite nibbles is the corn meal dish called “polenta.” This is finely ground yellow or white corn meal that is cooked in boiling water until it thickens. It can be eaten as is, or leftover polenta can be baked or fried. “Polenta” is an Italian word derived from the Latin pulmentum, a term used to described various crushed grains. Ancient Romans ate versions of it known as puls. It was with the introduction of corn from the New World in the 16th century that modern polenta came into being. Prior to that time the crushed grains used included such items as flour and millet.

Polenta is known as a peasant food; and it is usually served with a sauce. Today it is eaten world-wide. In southern Austria it is eaten for breakfast; along the Adriatic Coast is is called pura or palanta and is usually served with fish. In Hungary it is prepared with sweetened milk. In South Africa, it’s eaten as a cornmeal mush called mealie pap. In the southern U.S. it’s popular as a dish called coosh, cornmeal mush that is sliced and fried and topped with maple syrup.It is also traditional in Brazil, Uraguay and Argentina, where many Italian migrated to in the 19th and 20th century.

I prefer polenta with stewed chicken or gravy. But you can serve it with sausages, mushrooms, roasted vegetables, just about anything. Given below is the traditional way of making polenta. All you need is corn meal, water and butter. Nothing could be simpler, or more satisfying.

POLENTA

3 cups boiling water
1 cup yellow corn meal
1 cup cold water
2 tablespoons butter
Salt to taste

1. Bring the 3 cups of water to a boil.
2. Combine the corn meal with the cold water, stirring to break up any lumps. Add this gradually to the boiling water, stirring constantly. Add the butter and salt and continue cooking, stirring about 15 to 20 minutes until the polenta achieves a smooth creamy texture.
     Yield: about 8 servings.

Vegetable kabobs

One of my all time favorite dishes is Shish Kabob (or Shish Kabab). Whether it’s Middle Eastern, Arabic or Israeli, I love the suckers. I make them with lamb, beef or poultry; in sandwiches, pita bread, or over rice pilaf or steamed white rice. But what do you do if you’re a vegetarian? Well, you can make veggie kebobs. That’s right, veggie style. And just the same way as you would prepare regular shish kebob.

So, for my vegetarian friends, what follows is a vegetable kebob recipe. You can use almost any firm vegetable for this; just cut them up into pieces. You can try broccoli florets, or asparagus, or cauliflower, Brussels sprouts, or even add tofu. In this recipe I went for zucchini, cherry tomatoes, onions, pimentos, and white mushrooms. In terms of mushrooms, you can substitute portobello, cremini, oyster mushrooms, shitake or any other. Let your imagination run wild.

VEGETABLE KEBOBS

2 medium zucchini, washed, with ends cut off, and each zucchini cut into 6 slices
12 cherry tomatoes, washed and dried with paper towels
2 pounds fresh white mushrooms, washed and dried with paper towels
2 large onion, peeled and cut into eights
I large bell pepper (pimento), green, yellow or red, washed and cut into squares
1/2 cup olive oil
2 tablespoons fresh chopped parsley
1/2 teaspoon dried oregano
3 garlic cloves, finely minced
1/4 teaspoon freshly ground black pepper

1.  Place vegetables on skewers, alternating vegetables.

2. Place olive oil in a small bowl. Add parsley, oregano, garlic and pepper. Mix well; and brush over all the vegetables.
3. Place skewers under the grill in an oven; or in an outdoor grill, either using a gas grill or over hot coals. Grill for about 5 minutes. Turn and grill another 5 minutes, brushing with olive mixture frequently while cooking.  
    Yield: 4 to  servings.

Enhanced by Zemanta

Broiled Tuna Sandwiches

I’m an aficionado of canned tuna fish. Have been all my life. Like most Americans, it’s mainly been in the usual tuna fish sandwiches. You know the deal: 2 slabs of bread and tuna mixed with gobs of mayonnaise. Canned tuna has so many uses. Back in Spanish Harlem, during my salad days, we use to make a quick meal of canned  tuna fish over rice. Simple and delicious. But the sandwiches remained our usual standby. And in our experimenting with tuna sandwiches we came upon our favorite: broiled tuna sandwiches (of which the recipe is given below).

It should be noted that in the U.S. 52% of canned tuna is used for sandwiches. While 22% is for salads, and 15% is for other uses such as casseroles. Canned tuna comes in 2 variations: Chunk Light and White Albacore (also known as “solid white tuna”). Chunk light tuna comes from darker species of tuna and is considered not as good as solid white. The interesting thing is that chunk light contains lower levels of mercury than albacore white and thus it’s healthier for you. According to the American Medical Association, canned tuna contains various levels of mercury. So,  for young children it should be limited to no more than 2 meals a month. Whereas chunk light should be limited to 3 meals a month. All this is off-set by the fact that canned tuna is a good source of Omega-3 fats that help reduce cardiovascular disease.

BROILED TUNA SANDWICHES

2 cans (5-oz) tuna, flaked
1 cup chopped celery (about 2 large ribs)
1/4 cup mayonnaise
1 clove garlic, finely minced
1/4 teaspoon dried oregano
Freshly ground black pepper to taste
4 hamburger rolls, split and toasted (or 8 slices toast)
Grated Parmesan cheese to taste

1. In a bowl mix all the ingredients except the rolls and Parmesan cheese.
2. Spread rolls on a baking pan or cookie sheet, and spread with the tuna mix to cover. Sprinkle with Parmesan.
3. Broil about 6 inches from heat source until bubbly (about 5 minutes).
4. Cover with roll tops. Cut each roll in half and serve.
    Yield: 4 servings.

The Power of Grits

I came across grits, that all-American gem, while stationed down South during my time in the Marine Corps. And I got to love them. I was, and remained hooked on grits. This archetypical Southern staple is like no other. Strange that a kid from Spanish Harlem should become so enamored of this dish but, then, why not?

Grits are of North American Indian origin. It is simply coarsely ground corn. The preferred version in the South is hominy grits. This is field corn that is soaked in lye water (what in the old days was known as potash water). The corn kernels swell to twice their size, and are then dried and ground. Hominy as an Indian food goes back to at least 5,000. When European colonists came to the Americas, the Indians taught them how to make it. Hominy comes in three varieties: fine, medium or coarse. A newer innovation, quick grits, is very fine grain that has been pre-steamed. But no real Southerner would ever eat or cook quick grits. That would be sacrilege. To them the old-fashioned stone ground gits is the real deal.

Grits comprise the typical Southern breakfast. They are nominally served with butter, sausage, country ham or red-eye gravy. The words “grits” is derived from the Old English “grytt,” meaning coarse corn meal. As such grits is similar to corn-based porridges such as the Italian polenta and the ever popular farina. Besides breakfast, grits has another use: when I was down South they would take leftover cold grits, slice it like bread and fry the slices in oil. Another way to enjoy this heavenly item.

When making grits, the rule of thumb is that grits it will consume four times their volume. So, for 1 cup of grits use 4 cups or water or chicken stock, and simmer for 20-25 minutes until the liquid is absorbed. I recall that grits was popularized in the 70s TV series Alice where the waitress, Flo, working at Mel’s Roadside Diner, would always exclaimed, “Mel, kiss mah grits!” And, just one more fact, there’s even a World  Grits Festival held yearly in St. George, South Carolina.

The recipe given below is simply grits cooked with onion, garlic, nutmeg, red pepper, Cheddar cheese and eggs. Then the whole thing is baked in a casserole. Another innovative way to cook grits, and it’s scrumptious.

CHEESE BAKED GRITS

1 cup grits
4 cups boiling water or chicken stock
Salt to taste
2 tablespoons butter or margarine
1 medium onion, chopped
1 clove garlic, finely minced
1/4 teaspoon grated nutmeg
1/2 teaspoon crushed red pepper
2 cups grated sharp Cheddar cheese
4 eggs, separated

1. Stir grits into boiling water or stock. Add salt and cook until soft.
2. As the grits cook, preheat oven to 350 degrees F.
3. In a small pan, melt the butter and saute the onion and garlic until soft.
4. Add to the cooked grits along with the nutmeg, red pepper and Cheddar cheese. Stir to combine.
5. Let cool slightly and add the egg yolks.  In a small separate bowl beat egg whites until stiff and they  hold soft peaks. Fold into grits mixture.
6. Spoon mixture into a casserole (about 2 quarts). Here I prefer to use a cast-iron pan. But any good baking pan or souffle dish will do. Place in oven and bake for 25-30 minutes until desired degree of doneness.
    Yield: Six or more servings.
   

Older posts Newer posts

© 2026 Oswald Rivera

Theme by Anders NorenUp ↑