Oswald Rivera

Author, Warrior, and Teacher

Category: vegetables (page 15 of 16)

Tomatoes for the End of Summer

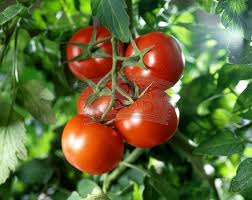
By now most of us are, as the saying goes, “tomatoed-out.” In the dark days of winter we dream of fresh, succulent vine-ripened tomatoes. By late August, we’ve just about had our fill. I mean, how many tomato salads or stuffed tomatoes can you have? Well, kiddies, the season will last until October. And, yes, there are still many innovative ways to use this vegetable. Below are given some ingenious ways to use tomatoes. So, in the middle of a frosty February, you can again begin to dream of the fresh juicy crop come June .

RAW TOMATO SAUCE

That’s right, a raw sauce where the tomatoes don’t have to be cooked. Simple: In a bowl, combine 1 pound chopped tomatoes or 1 pint cherry tomatoes, halved; 1/2 cup diced mozzarella cheese; 1/3 cup chopped black olives; 1/4 cup olive oil; 1 teaspoon capers; 1 tablespoon red wine vinegar and 2 garlic cloves, minced. Stir in 1/4 cup fresh chopped basil, 1 teaspoon oregano, salt and pepper to taste. Let the bowl stand for 1/2 hour to allow the flavors to combine. Toss with you favorite hot pasta. 4 servings.

TOMATO WITH BASIL AND MOZZARELLA

The all time favorite, and the easiest thing to prepare: Wash and slice off the tops and bottoms of 1 pound tomatoes, and cut the tomatoes into about 3 slices each. Slice 1/2 pound mozzarella very thinly; wash and  dry 10-12 large basil leaves (more if the leaves are small). On a salad plate, arrange the mozzarella and basil on the tomato slices, drizzle with olive oil, and sprinkle with some oregano and pepper. 4-3 servings.

TOMATO GRATIN

A fancy-fied tomato dish to impress your guests: Preheat oven to 500 degrees F. Cut 2 large beefsteak tomatoes into 1/2-inch slices. Arrange the slices, slightly overlapping, in an oiled 9-inch gratin dish or shallow casserole.  Sprinkle with salt and pepper to taste, 2 tablespoons finely chopped basil, and 1 teaspoon oregano. Cook 2 garlic cloves, peeled and minced, in a small pan or skillet over moderate heat, stirring until fragrant, about 1 minute. Remove from heat and stir in 1 cup fresh bread crumbs, 1/3 cup grated Parmesan cheese, and salt and pepper to taste. Sprinkle over the tomatoes, and bake in the middle of oven until bread crumbs are golden, about 15 minutes. 4 servings.

TOMATO-FETA PITA SANDWICHES

In a large bowl, combine 1/4 cup olive oil and 1 tablespoon red wine vinegar. Add 1 teaspoon oregano, and salt and pepper to taste; 1 pint cherry tomatoes, halved; 1 medium cucumber, peeled, seeded and diced; 1 medium green bell pepper, chopped; 1/3 cup black olives, halved; 1 small red onion, chopped; and 1/2 cup fresh chopped parsley. Mix together, then stir in 1 cup crumbled feta cheese. Take 4 (8-inch) diameter pita bread, cut in halve and stuff with the tomato mixture. 4 servings.

HOMEMADE KETCHUP

That’s right, homemade ketchup. Believe me, much better than the stuff you get at the grocers, and much healthier. Store bought ketchup is all processed sugar and salt. Ca-ca. And the homemade brand is so easy to make: In a food processor, puree and blend 1/3 cup water; 3 small tomatoes, chopped; 2 tablespoons white vinegar; 1/4 teaspoon ground cloves; 1/4 teaspoon pepper; 1/3 cup honey; 1 tablespoon maple syrup, and 1 tablespoon cornstarch. That’s it. You’ll never use the store-bought stuff again.
  

Enhanced by Zemanta

Vegetable kabobs

One of my all time favorite dishes is Shish Kabob (or Shish Kabab). Whether it’s Middle Eastern, Arabic or Israeli, I love the suckers. I make them with lamb, beef or poultry; in sandwiches, pita bread, or over rice pilaf or steamed white rice. But what do you do if you’re a vegetarian? Well, you can make veggie kebobs. That’s right, veggie style. And just the same way as you would prepare regular shish kebob.

So, for my vegetarian friends, what follows is a vegetable kebob recipe. You can use almost any firm vegetable for this; just cut them up into pieces. You can try broccoli florets, or asparagus, or cauliflower, Brussels sprouts, or even add tofu. In this recipe I went for zucchini, cherry tomatoes, onions, pimentos, and white mushrooms. In terms of mushrooms, you can substitute portobello, cremini, oyster mushrooms, shitake or any other. Let your imagination run wild.

VEGETABLE KEBOBS

2 medium zucchini, washed, with ends cut off, and each zucchini cut into 6 slices
12 cherry tomatoes, washed and dried with paper towels
2 pounds fresh white mushrooms, washed and dried with paper towels
2 large onion, peeled and cut into eights
I large bell pepper (pimento), green, yellow or red, washed and cut into squares
1/2 cup olive oil
2 tablespoons fresh chopped parsley
1/2 teaspoon dried oregano
3 garlic cloves, finely minced
1/4 teaspoon freshly ground black pepper

1.  Place vegetables on skewers, alternating vegetables.

2. Place olive oil in a small bowl. Add parsley, oregano, garlic and pepper. Mix well; and brush over all the vegetables.
3. Place skewers under the grill in an oven; or in an outdoor grill, either using a gas grill or over hot coals. Grill for about 5 minutes. Turn and grill another 5 minutes, brushing with olive mixture frequently while cooking.  
    Yield: 4 to  servings.

Enhanced by Zemanta

Potato Pancakes

Potatoes have been with us since the beginning of time. But it was the Spanish conquistadors who brought it to Europe from Peru in the 16th century. Funny thing is that it wasn’t until the 1800s that potatoes gained currency throughout most of Europe and became the common staple we know today. It’s popularity is understandable. It is one of the most versatile of foods. Yet, over time it has become routine. We serve them fried, baked or mashed. Our Jewish brethren, during the Hanukkah festival. make them in the form of latkes, or potato pancakes. But, just like with rye bread, you don’t have to be Jewish to enjoy potato pancakes. They are easy to make; and are a well-deserved change from the usual fries.

One can have potato pancakes for breakfast, lunch or dinner. They make a great side dish with ham, steak or chicken. Or you can enjoy them simply with applesauce or sour cream.

Given below is a basic potato pancake recipe. I’ve learned through experience that it’s convenient to keep them warm in a low oven depending on time constraints. Believe me, once you’ve tasted these suckers, they’ll become a regular event.

BASIC POTATO PANCAKES

4 large russet potatoes, peeled
1 medium red onion
2 cloves garlic, peeled
1/2 cup parsley or cilantro leaves
2 eggs, lightly beaten
Salt and ground black pepper to taste
3-4 tablespoons all-purpose flour
Vegetable oil for frying (about 2 cups)

1. In a food processor, grate the potatoes, onion, garlic and parsley (or cilantro). Using a rubber spatula or wooden spoon, scrape into a large bowl. Drain off any excess liquid.
2. Mix in the eggs, salt and pepper. Add enough flour to the mixture to make it thick (about 3-4 tablespoons should do it).
3. Preheat oven to low (about 200 degrees F. or 95 degrees C.).
4. Heat a large heavy skillet or pan (I prefer cast iron) over medium heat. When hot, add oil to generously coat the bottom of the pan (about1/4-inch oil should be sufficient). Drop two or three 1/4-cup batter into hot oil, and flatten to make 1/2-inch thick circles. Fry, turning once, until golden brown (about 4-6 minutes per side). Drain on a plate lined with paper towels, and repeat until all the batter is used. Keep warm in the low oven until serving time.
     Yield: 4 servings.

Tomatoes

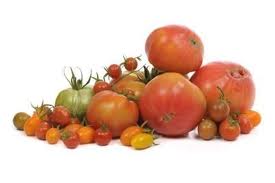
It’s summer and  juicy, ripe tomatoes are in season. It’s what we dream about in the depths of winter when all you can get are those mealy cellophane wrapped tomatoes that taste like sawdust. Then summer comes in with its the glorious abundance of plum tomatoes, beefsteak tomatoes, cherry tomatoes, you name it. In January and February we would kill for one of these. In Summer they are all over the place, and we can’t get enough of them.
The season for fresh-picked tomatoes is June through October, the bumper crop time. Tomatoes, besides being tasty, are actually good for you. They are an excellent source of vitamin C, as well as potassium. They also contain what are known as antioxidants (minerals and proteins) which help control blood pressure and prevent the development of such diseases as cancer, heart disease, and rheumatoid arthritis.. They can be fried, broiled, boiled, baked, and prepared in hundreds of ways. They not only bring taste, but also color and nutrition to any dish.
Given below are four simple tomato dishes. Just a sample of the ways you can enjoy this treat.
1. RAW TOMATO SAUCE
In a bowl, combine 1 1/4 pounds chopped plum tomatoes, 1 large handful chopped fresh basil leaves, 2 tablespoons chopped pitted black olives, 1/2 cup diced part-skim mozzarella cheese (or grated pecorino), 1 clove minced garlic, 4 tablespoons olive oil, 1 teaspoon red-wine vinegar, 1 teaspoon dried oregano, and salt and pepper to taste.  Cover and let stand at room temperature for 1-2 hours to let the flavors mingle. And serve with freshly cooked pasta of your choice.
2. TOMATO AND OLIVE SALAD
In a bowl, combine about 1 pound diced tomatoes (or cherry tomatoes, halved), 1 bunch sliced scallions, 1/2 cup sliced pimento-stuffed green olives (otherwise known as Spanish olives), 2 tablespoons olive oil, 1 teaspoon red-wine vinegar, 1 teaspoon oregano, and salt and pepper to taste. Serve as a salad, with tortilla chips, or (my favorite) over  steamed white rice as a veggie meal.
3. BAKED TOMATOES WITH CHEESE TOPPING
Cut four beefsteak tomatoes in halve horizontally. Top with a slice of mozzarella  cheese or grated Parmesan, oregano, salt and pepper to taste. Drizzle with a little olive oil and bake in a preheated oven, 450 degrees F., until tender (about 15 minutes). Yield: 4 servings.
4. SALMON-STUFFED TOMATOES
Combine in a medium-sized bowl, 1 can (8 ounces) salmon, drained. Flake the salmon and combine with 1/4 cup mayonnaise (or salad dressing), 1 tablespoon chili sauce, 1/2 grated small onion, 2 teaspoons lemon juice, 1/2 teaspoon dillweed, 1/2 teaspoon Worcestershire sauce,  and 1/8 teaspoon salt. Slice off stem ends of 4 medium tomatoes. Gently scoop out pulp, leaving  1/2-inch wall. Finely chop pulp and combine with salmon mixture. Stuff each tomato with the salmon. Place on a serving platter and chill. Before serving, garnish each with parsley sprigs. Yield: 4 servings.
There you have it, terrific and enjoyable summer tomatoes for picnics, barbecues or even a dinner. Go at ’em.

Domplines – Puerto Rican Dumplings

Almost every culture has dumplings as a staple. Usually, the dumplings are stuffed with some savory ingredient or other. In our culture we have domplines (pronounced “dom-plee-ness), which are our version of dumplings, except, they are not stuffed. It’s more like deep friend dough, which is a common staple in the Caribbean. Other places have it such as in Indian cuisine where they deep fry the dough and call it poori.

In our family, domplines have been with us forever. I remember my grandmother making them for breakfast with eggs, or at lunch or dinner with codfish. They are deceptively easy to make, and quite tasty. Given below is the basic recipe for domplines. If you want to liven up the recipe even more, you can add one or two minced cloves of garlic to the dough. This will give it an extra tang (if desired).The recipe is from my first cookbook, Puerto Rican Cuisine in America (Perseus Books Group: Running Press).

DOMPLINES (Puerto Rican style dumplings)

4 cups flour
1 teaspoon baking powder
2 tablespoons butter
1 cup lukewarm water
1/2 teaspoon salt
Vegetable oil for frying

1. Combine flour, baking powder and butter in a bowl.
2.Add salt to water and add to flour, a bit at a time, while mixing with a wooden spoon until it forms a doughy consistency.
3. Remove this dough to a lightly floured surface and knead continuously with hands until soft.
4. Form kneaded dough into a horseshoe shape and set aside.
5. Fill a cast iron or heavy bottomed skillet halfway with vegetable oil (usually about an inch). Heat until oil is very hot. Break off a small piece of dough and shape into a flat round patty. Drop patty into skillet and stir-fry until golden (about 5 minutes). Repeat until dough is all gone. Remove and drain on absorbent paper towels.
    Yield: about 20 dumplings
Note: If a little color is desired, you can add 1/2 teaspoon of  ground turmeric to the flour during the first step. This will render truly golden-yellow dumplings.

Buran – Eggplant/Lamb Recipe from the 13th century Arab World

In these perilous times, in this part of the world, what we hear about Islam and Muslims in general is rather negative. And yes, it’s understandable, given the wars we are in. But does anyone realize that, at one time, the tables were turned and while Europe was in the throes of its dark ages, the Islamic world was at the height in terms of science, culture, and government? Not only that, while Medieval western man was dining on rancid meat, in the Arab world, they were dining on savories cooked with spices from China and India and exotic fruit from Central Asia. In the West they subsisted on salted pork, roots plants and fermented ale, if they were lucky. In the Arab world they were using rosewater in their cooking and enjoying truffles from the Arabian Desert.

One of the earliest cookbooks comes from this period. It dates from the 13th century, and its author is a famed gourmet of the time, al-Baghdadi (his whole name is Muhammad ibn al-Hassan Ibn Muhahad ibn al-Karim al-Katib al-Baghdadi). His recipes reflect the times: they are full of spices from the East and are replete with frying, mincing, boiling, staining and stewing, usually all in one pot. Al-Baghdadi’s masterworks are lamb recipes. He cooks lamb with rice, with chickpeas, even with noodles. But the recipe given, Buran (my favorite) is simply lamb kabobs  served with friend and mashed eggplant.

So, tonight, imagine you’re in the court of the Caliphs, you’re the prince or princess of Persia and you’re dining on Buran, a gastronomic Arab delight.

BURAN

1 medium eggplant, about 1 1/2 pounds, peeled and cut lengthwise into 1/2-inch slices
1 pound ground lamb
1/4 cup sesame oil
1/2 cup vegetable oil
Salt to taste
1/4 teaspoon ground coriander
1 cup plain yogurt
2 cloves garlic, peeled and finely minced
1/2 teaspoon ground cumin
1 teaspoon ground cinnamon

1. Cook the eggplant in boiling salted water for 5 to 6 minutes. Drain and let stand at least 1 hour.
2. Meanwhile, use wet and oily hands to shape the lamb into small meatballs (about 20 to 30 kabobs). Heat the sesame oil in a large skillet and fry the meatballs over medium-high heat until well browned (about 10 minutes). Cover with water, bring heat to low and simmer until most of the water has evaporated and only some of the oil is left. Set aside and reserve.
3. Heat the vegetable oil in a large skillet (or use the same skillet from before), and fry the eggplant over medium heat until golden on both sides. The frying may be done in several batches with more oil being added as needed. Place the eggplant in a bowl and mash with a ladle or large spoon. Add salt, coriander, yogurt, garlic, and mix well.
4. Transfer the eggplant to a serving dish, arrange the meatballs on top, sprinkle with cumin and cinnamon, and serve.
    Yield: 4 servings.

Eggplant Parmesan/Provencal

Back in Spanish Harlem, in our family’s repertoire, one of the standby dishes was Eggplant Parmesan. Although we didn’t call it that. We are vociferous eggplant eaters, and the dish was just another version which we knew as eggplant Italian style because we added grated cheese. To us, back then,  any dish that had Parmesan cheese in it was considered Italian; just like any dish that had soy sauce was considered Chinese. It was the innocence of the meat and potato days of yore.

What made our version delectable is that it contained crispy friend eggplant, which we loved. Add a little tomato sauce, grated Parmesan, some good crusty bread and you has a great meal. Later in life, I discovered the French Eggplant Provencal, which was the same damn thing minus the cheese. You just add some capers to it and baked the eggplant instead of frying. Also, to the French, Eggplant Provencal is normally served as an appetizer. Whichever method you use, if you’re an eggplant lover, you’ll savor the meal. And, even if you don’t like eggplant, you just might change your mind.

EGGPLANT PARMESAN

1 medium-sized eggplant (about 1-1/2 pounds), peeled and cut into 1/2-inch slices
1/2 cup flour
1 teaspoon salt
1/8 teaspoon ground black pepper
1 teaspoon oregano
1/2 cup olive oil or vegetable oil (or more for frying)
3 tablespoons grated Parmesan cheese
1/2 cup canned tomato sauce, heated

1. Blend flour, salt, pepper  and oregano on a plate or piece of wax paper and coat each eggplant slice well with mixture.
2. Heat half of the olive oil in a heavy skillet, and fry as many slices of eggplant as can be accommodated without crowding until crisp and brown on both sides. Transfer slices to a shallow heat-proof platter or pie plate, and keep warm.
3. Add remaining oil to skillet and brown rest of eggplant slices. Sprinkle half of browned eggplant in platter with a tablespoon grated Parmesan cheese. Add remaining slices and second tablespoon of cheese.
4. Pour hot sauce over and around eggplant. Sprinkle with remaining cheese, place under a hot broiler from 3 to 4 minutes, and broil briefly until cheese melts and is slightly brown.

EGGPLANT PROVENCAL

1 medium-sized eggplant (about 1-1/2 pounds), peeled and cut into 1/2-inch slices
1 cup olive oil
1 clove garlic, peeled
1/2 cup canned tomato sauce
1 teaspoon salt
1/8 teaspoon ground  black pepper
1 teaspoon oregano
1/2 cup capers

1. Preheat oven to 450 degrees F.
2. Dip eggplant slices in olive oil, and arrange on a flat baking pan or dish (I prefer cast-iron). Bake 10-15 minutes or until tender.
 3. Crush garlic and brown lightly in a little olive oil in a small saucepan. Add tomato sauce and cook until hot. Remove from heat and season with salt, pepper and oregano.
4. Pour sauce over eggplant, sprinkle with capers and serve hot or cold.

For both recipes the yield is about 4 servings.

Enhanced by Zemanta

Stuffed Plantain Balls

I love plantains, especially green plantain, the type that we prepare in fritters called tostones. But you also have ripe plantains; essentially green plantains that have ripened to a deep, dark yellowish color. Some people prefer the ripe plantain since they give a sweeter flavor. In my family we prefer tostones. Although once in a while we cook ripe plantains with eggs for breakfast; or in a traditional dish called pinon (pronounced peen-yon) , a layered casserole of ripe plantains, beef and kidney beans.

Another of our favorite uses of ripe plantains is cheese-stuffed plantain balls. Think of it as fallafel balls but with cheese inside and a luscious, sweet exterior. Believe me, once you’ve had these plantain balls, you’ll be hooked. They can be served as an appetizer or as a main entree accompanied by rice—a perfect vegan dish.

CHEESE-STUFFED PLANTAIN BALLS

6 ripe plantains, unpeeled and cut in half widthwise
8 cups water
Salt to taste
1/4 cup butter
2 tablespoons cornstarch plus cornstarch for shaping balls
1/2 pound cheddar cheese, shredded
Oil for deep frying (vegetable oil, corn oil, canola oil, olive oil, etc.)

1. Drop the plantain halves into boiling salted water and cover. Cook rapidly for 20 minutes. Drain. Peel the plantains and mush the pulp. Add the butter and 2 tablespoons cornstarch and mix well. Let cool enough to handle.
2. To shape the balls, coat the palms of the hands with cornstarch. Pick up about 1 tablespoon of the pulp (or 1 teaspoon, depending on the size desired) and flatten slightly between the palms. Add a portion of the cheese and mold the plantain around it, shaping the whole into a ball. Repeat until all the balls are formed. Be aware that you can make the balls as large or as small as you desire. In the Rivera family we like big plantain balls. Other folk may prefer smaller variations similar to Swedish-type meatballs.
3. Heat the oil for deep frying. Drop the balls into the oil and cook until golden. Remove and drain on paper towels.
    Yield: 8 to 12 balls, depending on size.

Enhanced by Zemanta

Pumpkin Gratin


Halloween is upon us yet again. And the jack-o-lanterns are out. Anybody ever consider cooking those suckers? I would not recommend it. The traditional pumpkin used as a jack-o-lantern motif makes for a flavorless, insipid dish. That’s why they are used for decorations. In my culture, pumpkin are prized as bianda or cooked root plants that we use to enhance a meal. Traditionally, our favorite pumpkin dish is very simple: slice a piece of pumpkin, peel, remove seeds, and boil until tender. Then serve with olive oil and vinegar.

But I’ve experimented with pumpkin dishes and found that they make a great gratin. A gratin (pronounced grah-tan) comes from French cooking. It is a dish prepared with a brown crust. My pumpkin gratin is quick and easy to make, and it’s tasty to boot. Again, use small available commercial pumpkin, not the Halloween type or, better yet, you can use winter squash or butternut squash.

So, here goes Le gratin de Courge, as our French brethren would say. It makes a fabulous side dish or accompaniment to any meal.

PUMPKIN GRATIN

2 to 2 1/2 pound pumpkin, butternut, or other winter squash, halved, seeded, peeled, and cut
into 1/2-inch cubes
1/4 cup flour
1/3 cup olive oil
8 garlic cloves (yes, 8), finely chopped
3 tablespoons chopped fresh parsley
Salt and ground black pepper to taste
1/4 teaspoon chopped fresh oregano (or pinch dried)

1. Preheat oven to 325 degrees F.
2. Toss the pumpkin or squash cubes in the flour until they are evenly coated.
3. Generously oil the bottom and sides of an ovenproof casserole, Dutch oven, or cast-iron pan (you will have some oil left over). Fill the casserole with the pumpkin or squash. Then scatter the garlic and parsley over it, and season with salt, pepper, and oregano. Sprinkle the remaining oil over the pumpkin or squash.
4. Place in oven and bake for 2 to 2 1/2 hours or until the top has formed a rich dark crust. Note that it’s not necessary to add water during cooking since the pumpkin or squash produces enough liquid on its own.
Yield: 4 servings.

Enhanced by Zemanta

Colcannon for Saint Paddy’s Day


Saint Patrick’s Day is here again. According to legend, Saint Patrick drove all the snakes out of Ireland. My father use to say use that, after hoisting a few drinks, all the snakes came back. Be it as it may, it’s time for festivity, joy, green beer, green hats and all that goes with this glorious holiday, at least on this side of the pond.

The traditional dish for Saint Paddy’s day is, of course, corned beef and cabbage. However, there is another Irish treat that I myself am partial to: Colcannon. This is a country dish that’s right up there with Irish stew and Irish soda bread; and it can be served on Saint Paddy’s day or any other day of the year. It’s a homey, delicious dish. Some would call it mashed potatoes plus. But that doesn’t do it justice. It’s far tastier and richer than ordinary mash potatoes. It goes great with a few rashes of Irish bacon or a few slices of smoked ham. Add a pint, and you’re in heaven.

COLCANNON

8 large mealy potatoes
8 small white onions, peeled
3 scallions, washed and trimmed
1 cup half and half milk
1 1/2 cups boiled, chopped Savoy cabbage
3 tablespoons melted butter
Pinch of grated or ground nutmeg
Salt and ground black pepper to taste

1. Boil potatoes, peel and mash. Place in a large bowl and set aside.
2. Put the half and half in a small pan or skillet. Add onions and scallions and cook over medium-low heat until tender. Strain, reserving liquid. Mince onions and scallions.
3. Add the onions, scallions, and the half and half liquid to the potatoes. Mix well and whip until fluffy. Add more half and half milk if needed. Stir in all other ingredients and blend well.
Yield: 6 servings.

Reblog this post [with Zemanta]
Older posts Newer posts

© 2026 Oswald Rivera

Theme by Anders Noren — Up ↑