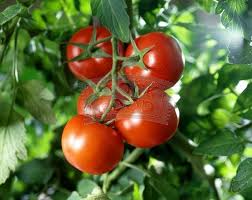
Oswald Rivera

Author, Warrior, and Teacher

Category: all (page 72 of 77)

Rice Pudding


For the holidays we Puerto Ricans have our own versions of desserts. The most popular is arroz con dulce. Simply, rice pudding. The literal translation of arroz con dulce is “sweetened rice.” A more appropriate term would be sweet coconut rice. Coconut milk is the main component of the dish. In my first cookbook, Puerto Rican Cuisine in America, I give the recipe using a fresh ripe coconut. If you want to be traditional and use a genuine coconut, you are welcomed to get the book and try the recipe. For those who don’t have the time to crack open and prepare a coconut, I give below a quicker recipe using canned coconut milk or cream. In either case, the recipe is marvelous and delicious. Believe me, this is not your ordinary rice pudding recipe. As a dessert, it sets the bar pretty high.

ARROZ CON DULCE (Rice Pudding)

2 cups either long grain or short grain rice
2 cups canned coconut milk or cream
1 5-ounce can evaporated milk
1 teaspoon ground cinnamon
1 teaspoon ground cloves
1 teaspoon salt
1/4 teaspoon vanilla extract
1/2 cup seedless black raisins
1 1/2 cups brown sugar
1 teaspoon butter or margarine
1/2 cup cracker crumbs

1. Wash rice at least three times in cold water and drain to rid it of starch. What in Pennsylvania Dutch country is known as “washing in several waters.”
2. In a heavy kettle or pot, heat one cup water. When it comes to a roiling boil, add rice, coconut milk, evaporated milk, cinnamon, cloves, salt, vanilla, raisins, sugar and butter. Cook on moderate heat, stirring frequently with a wooden spoon, for 35 minutes or until rice is tender and most of the liquid has been absorbed.
3. Spoon into a round serving platter or large pie plate.
4. Sprinkle with cracker crumbs and allow to cool at room temperature before serving.
Yield: 10 0r more servings.

Enhanced by Zemanta

Latkes – Reprise


Last year about this time I put up my recipe for Puerto Rican latkes. We discovered latkes from our Jewish friends when they celebrated Chanukah (also known as Hanukkah). We Latinos love every manner of fritters and, to us, that’s what latkes were. In our family we soon started making our own, Caribbean version. We make then every year and we grew to love them. While experimenting with them, we also discovered that if you add some grated carrots to the recipe, it enhances the flavor.

So, here again are potato latkes, Puerto Rican style.

POTATO LATKES (RIVERA FAMILY STYLE)

3 large potatoes
1 small onion, chopped fine
3 eggs
1/4 cup grated carrots
2 tablespoons matzo meal
1 teaspoon salt
1/4 teaspoon pepper
1/4 teaspoon oregano
2 tablespoons parsley, chopped
Oil for frying (I use a combination of vegetable oil and olive oil, 1/2 cup or more)

1. peel the potatoes and grate them into a bowl. You can do it by hand (the traditional method) or by using a food processor. Squeeze out the extra liquid into the sink.
2. Add onion, eggs, carrots, matzo meal, salt, pepper, oregano and parsley. Mix well.
3. In a large heavy skillet (I prefer cast-iron), heat the oil. Using a tablespoon, carefully drop the potato mixture into the hot oil and fry until browned on both sides, turning only once (about 3 minutes per side). Some prefer to flatten each latkes with a spoon. Use whatever method you desire. The latkes should not only be golden but crispy.
4. Drain on paper towel and serve with applesauce, sour cream or preserves.
Yield: about 2 dozen or more latkes.

Enhanced by Zemanta

Sofrito


Sofrito. I love the word: “Soh-free-toh.” Without it, Puerto Rican cuisine would be scant indeed. It is an aromatic mix of herbs and spices that is a base for cooking countless dishes. This concept can be found in other cultures as well. Think of garam masala, the Indian mix that is also used a a base flavoring. Or kimchi in Korean cusine. We use sofrito when cooking chicken, fish, pork, beef, you name it—almost everything except desserts.

Sofrito can be whipped up in a few minutes in a blender or food processor. The word itself is a generic term that has no correct English translation. “Frito” is Spanish means fried. Sofrito could be taken to mean stir-fried, although this would not be entirely accurate. Sofrito can be stored in a closed, tight jar or container in the refrigerator for 3 to 4 days or, in the freezer compartment, indefinitely. It’s the kind of product where the basic recipe can be doubled or tripled, depending on how much you may want to use. Given below is a quick recipe.

Sofrito

8 leafy stems of cilantro (available almost anywhere these days)
1 medium green bell pepper (pimento)
1 clove garlic, crushed
1 medium onion, coarsely chopped
1/4 pound aji dulce (small, sweet chili peppers found in most bodegas or Asian stores and sold
loose by the handful or in packets of 1/2 to 1/4 pound. A 1/4 pound packet contains about 28
peppers) They should be sliced in half with inner seeds removed.
6 whole leaves recao, chopped (recao is a small, green stemmed herb also found in Caribbean
and Asian markets). If you don’t have recao, you can substitute curly parsley. In the Cuban
version of sofrito they disregard recao altogether. Let you tastebuds be the judge.

Combine all the ingredients in a blender and puree until it has a smooth, sauce-like consistency, adding 1 tablespoon of olive oil or vegetable oil while pureeing. This will yield about 1 1/3 cups.
In terms of storing sofrito, a great idea is to freeze it in ice trays. A regular size ice cube is equal to approximately 2 tablespoons of sofrito. You simply plop a cube into the skillet or stew pot, and it’s much easier than scooping out tablespoons of the stuff from a can in the freezer.

Okay, how do you use it? Simple. You can just add it as is to a stew or soup to enhance its flavor; or to a pot of beans, or almost any other dish to give that added kick. If you want to make flavorful, colorful rice, saute 1 or 2 tablespoons sofrito in 1 tablespoon olive oil or corn oil for about a minute or so to blend the diverse flavors. Add 1 tablespoon of tomato sauce or tomato paste and cook a minute or 2 longer. Add rice, water, and cook as you normally would. It makes plain white rice LUXURIOUS.

A final note. There are now on supermarket shelves many erzats sofrito products. Skip ’em. All you’re getting are chemicals and assorted crap. Nothing beats homemade sofrito. Besides, it’s so easy to make.

The Color of Rice


My friends marvel when I serve them rice pilaf or yellow rice dishes. Invariably they ask: what colors the rice? It’s a complex question, depending upon the dish. Fragrant colored rice has been in my culture since the beginning. It was the Spaniards who got the method from the Moors, when the Arabs introduced saffron as a flavoring and coloring agent in Southern Spain. Saffron is still the best thing around—but it’s expensive. If you can afford it, more power to you. All you do is add a few strands of the stuff to the rice while it’s boiling to get that great arroz amarillo (yellow rice) hue.

My parents came from the Greatest Generation (as it is called by some). So, during the Great Depression, they and their fellows developed equitable shortcuts to using safron (which they couldn’t get and, even if they could, they couldn’t afford it). Below are easy, ready to use alternatives that give rice whatever color you want; and also add to its flavor. I’ve used these alternatives, at one time or another, depending upon my financial condition, and it’s given me a marvelous rice dish every time.

Achiote – This is simply annatto seeds cooked in vegetable oil or olive oil. It’s our favorite product for coloring food. You can find it in most supermarkets in 8-ounce jars. Annatto is the pulp of the tropical tree Bixa orellana; and annato dye is used in coloring some cheeses. To prepare: just cook 1 tablespoon annatto seeds in 1/2 cup olive oil, on low heat, stirring frequently for 5 minutes. During cooking, the oil will turn a bright orange-red. The longer the seeds steep in oil, the deeper the hue. Remove from heat, let cool, and strain into a glass jar or container. You can keep it in the fridge indefinitely. Use as you wish, from 1 to 3 tablespoons when cooking rice, depending on the color you want to attain.

Tomato Sauce and Tomato Paste – This will do when you don’t have annatto seeds. But, depending on how much you use, it will render a more reddish color to the rice. Now, experts in my family contend that tomato sauce will give a better color, while tomato paste will give a better flavor. It’s all a matter of personal preference. To prepare: cook 1/3 or more cup tomato sauce, or 2-3 tablespoons tomato paste, in 3 tablespoons olive oil. If you want to enhance the flavor, you can add 1 small chopped onion and/or 1-2 cloves finely diced garlic. When you reached desired consistency, add a couple of cups of rice. Stir to mix, add water, bring to a boil, lower heat, cover, and cook the rice as you normally would.

Tumeric – This spice is known as Indian saffron, since it’s widely used as an alternative for the more expensive saffron. You get it in the supermarket in the form of a dry root powder. It not only adds a custard-like yellow color to rice but it also impart a distinct flavor. Tumeric is extremely strong, and it gets stronger as it cooks. A little goes a long way. Be judicious in its use. As noted, it’s a powerful yellow dye, so try not to stain your apron or clothes with it while cooking. To use: just add 1 teaspoon (or more, but be careful) to two cups of rice when it comes to a boil. Cover and simmer as you normally would.

Dry mustard – That’s right, dry yellow mustard in the powdered form. I know. You’re thinking about mustard on hot dogs, burgers, etc.; but mustard, in its own right, adds great flavor and color to foods. Like tumeric, it tends to be strong. Figure it this way, you can substitute 1 teaspoon of dry yellow mustard for 1 teaspoon tumeric. Just add to rice when it comes a boil, cover, and cook as instructed.

Parsley – For green rice. Yes, it’s hard being green. But in rice it’s okay. Adds another dimension and flavor to the dish. Simple: take 1 bunch of parsley (I prefer the curly Italian type parsley), wash and chop finely (by hand, or in a food processor). Saute it in 2-3 tablespoons olive oil with a couple of finely chopped garlic cloves thrown in. To enhance the flavor you can even add a chicken bouillon cube, and (if you want) 3 tablespoons light cream. Add rice, water, and cook as you normally wood. It will give you deliciously green-hued rice.

Black Rice (Arroz con Calamares) – This is rice cooked with squid or cuttlefish. The color comes from the dark color imparted to the grains as they cook with the squid in its ink. It’s a favorite in my crowd. The trick here is that the rice will come out darker if canned squid is used. 4-ounce cans of squid in their ink can be found in most supermarkets or Asian and Caribbean stores. To prepare: saute, in 2 tablespoons olive oil, 1 green bell pepper (cored seeded and chopped), 1 small onion (chopped), and 1 clove garlic (finely minced). Add 1/2 cup tomato sauce, and 1 chicken bouillon cube. Stir in 3 cans squid in this ink plus 6 pimento stuffed Spanish olives. Stir in 2 cups rice, water to cover by about 1/4-inch, season with salt and pepper, bring to a boil, and cook until liquid is absorbed (about 20-25 minutes).

There you have it, friends, different and varied ways to add delicious color to your rice dish. Experiment, see which one you like best—and enjoy!

Enhanced by Zemanta

Pumpkin Gratin


Halloween is upon us yet again. And the jack-o-lanterns are out. Anybody ever consider cooking those suckers? I would not recommend it. The traditional pumpkin used as a jack-o-lantern motif makes for a flavorless, insipid dish. That’s why they are used for decorations. In my culture, pumpkin are prized as bianda or cooked root plants that we use to enhance a meal. Traditionally, our favorite pumpkin dish is very simple: slice a piece of pumpkin, peel, remove seeds, and boil until tender. Then serve with olive oil and vinegar.

But I’ve experimented with pumpkin dishes and found that they make a great gratin. A gratin (pronounced grah-tan) comes from French cooking. It is a dish prepared with a brown crust. My pumpkin gratin is quick and easy to make, and it’s tasty to boot. Again, use small available commercial pumpkin, not the Halloween type or, better yet, you can use winter squash or butternut squash.

So, here goes Le gratin de Courge, as our French brethren would say. It makes a fabulous side dish or accompaniment to any meal.

PUMPKIN GRATIN

2 to 2 1/2 pound pumpkin, butternut, or other winter squash, halved, seeded, peeled, and cut
into 1/2-inch cubes
1/4 cup flour
1/3 cup olive oil
8 garlic cloves (yes, 8), finely chopped
3 tablespoons chopped fresh parsley
Salt and ground black pepper to taste
1/4 teaspoon chopped fresh oregano (or pinch dried)

1. Preheat oven to 325 degrees F.
2. Toss the pumpkin or squash cubes in the flour until they are evenly coated.
3. Generously oil the bottom and sides of an ovenproof casserole, Dutch oven, or cast-iron pan (you will have some oil left over). Fill the casserole with the pumpkin or squash. Then scatter the garlic and parsley over it, and season with salt, pepper, and oregano. Sprinkle the remaining oil over the pumpkin or squash.
4. Place in oven and bake for 2 to 2 1/2 hours or until the top has formed a rich dark crust. Note that it’s not necessary to add water during cooking since the pumpkin or squash produces enough liquid on its own.
Yield: 4 servings.

Enhanced by Zemanta

Chicken Noodle Soup (P.R. Style)


Chicken noodle soup. What is lovingly termed “Jewish penicillin.” We Puerto Ricans have our own version of it, and just as good. We use noodles, which are called fideos (fee-deh-os). These noodles are thin coiled strands similar to angel’s hair or vermicelli. People back on the island, in the old days, read the package name and took it to mean any kind of noodles. In time fideos became the most popular pasta in both the island and the mainland. It’s use is mainly in soups. When Puerto Ricans first migrated to New York back in the 1940s and 50s, and went shopping, they wouldn’t ask for noodles, they would ask for fideos. It was the only pasta pasta we knew, apart from spaghetti.

I would say our chicken noodle soup is as healthy and beneficial as its Jewish counterpart; and it has a particular Latin flavor. As noted, if you can’t find the fideos, any thin strand pasta will do as well. You can find this recipe (and others) in my cookbook, Puerto Rican Cuisine in America (Avalon Books).

SOPA DE POLLO CON FIDEOS (Chicken Noodle Soup)

1 broiler fryer (about 2-2 1/2 pounds, cut in parts)
2 quarts (8 cups) water
1/2 pound fideos #169 (see above)
2 medium Idaho or Maine potatoes, cut into 1-inch cubes
1 packet Sason Goya (coriander and annatto—found in any supermarket these days)
1 chicken bouillon cube
1/4 cup tomato sauce
Salt and ground black pepper to taste
2 tablespoons fresh chopped parsley

1. Rinse chicken under cold running water and pat dry.
2. Place chicken in a large kettle or Dutch oven and add water. Bring to a boil, lower heat and simmer, covered, for 1 hour or until chicken is very tender.
5. Remove chicken to a cutting board and let cool. Bone chicken, discarding bones and skin. Cut meat into bite-size pieces
4. Add chicken pieces, fideos, potatoes, Sason Goya, bouillon cube and tomato sauce to the broth. Add another cup of water, if needed, and season with salt and pepper.
6. Bring to a boil, cover and simmer on low heat for 15 minutes. garnish with parsley.
Yield: 4 to 6 servings.

Enhanced by Zemanta

Hummus


When I was a youngster growing up back on the block, we never heard of hummus. It wasn’t until my early adult-hood that I became aware of this Middle Eastern savory. Today its is ubiquitous. You see it everywhere. No party, wedding, birthday bash, or social function would be complete without it. It’s used as a spread, dip, or pita filling. Most people get it in the supermarket, with all the additives that come with it to preserve shelf-life. However, some of us would never buy the store bought stuff. Why? Because it is so EASY to make. Ten minutes, top, and you have grade A hummus.

Hummus is a concoction of chick peas (garbanzo beans), Tahini, or sesame seed paste. I use Tahini, which can be found in any store and is simply pureed roasted sesame seeds. Apart from using hummus as dip or over veggies, I like it over rice. Try it. It’ll spice up the old grain. But my favorite hummus recipe is with pasta and olives. Simple: cook any tubular pasta (penne, macaroni, rigatoni, ditalini, etc.) as per package directions. Drain, then add a cup of hummus, and one (6-oz) can medium or large black olives (drained under cold running water to remove excess salt, and sliced). Mix it all together, and you have a great, delish pasta dish. Quick and Nutritious.

Of course, you need to make the hummus first. So, here is my quick hummus recipe. You’ll never buy the shelf stuff ever again.

BASIC HUMMUS

1 (15-oz) can garbanzo beans (chick peas)

1/3 cup Tahini

1/4 cup lemon juice

3 cloves garlic, peeled and halved

ground black pepper to taste

1 teaspoon olive oil

1. Place all ingredients, except the olive oil, in a blender or food processor. Blend until smooth.

2. Transfer to a serving bowl or dish. Drizzle olive oil over the mixture and serve.

Yield: about 2 cups (the recipe can be doubled for additional servings)

NOTE: Some people like to add cumin (about 1 teaspoon) and a pinch of paprika to the recipe for a more pronounced Middle Eastern flavor. Do whatever suits you best.

Rossana Rossi’s Red Clam Sauce


One of my dear friends, Rossana Rossi, had sent me (at my request) a delicious clam sauce. It is truly scrumptious. Now, in her recipe, fresh clams are used. If you don’t want the bother or trouble of shucking fresh clams, I guess you can buy chopped or whole clams from a jar at the supermarket. But, I tell ya, it ain’t the same. The taste and texture of fresh clams is unequal in this dish.

As to the type of clams used? There is a variety. You got Chowder clams that are used for (you guessed it) clam chowder. There are Cherrystone clams, not as large as chowder clams. You could say they’re the second largest, and go great in a clam sauce. Then there Top Neck clams that are used mainly for clams casino and clams on the half shell. And, finally, Little Neck clams that can be used in a clam sauce as well as steamers. They are tiny and sweet.

Rossana says this is her personal recipe for clam sauce, and she invented it about a month ago while working on a “super tasty awesome tomato sauce.” It’s a “Dominican/Italian” recipe.

ROSANNA ROSSI’S RED CLAM SAUCE

2 dozen Cherrystone clams, or 4 pounds Little Neck clams, scrubbed clean and picked over
4 tablespoons olive oil
2 cloves garlic, minced
2 (28-ounce) can diced tomatoes
2 teaspoons oregano
1 teaspoon thyme
2 tablespoons vinegar (preferably herb-infused)
1 teaspoon rosemary
1 whole cinnamon stick

1. In a large frying pan or skillet, heat olive oil. Add garlic and saute quickly (do not let the garlic burn). Add tomatoes, oregano, thyme, vinegar, rosemary and cinnamon stick. Lower heat and simmer about an hour or so (Rossana says she cooks her sauce for 2 hours).
2. While the tomato sauce is cooking, place about 1-inch water in a large saucepan, add clams and steam them open. Place shell-less clams in a plate and set aside. Save the water left in the saucepan. If you desire, once clams have cooled you can chop them before adding to the sauce, or you can leave them as is.
3. When the sauce is just about done, add the clams and clam water. Simmer until the flavors are blended. The trick is not to overcook the clams; just reheat.
4. Serve over any long-type pasta such as linguini, spaghetti, perciatelli, or fettuccine.
Yield: 6 servings or more

Enhanced by Zemanta

Grillin’ Chicken

We’re not going to put away that grill anytime soon. The long hot summer continues. So does al fresco cooking. In that vein, let’s grill some more. This time, chicken. Believe it or not, chicken is one of the most easiest things to cook on a grill. Problem is, most times, it’s burnt chicken on the outside and, almost raw chicken on the inside. I discovered a long time ago, to get perfectly grill, cooked chicken, simply parboil the chicken pieces beforehand. Now, this may not be necessary if cooking chicken breasts, especially if they have been pounded into thin pieces. That being said, making chicken on a grill is a quick straightforward thing. It all depends on the herbs or sauce used in the cooking.

Below are three easy grilling recipes for poultry. Don’t have access to a grill? You can do same by broiling chicken in the oven.

#1: GRILLED POULTRY

For this recipe you can use small chickens, Cornish game hens, or even quail. Rinse poultry under cold running water, and pat dry with paper towels. Split the poultry in half. In a bowl, combine 1/2 cup olive oil, 2 tablespoons red wine vinegar, 1 teaspoon dried oregano, 3 minced garlic cloves, and 1/4 teaspoon dried sage. Add poultry and marinate for about 30 minutes or more. Remove from marinade and grill the poultry pieces directly over medium coals or gas grill. Cook for about 20 minutes, turning and basting frequently with the marinade mixture.

#2: SIMPLE GRILLED CHICKEN
4 chicken breasts
1/3 cup olive oil
6 tablespoons fresh lemon juice
1 teaspoon oregano
1 teaspoon thyme
1 teaspoon rosemary
2 garlic cloves, peeled and minced
1/2 teaspoon red pepper flakes (optional)

1. In a blender or food processor, combine all the ingredients except for the chicken breasts, and process until smooth.
2. Place chicken in a large bowl or, better still, in a resealable plastic bag ( I like the ones that have the zip lock). Pour marinade mixture over chicken and cover (if using bowl), or seal, if using bag. Place in the refrigerator and let marinate for 1-2 hours (you can even marinate overnight if you want a full, rich flavor).
3. Drain marinade and reserve. Grill chicken, turning and basting frequently with marinade for about 30-40 minutes or until desired tenderness.

#3 GINGER-HONEY GLAZE GRILL CHICKEN

1 2 1/2-to-3 pound chicken, quartered or cut into serving pieces
Olive oil, melted margarine or butter
1 teaspoon ground black pepper
2 teaspoons dried oregano
1/2 teaspoon finely shredded orange peel
1/2 cup orange juice
1/2 cup sliced scallions
2 tablespoons honey
1 tablespoon soy sauce
2 teaspoons corn starch
1 teaspoon grated ginger

1. Rinse chicken under cold running water and pat dry with paper towels. Place chicken in a pot with water to cover, bring to a boil, and parboil for about 2 minutes.
2. Remove chicken and brush with oil, melted margarine or butter. Sprinkle with pepper and oregano. Set aside
3. To make Ginger-Honey Glaze: combine remaining ingredients in a small skillet or frying pan. Cook and stir over medium heat until bubbly. Cook, stirring all the time, about 2 minutes more.
4. Place chicken, skin side down in an uncovered grill directly over medium coals or gas grill, and cook for 20 minutes. Turn and grill for 15-20 minutes more or until desired tenderness, basting often with the Ginger-Honey Glaze.

Enhanced by Zemanta

Grilled Steak with Peppercorns

One of the most popular and easiest dishes to make is steak au poivre vert. That is, steak cooked with green peppercorns. It’s a classic, and a favorite with firemen in firehouses because it is so easy to prepare, and still considered classically French. Well, the same deal can be done in the hot summer months on the old grill. And you don’t need green peppercorns. If you don’t have them, you can use regular black peppercorns which can be found in any grocery store. No need to be fancy with the meat, unless you want to. Almost any steak variety can be used, and not just the top quality stuff like rump, porterhouse or rib-eye. Usually, for this type of grilling the best is strip steak, boneless beef steak, beef tenderloin, top round or, if you want to spend a little more cash, sirloin. The steak should be anywhere between 1-inch to 1 1/2-inch thick.

With almost any food item, there are two ways to grill: direct heat and indirect heat. With direct grilling the meat is placed directly over the heat source. This is the basic and most preferred method. For indirect grilling, the heat source is off to the side of where the meat is cooked. For a gas grill this means turning on the burner on one side but cooking the meat on the other side of the grill. The same with a charcoal grill. Just have the heated coals on one side and cooked the meat on the other side. I am not partial to indirect grilling. I like the meat cooked and seared. Choose whatever way works best.

Grilled Peppercorn Steaks
4 steaks
3/4 cup whole black peppercorns
2 cloves garlic, peeled
1/2 teaspoon dried oregano
1/4 cup olive oil
1/4 cup butter
1/2 cup scallions, chopped (can use both green and white parts)
2 cups red wine
1/3 cup capers, drained

1. Put peppercorns, garlic, and oregano in a mortar. Pound until crushed. Add olive oil and mix thoroughly.
2. Coat both sides of steaks with peppercorn-olive oil mixture.
3. Grill steaks, covered with grill lid, about 5-6 minutes per side or until desired doneness.
4. Melt butter is a small skillet. Add scallions and saute 1-2 minutes. Add wine and capers, and cook until liquid is reduced by half (about 10-15 minutes). Pour over steaks and serve. Note that this part can be done in the kitchen ahead of time so you can have it ready by the grill.
Yield: 4 servings.

Enhanced by Zemanta
Older posts Newer posts

© 2025 Oswald Rivera

Theme by Anders NorenUp ↑